[5.0] Create Assets in Seconds with the New Workflow
Creating an asset is now quick and simple. Just drop a pin on the map, fill out a short form, and you are done.
Mobile App
Drop A Pin
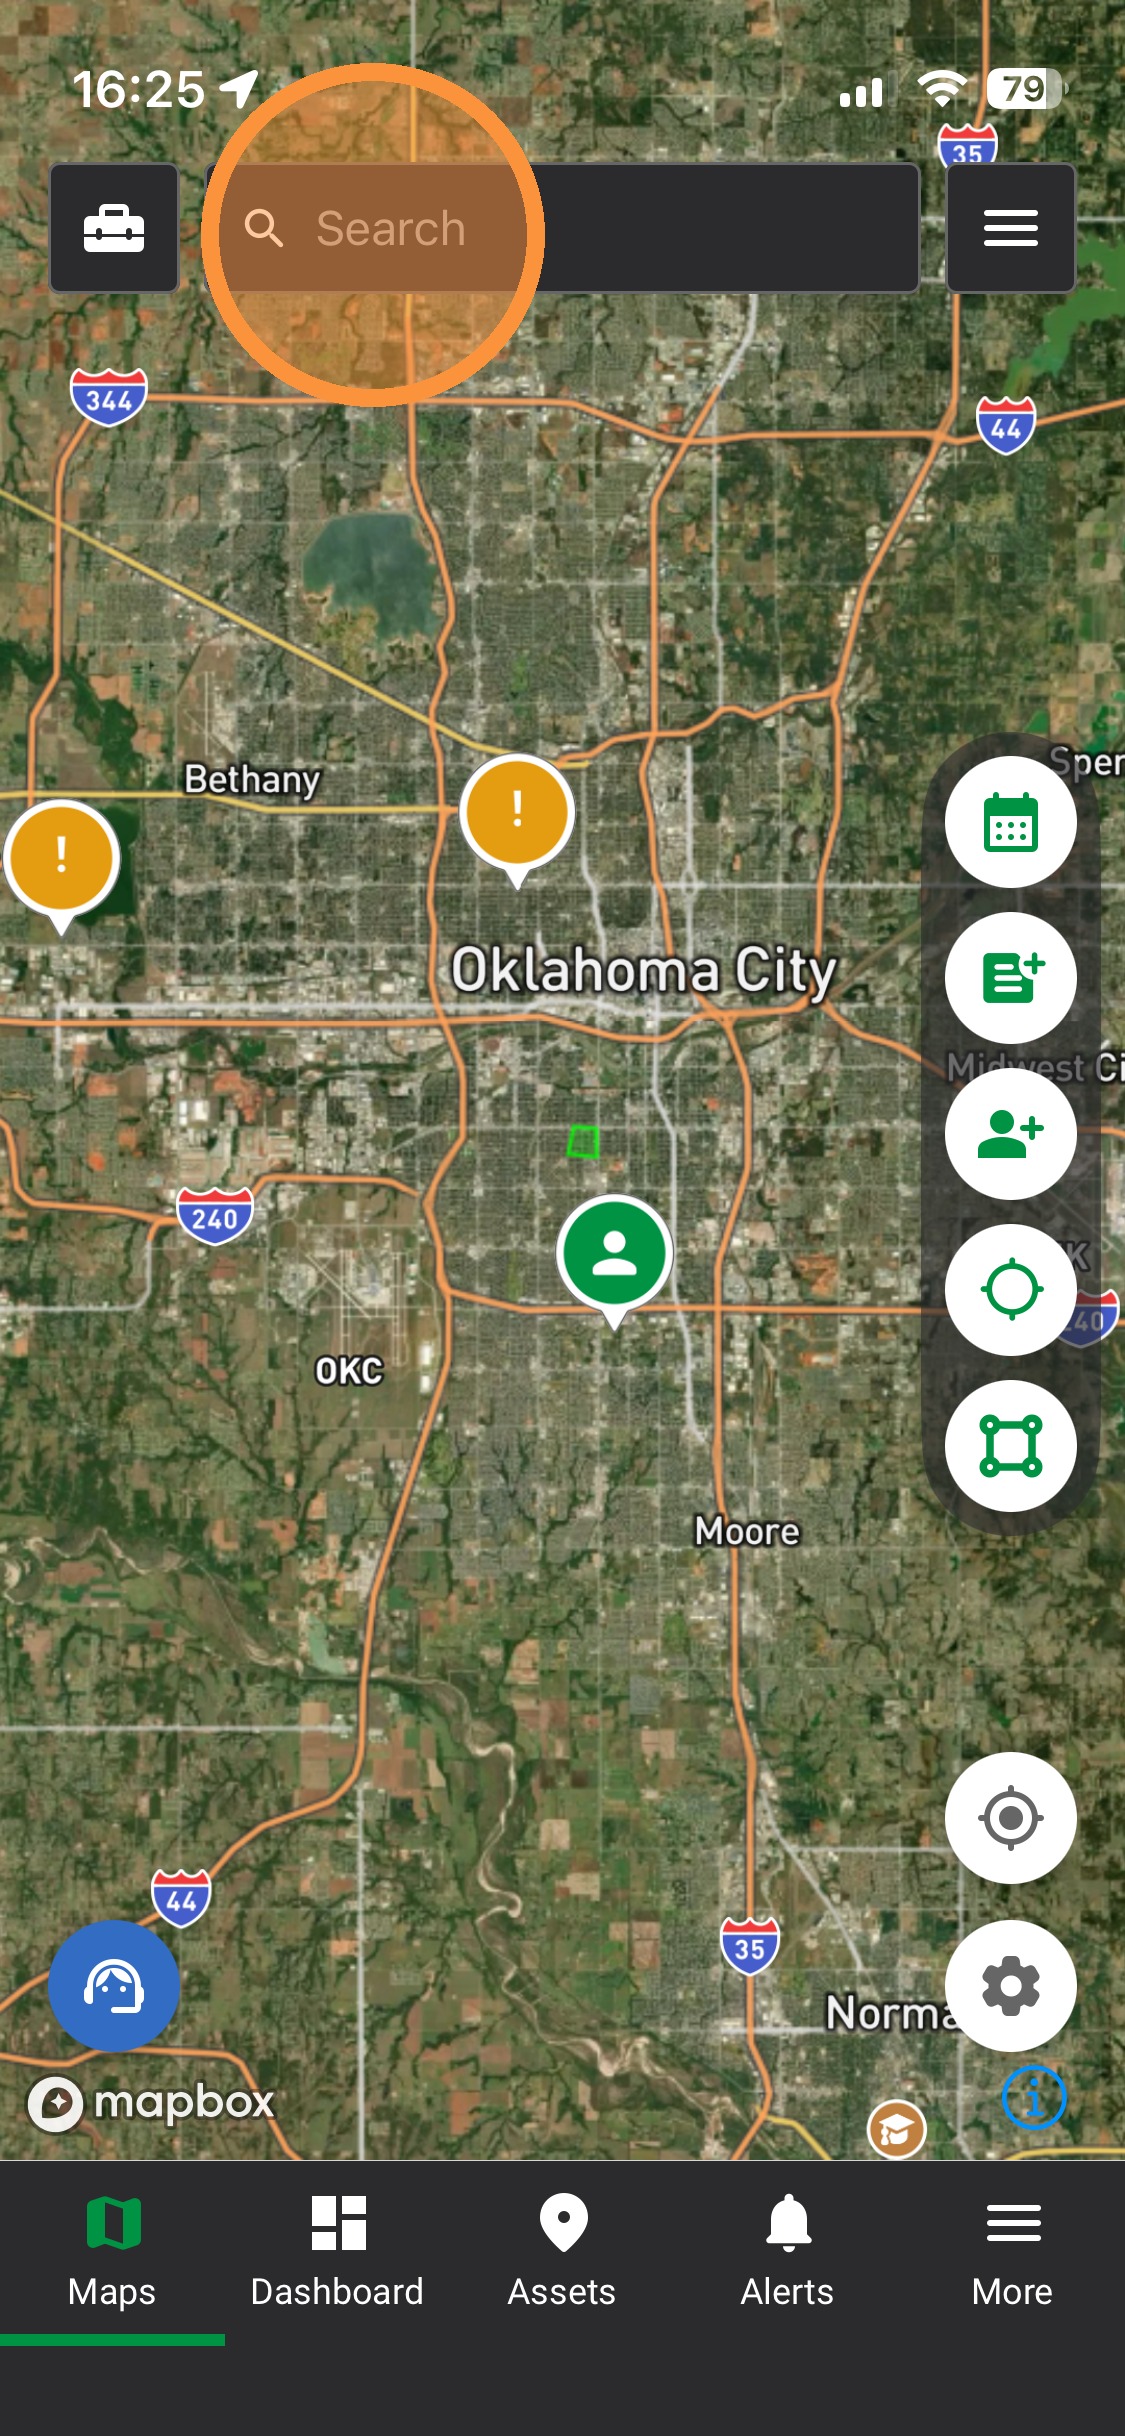
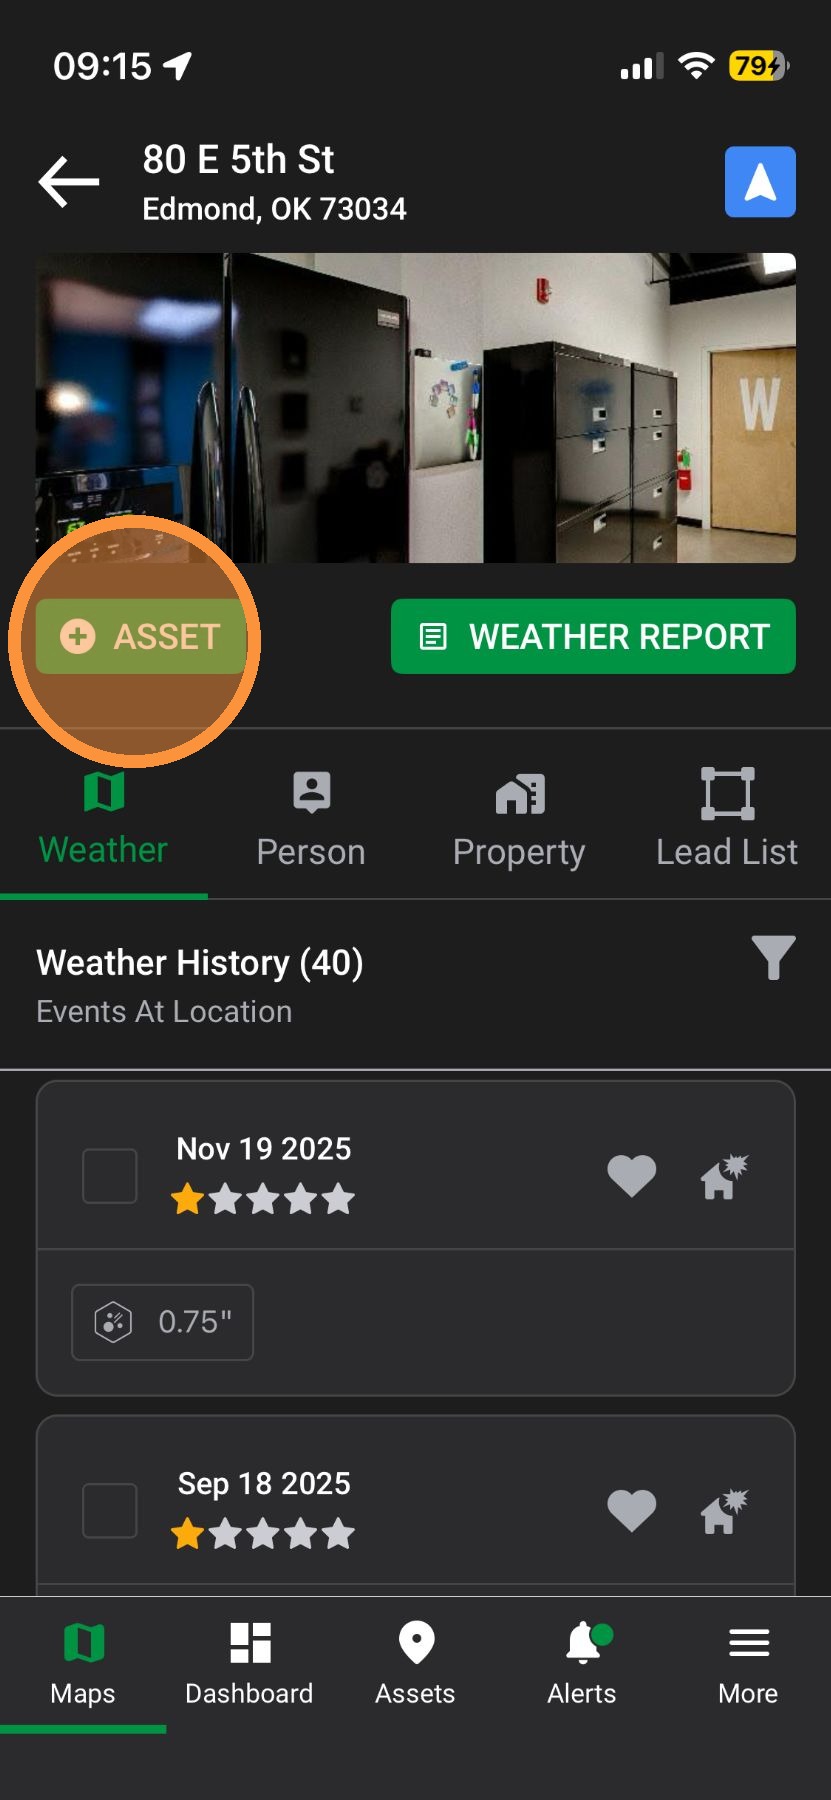
1. Tap "Maps" Page
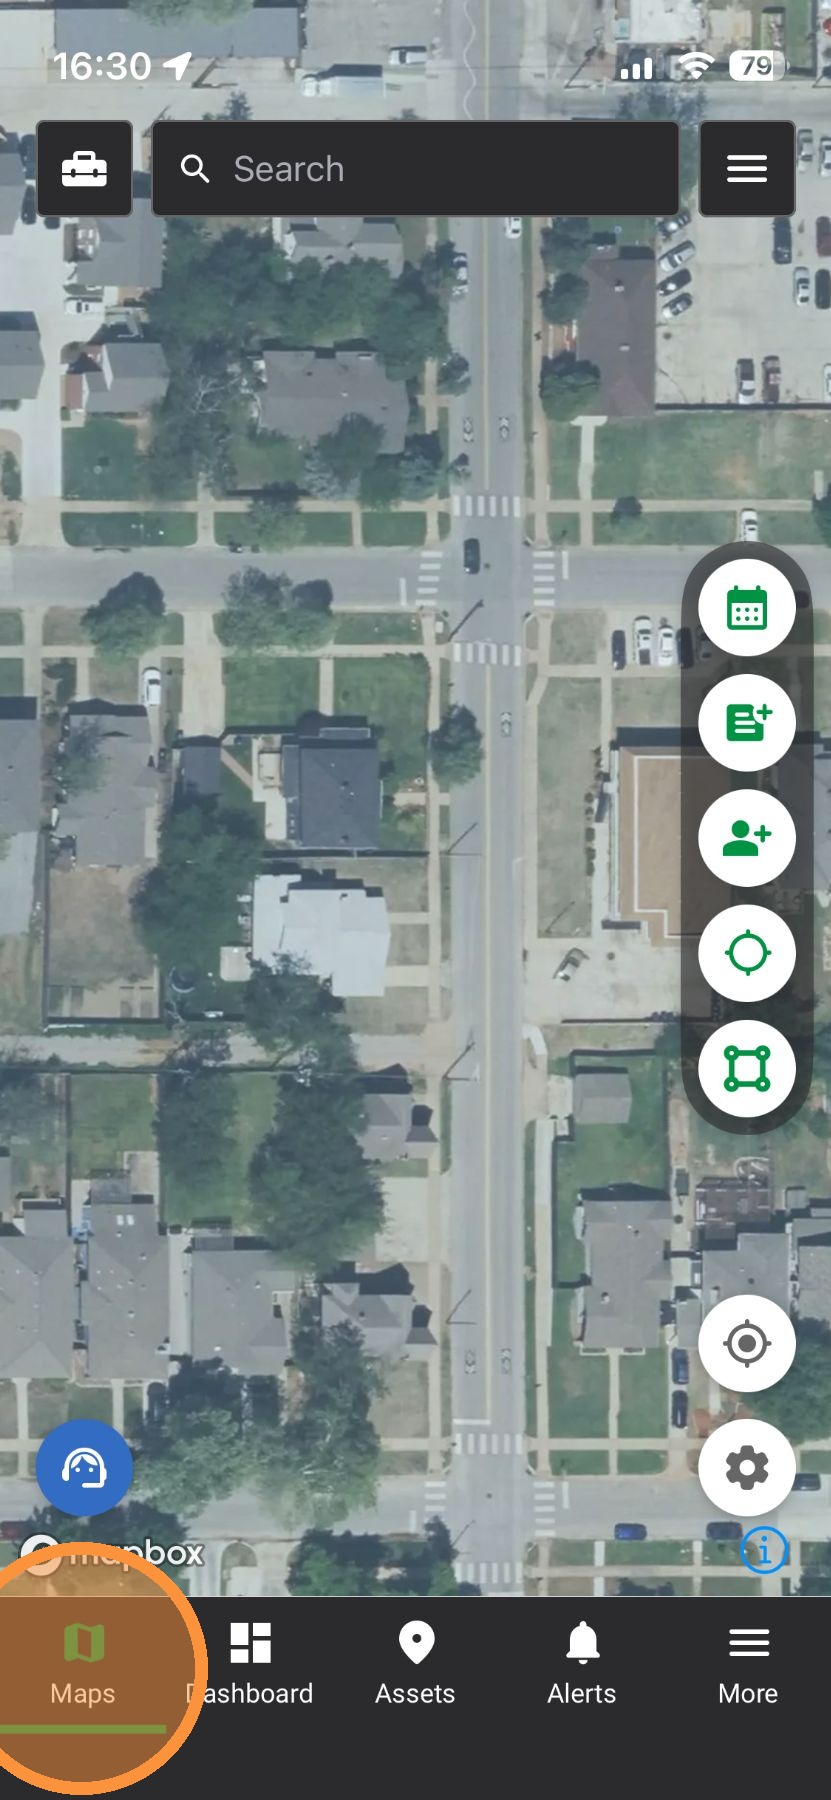
2. Tap "Create Asset"

3. Tap an address

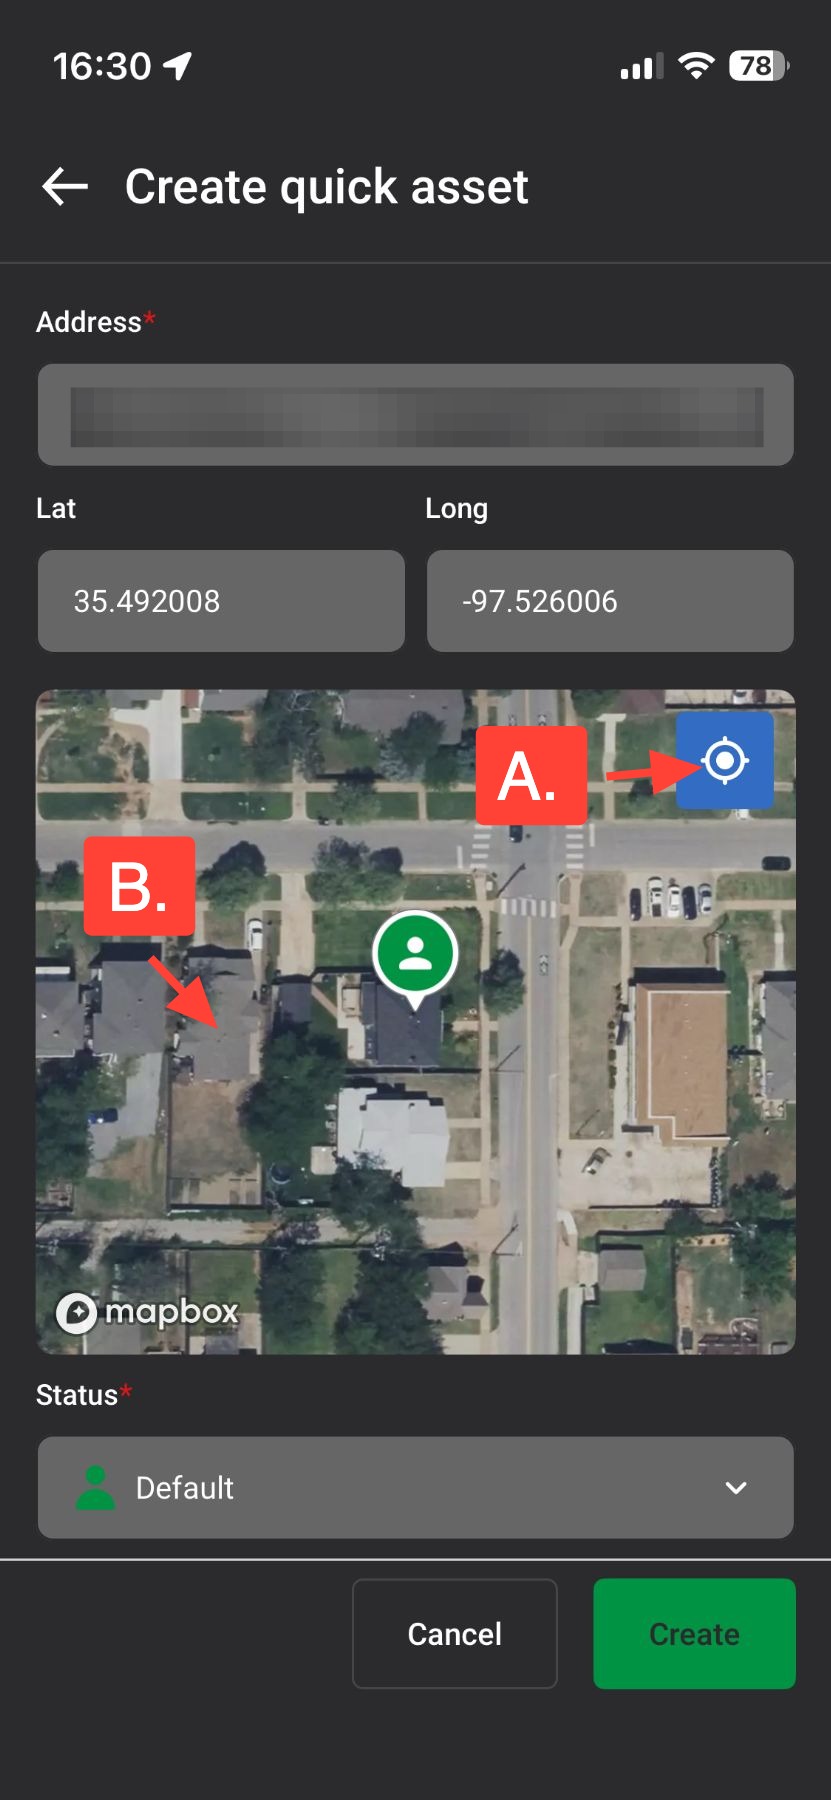
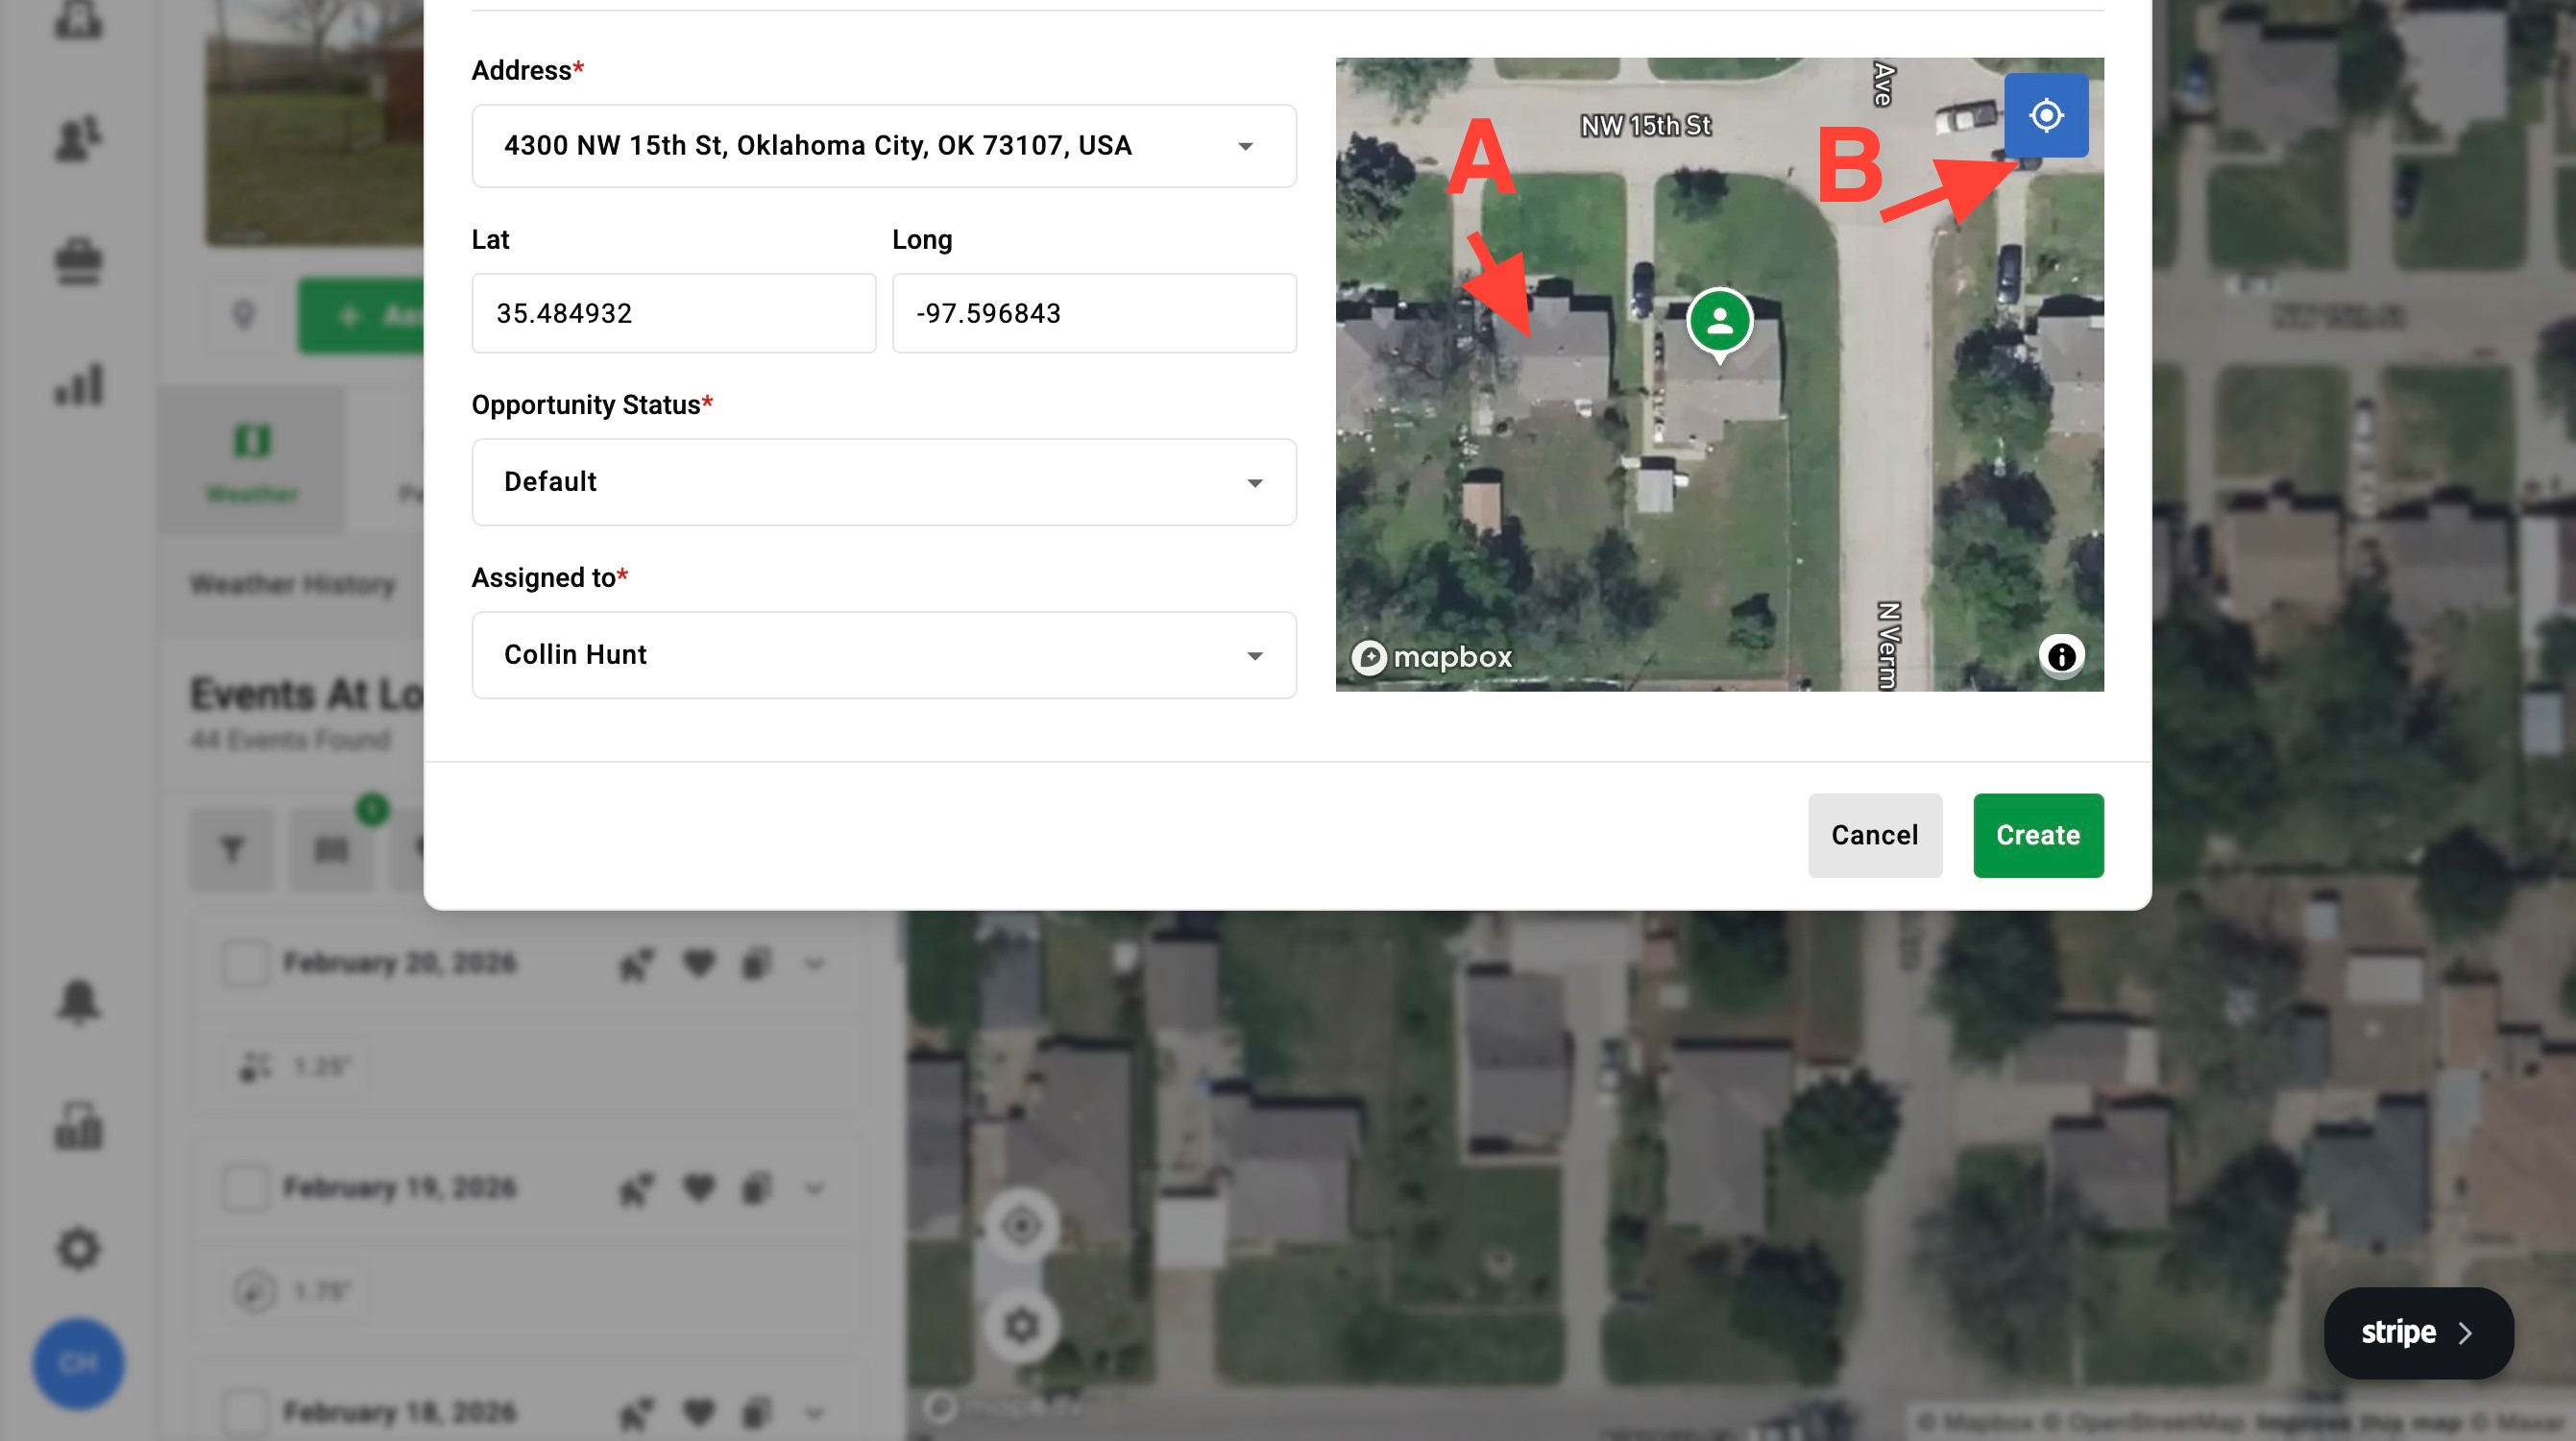
4. If the pin placement is incorrect, you can
A. Tap the blue "Location" button to place the pin at your location
B. Tap on the map adjust the pin.
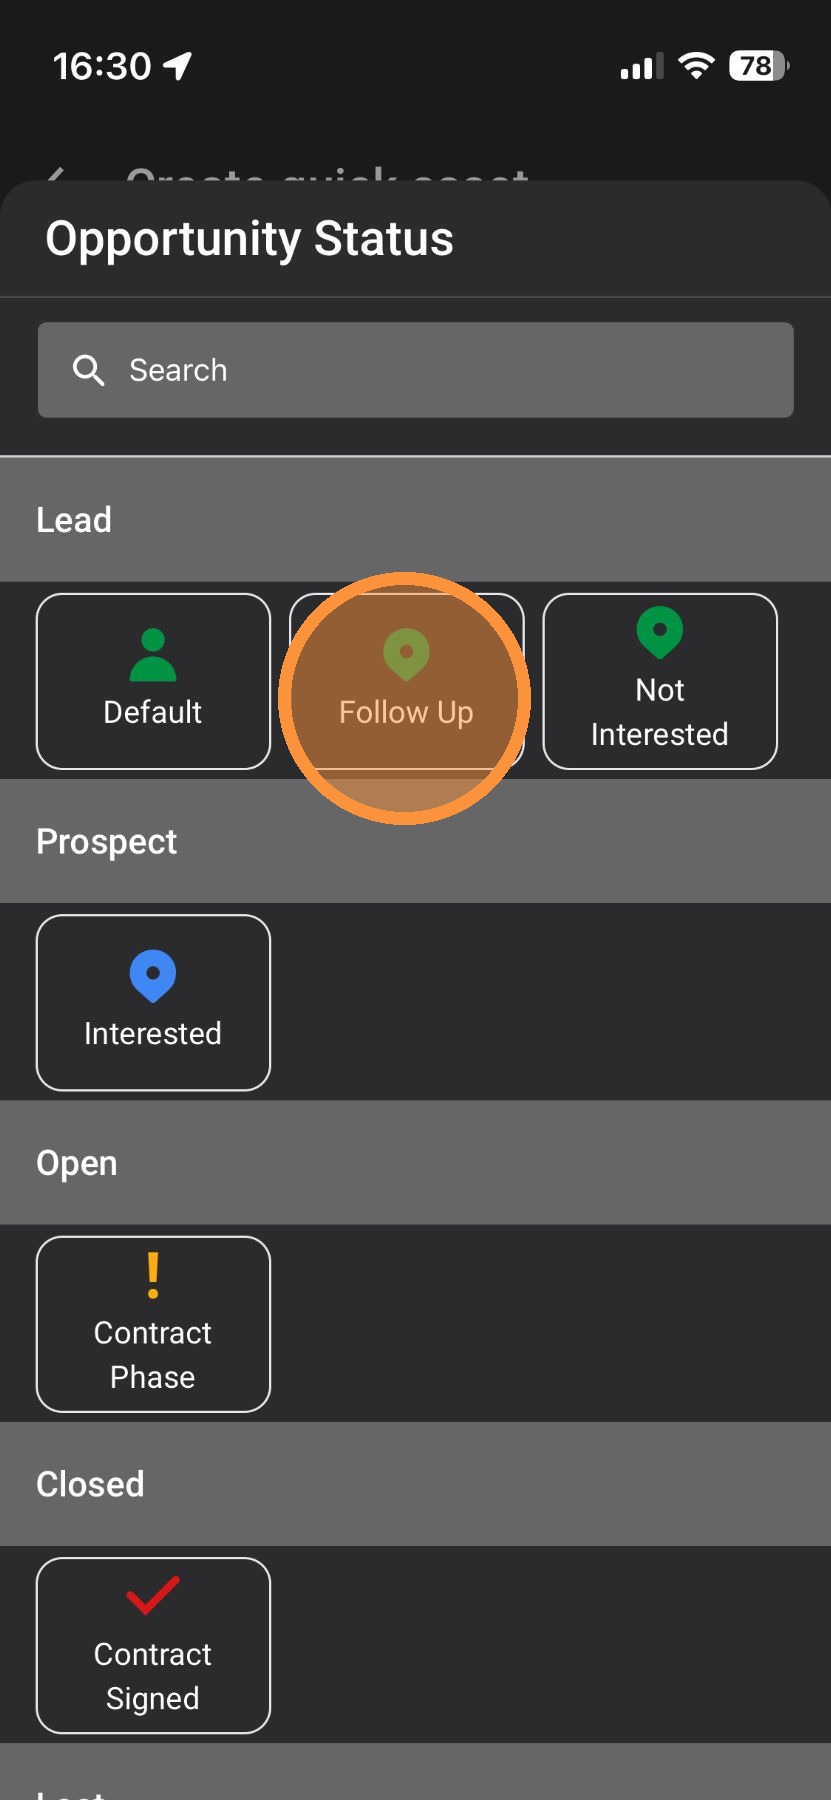
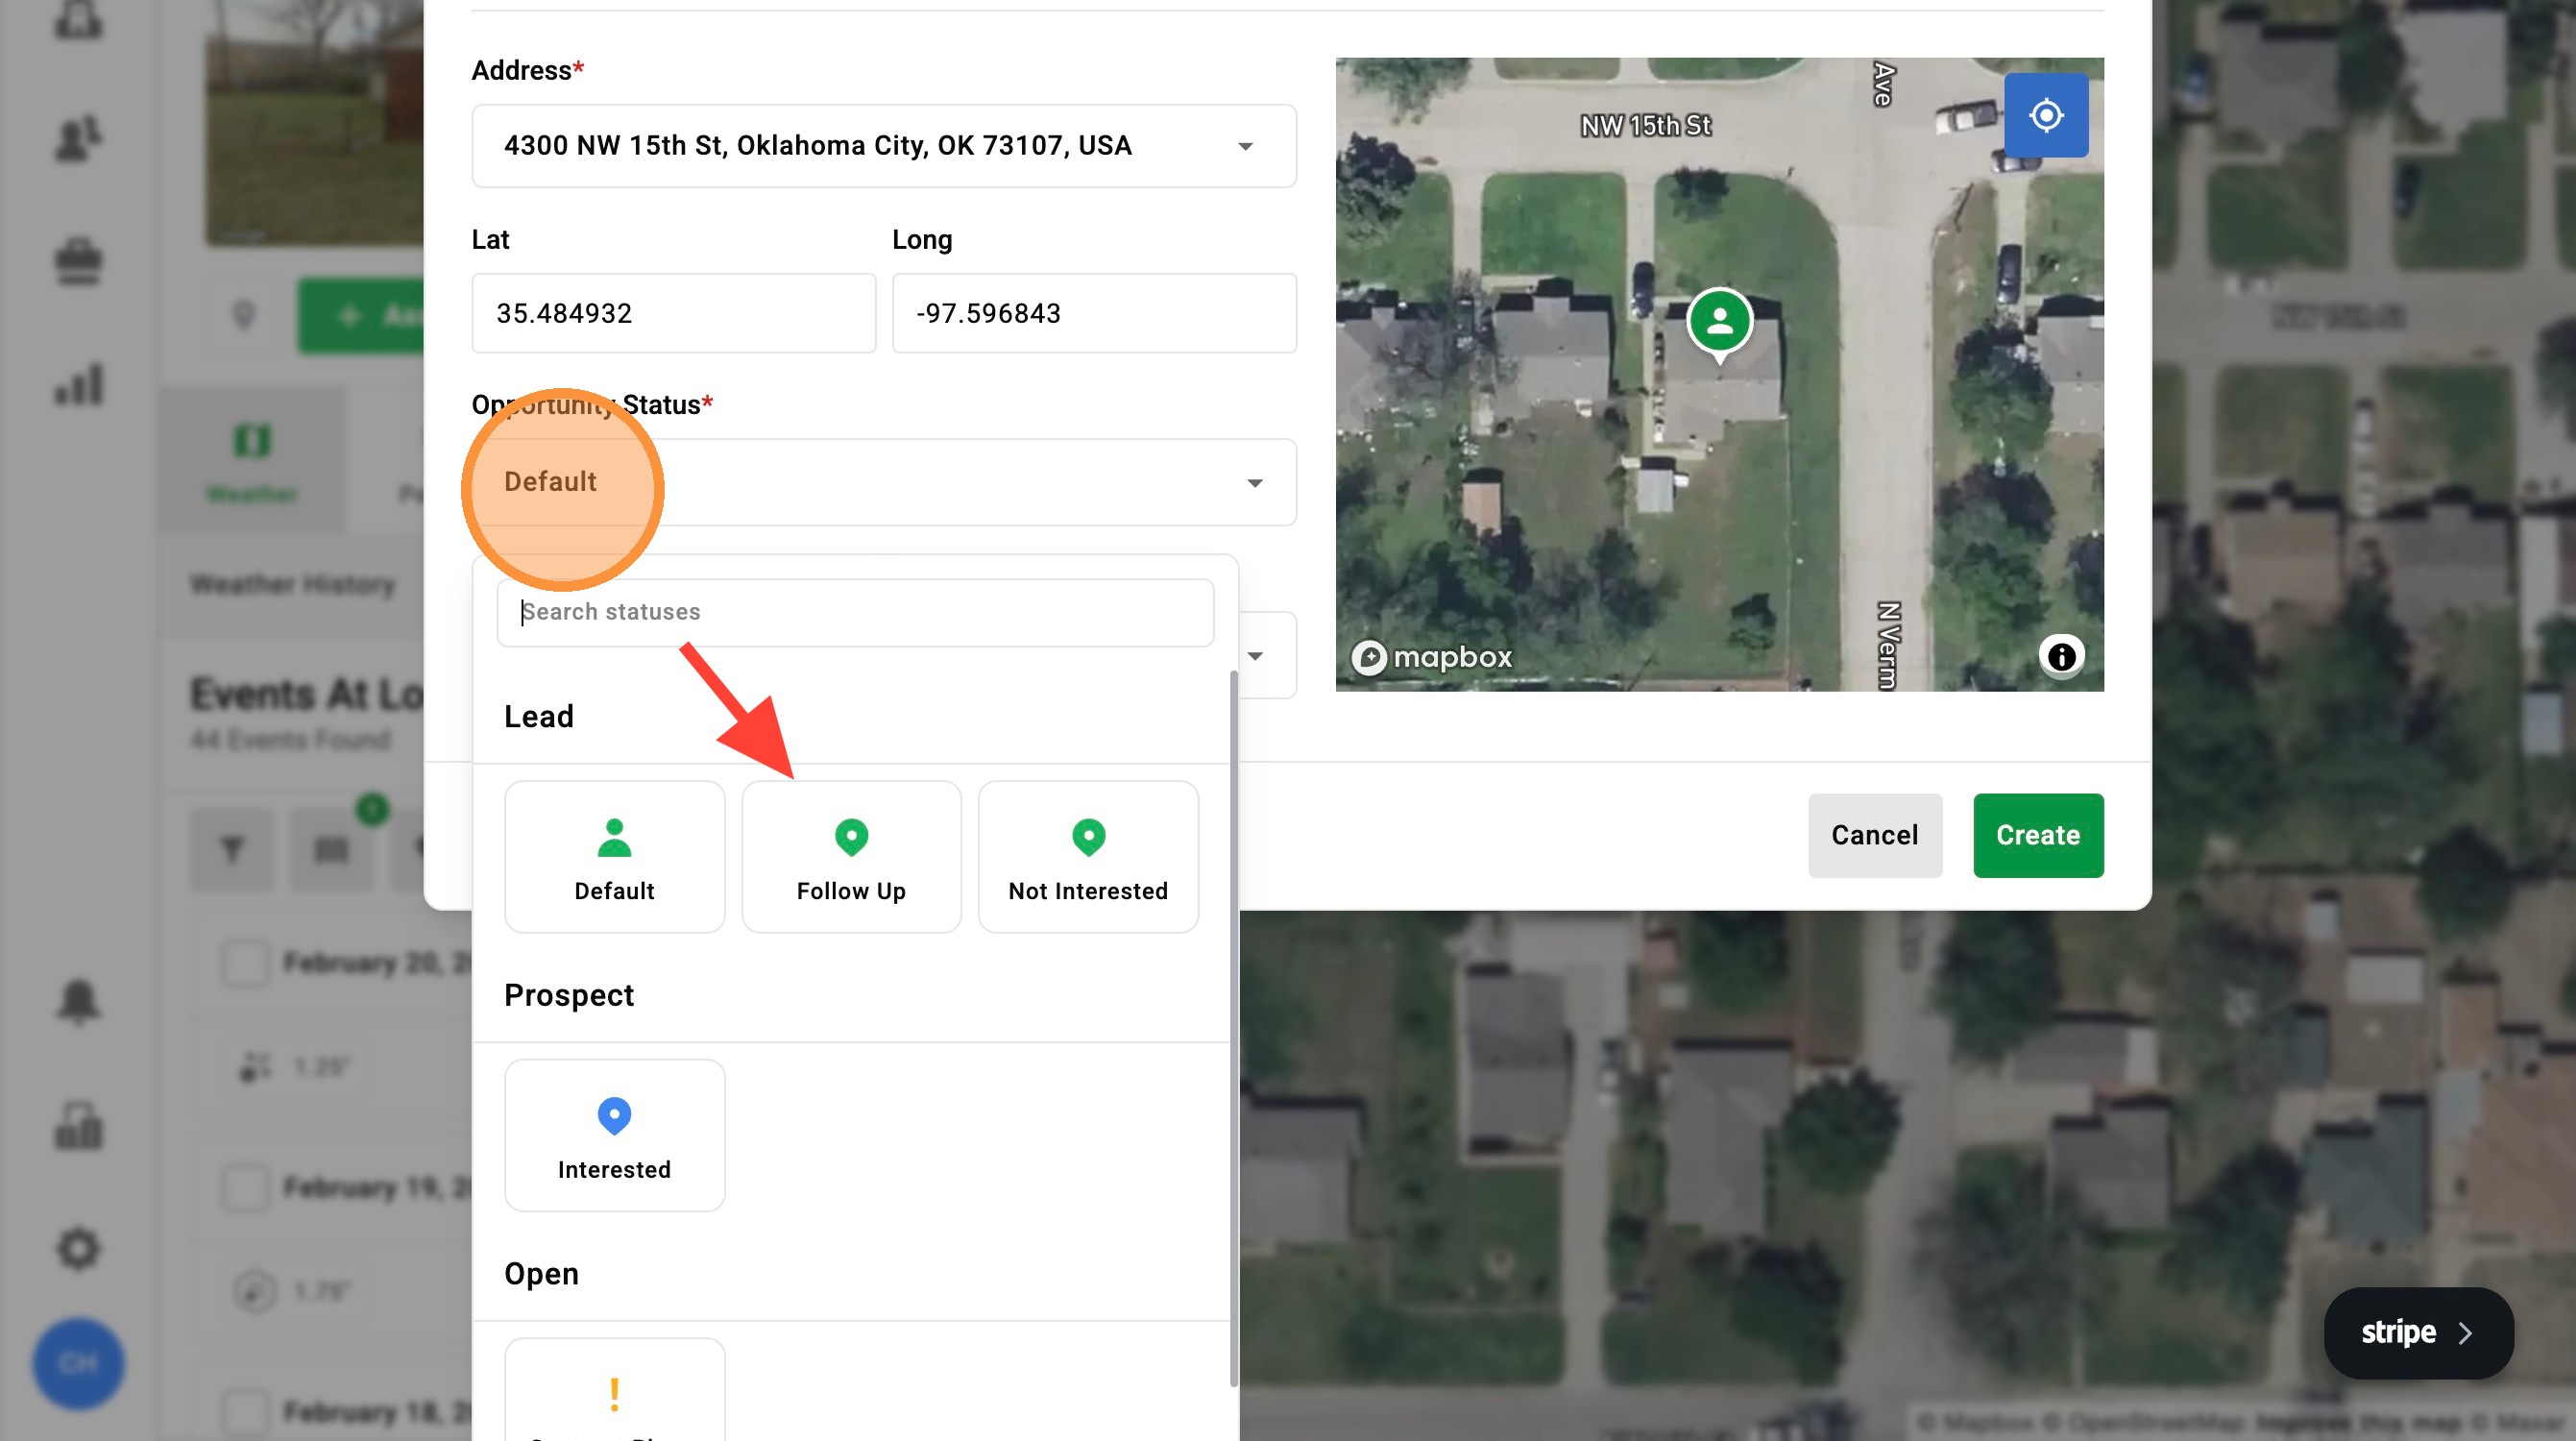
5. If you have DealTrace, you can adjust the Status within your Opportunity Pipeline
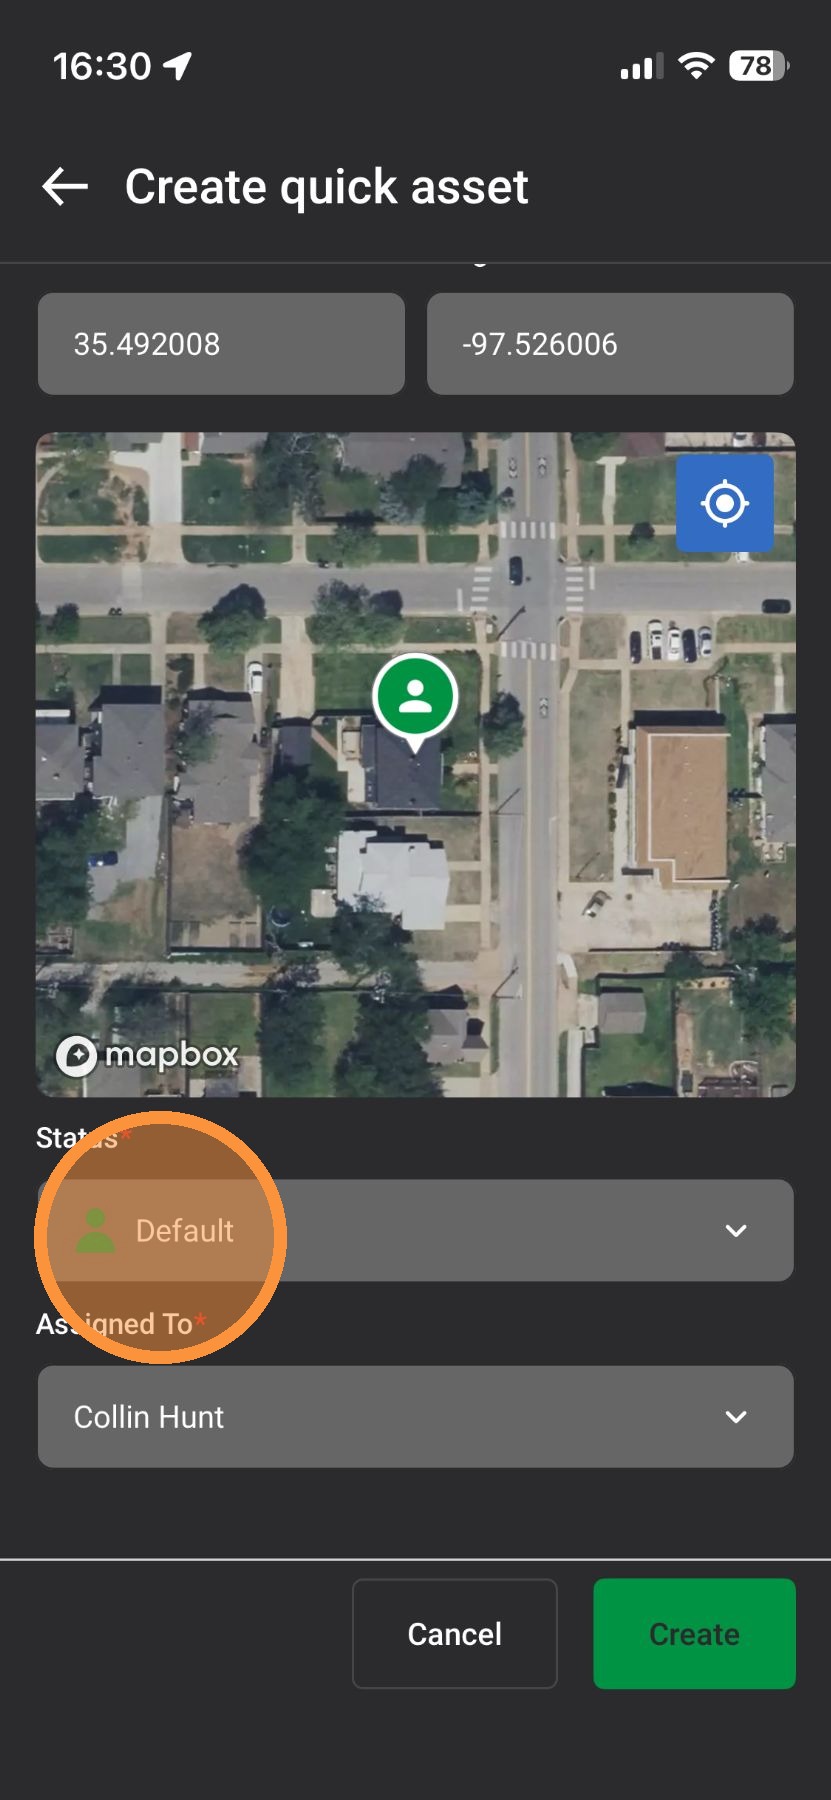
6. Tap a new Status
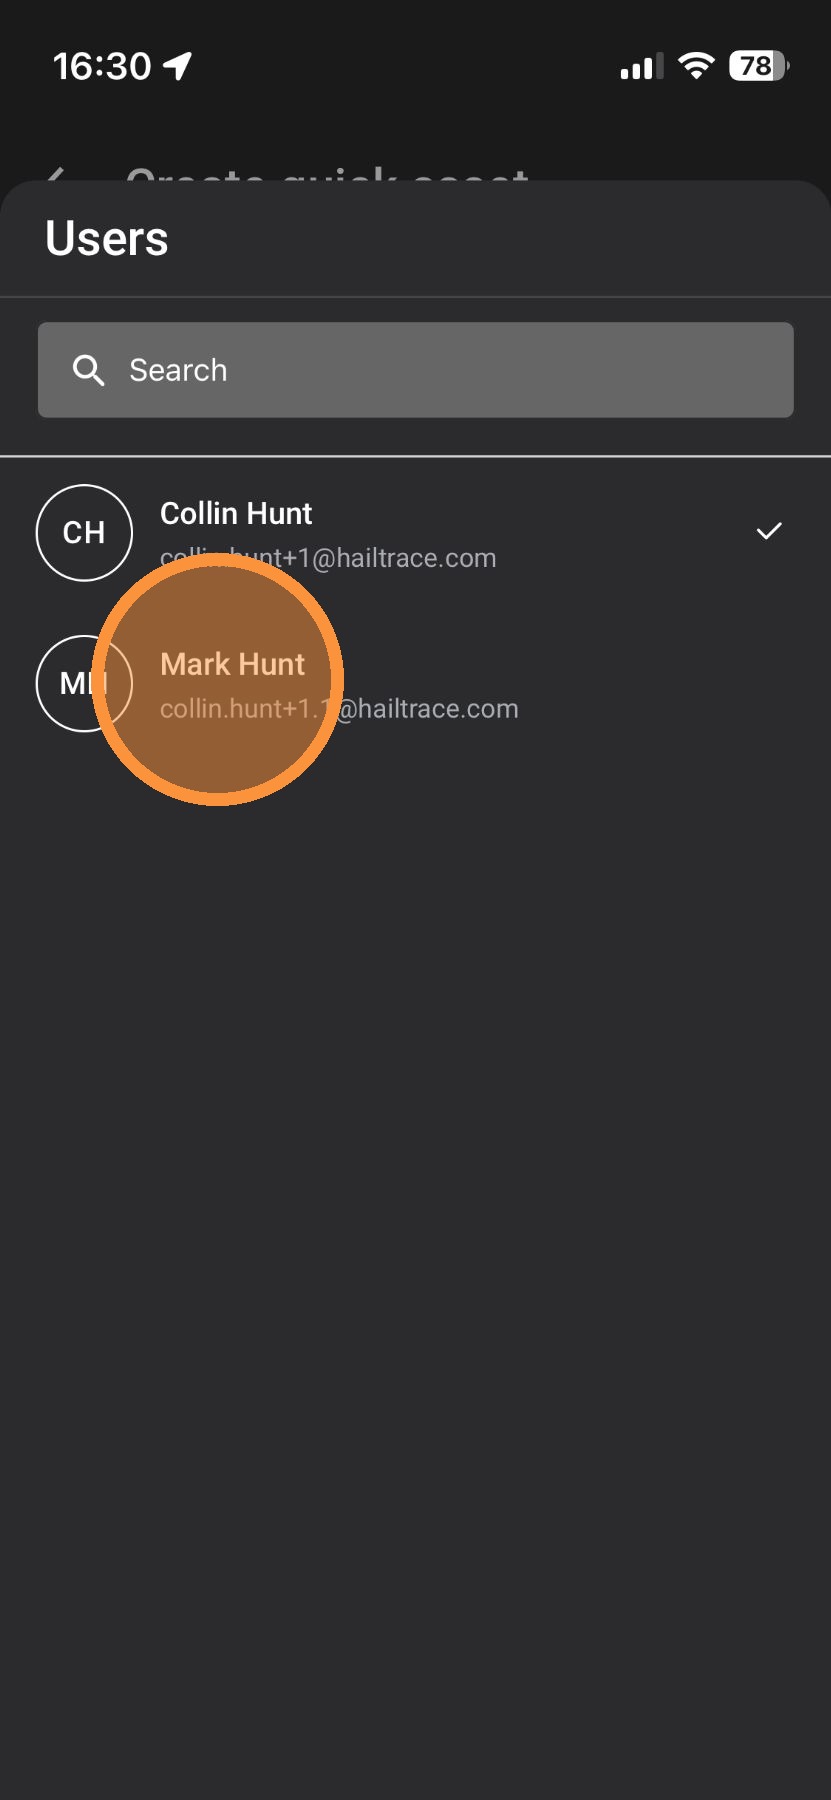
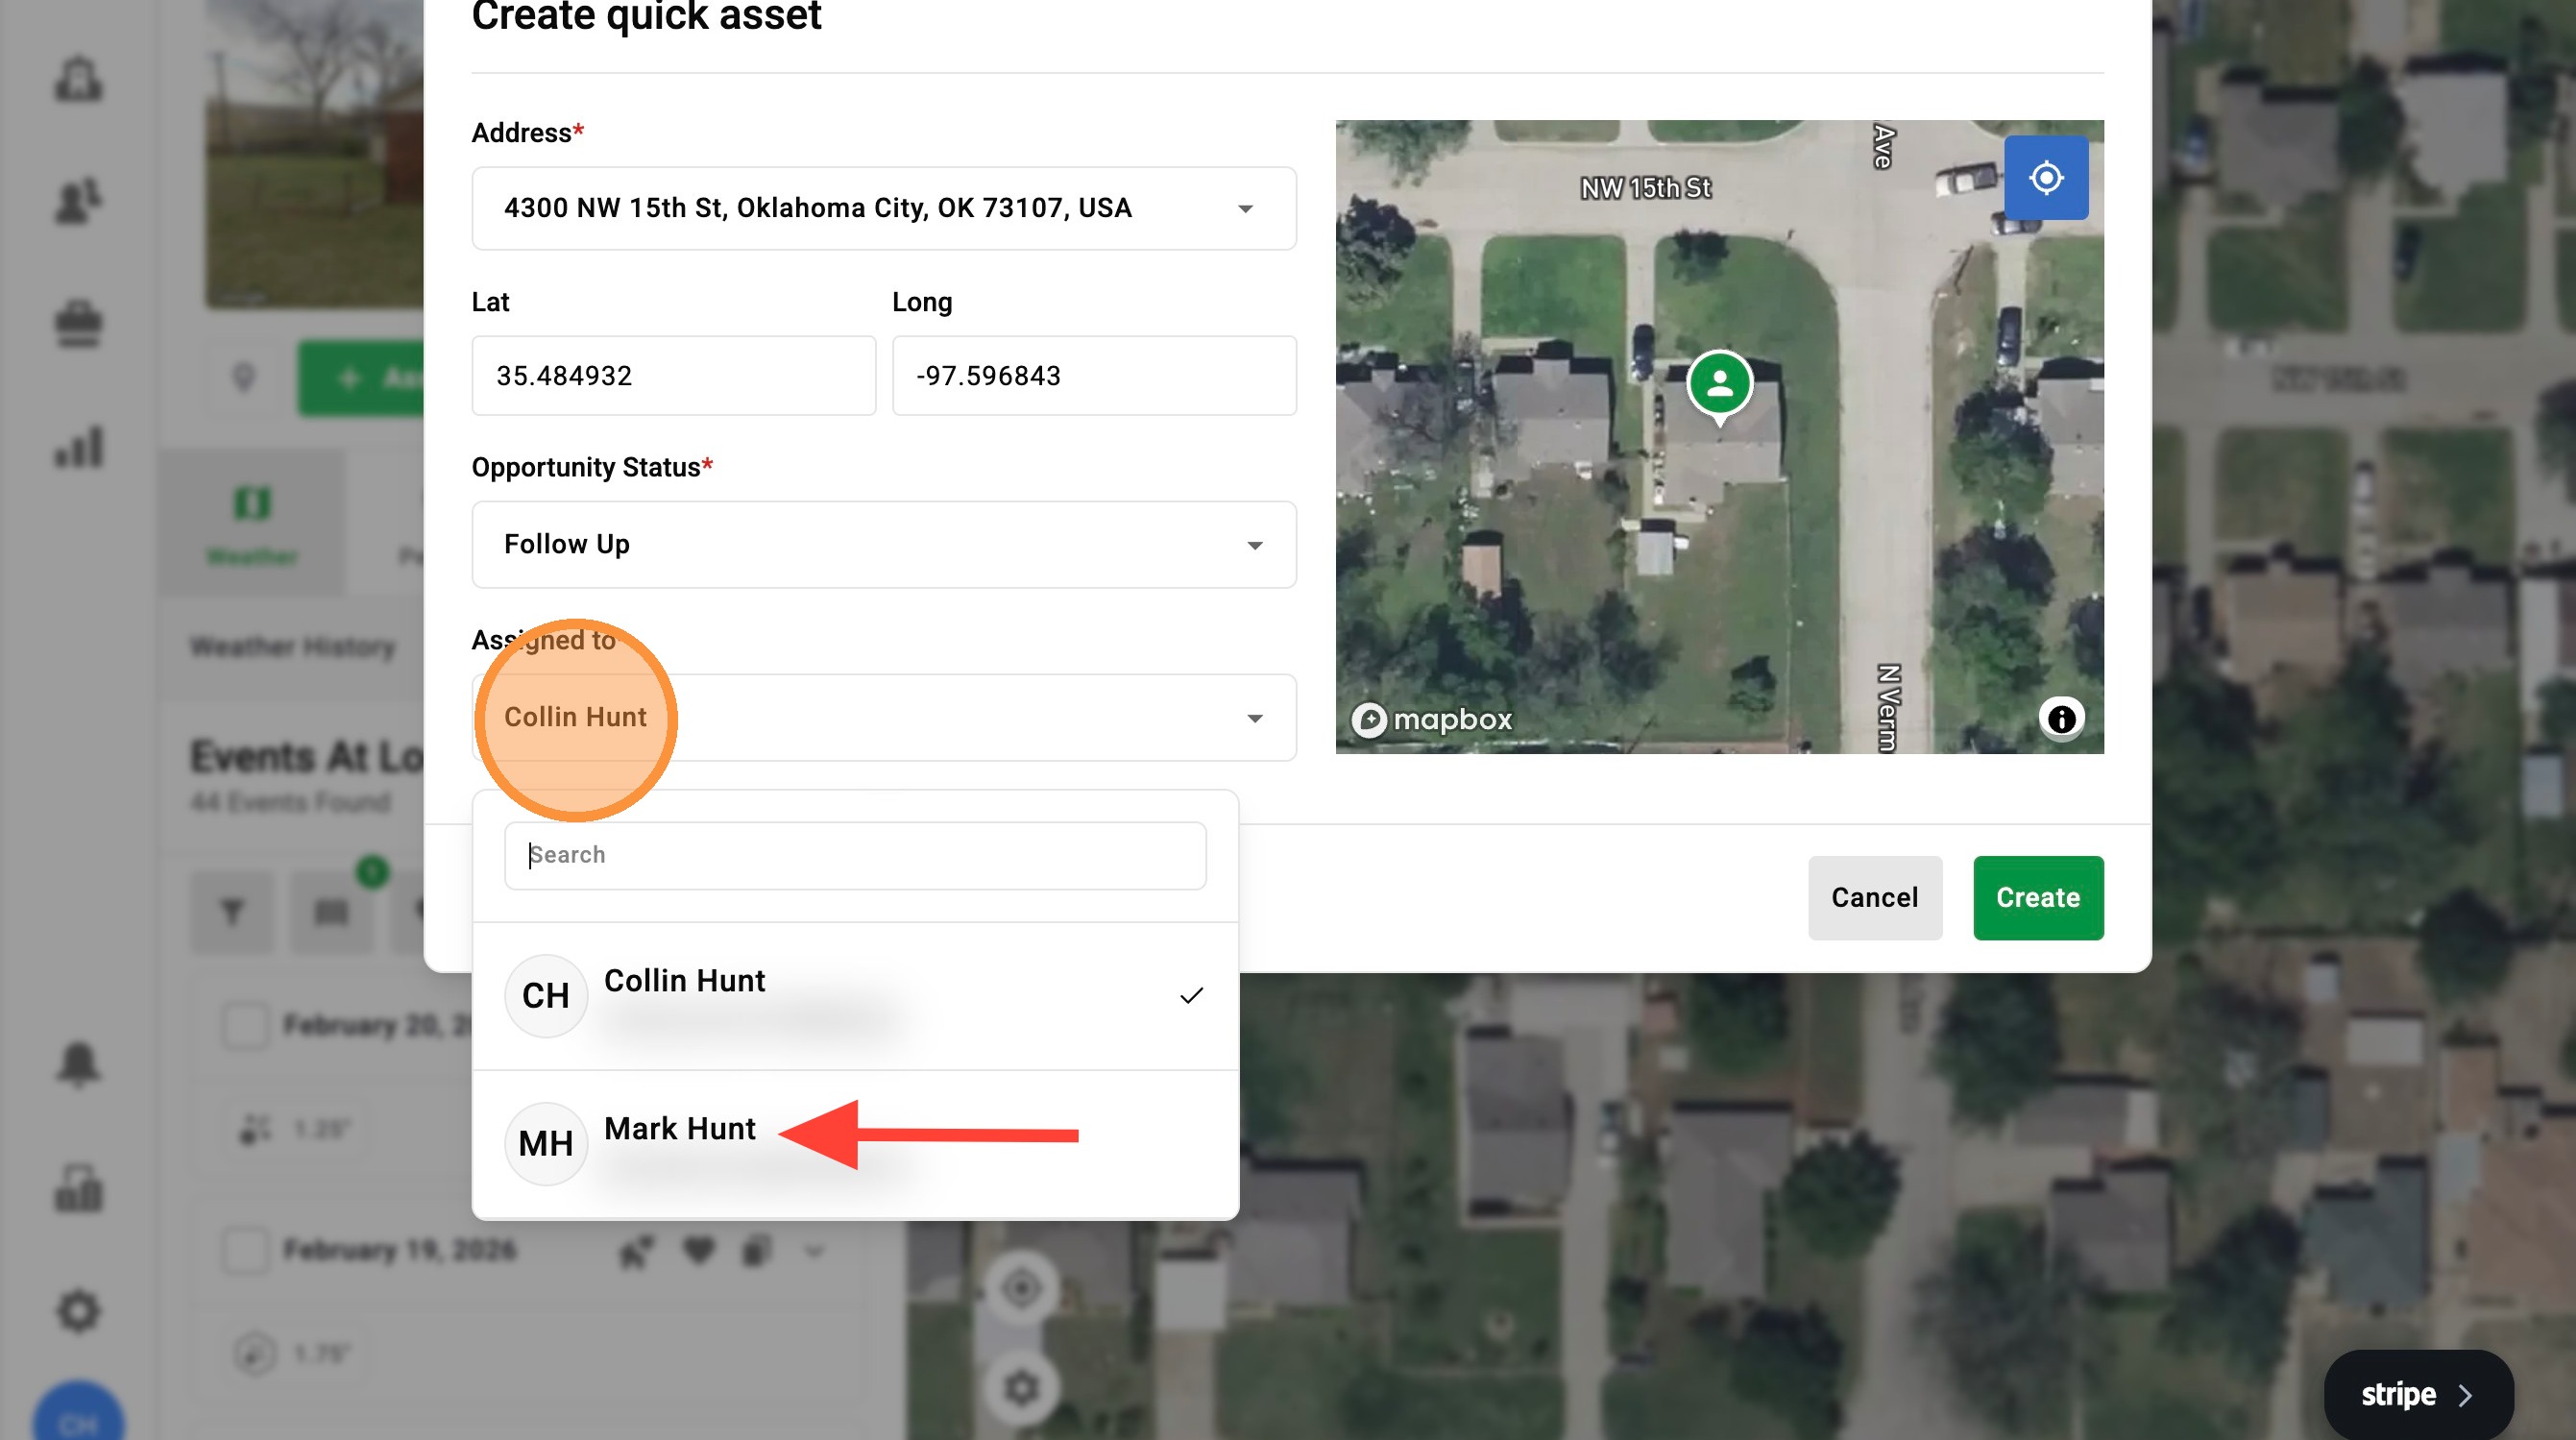
7. If you have DealTrace, you can assign the asset to other people on your team
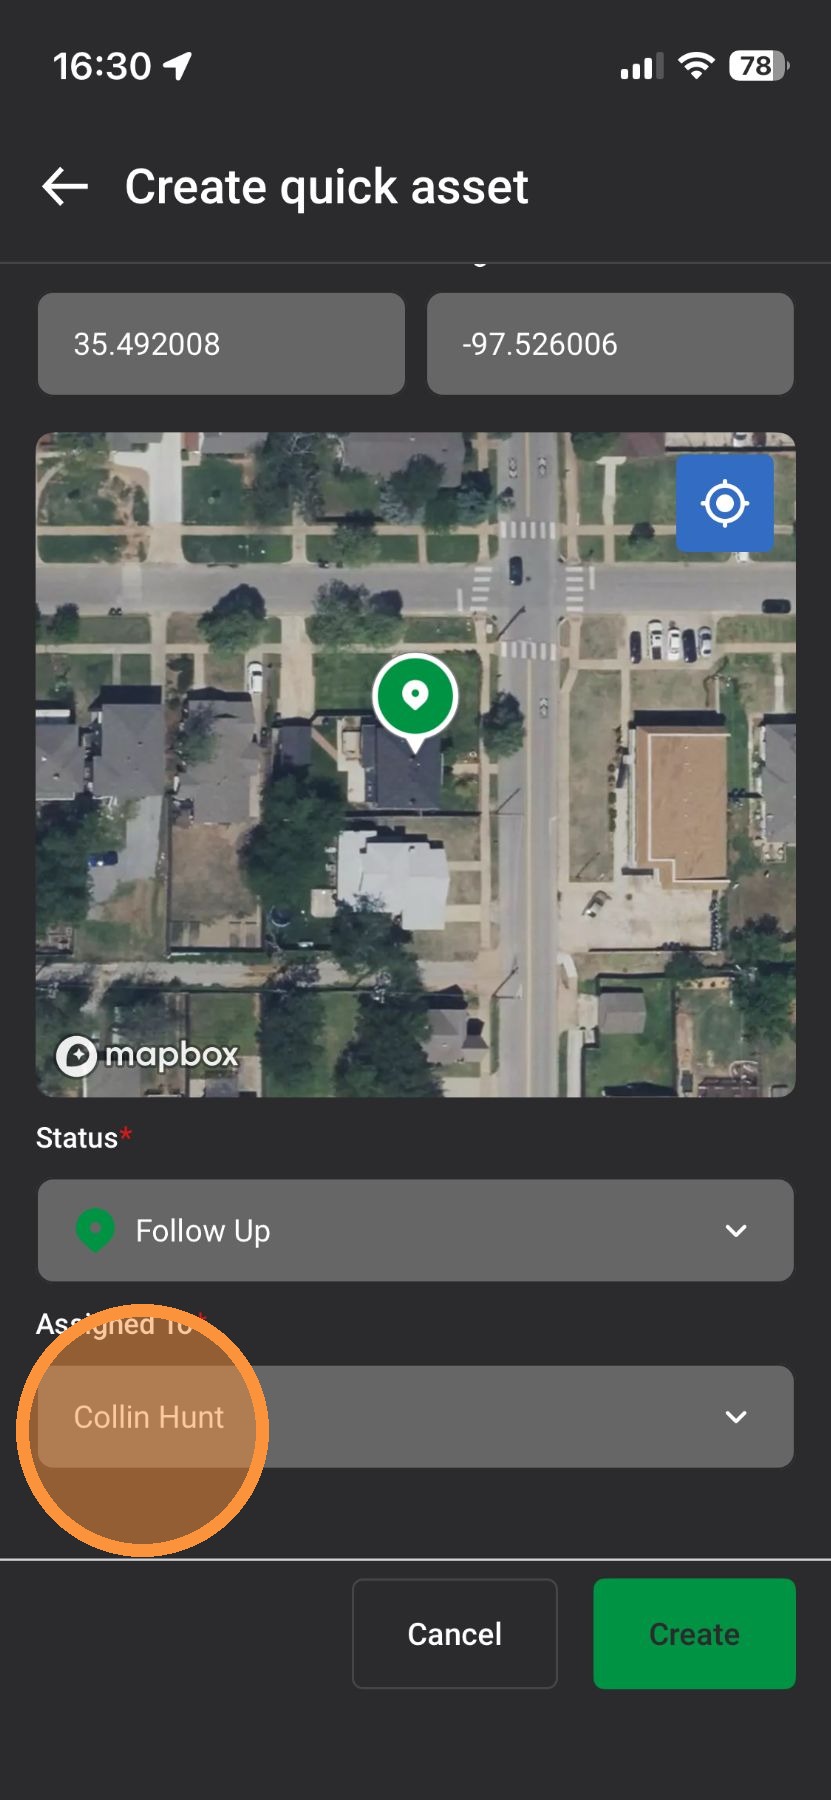
8. Tap to select a person
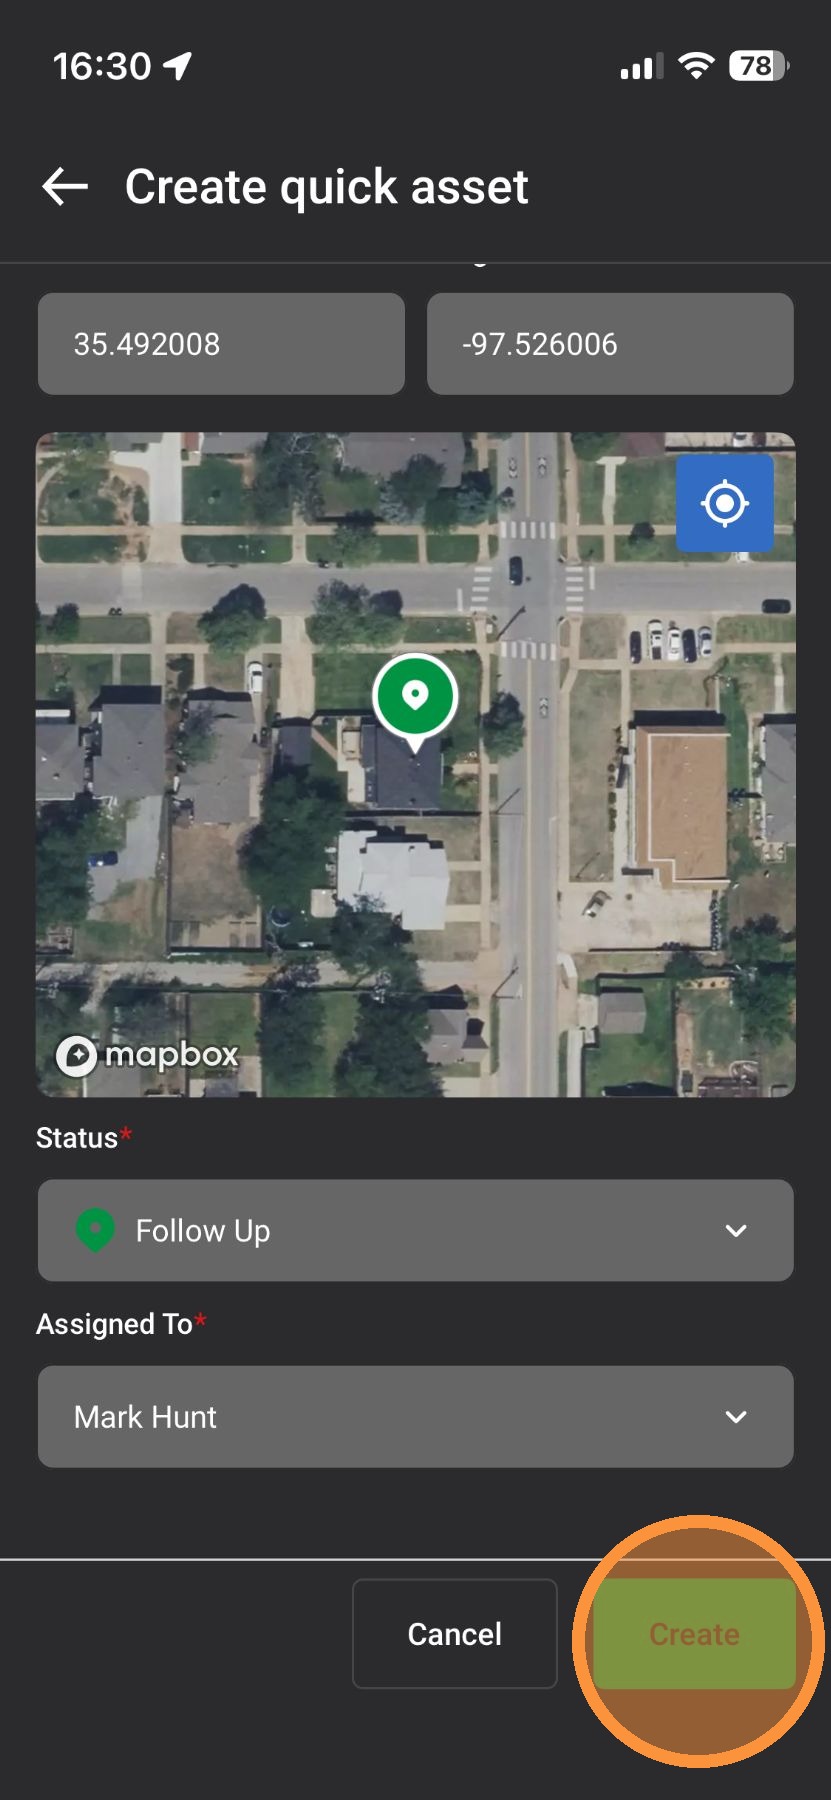
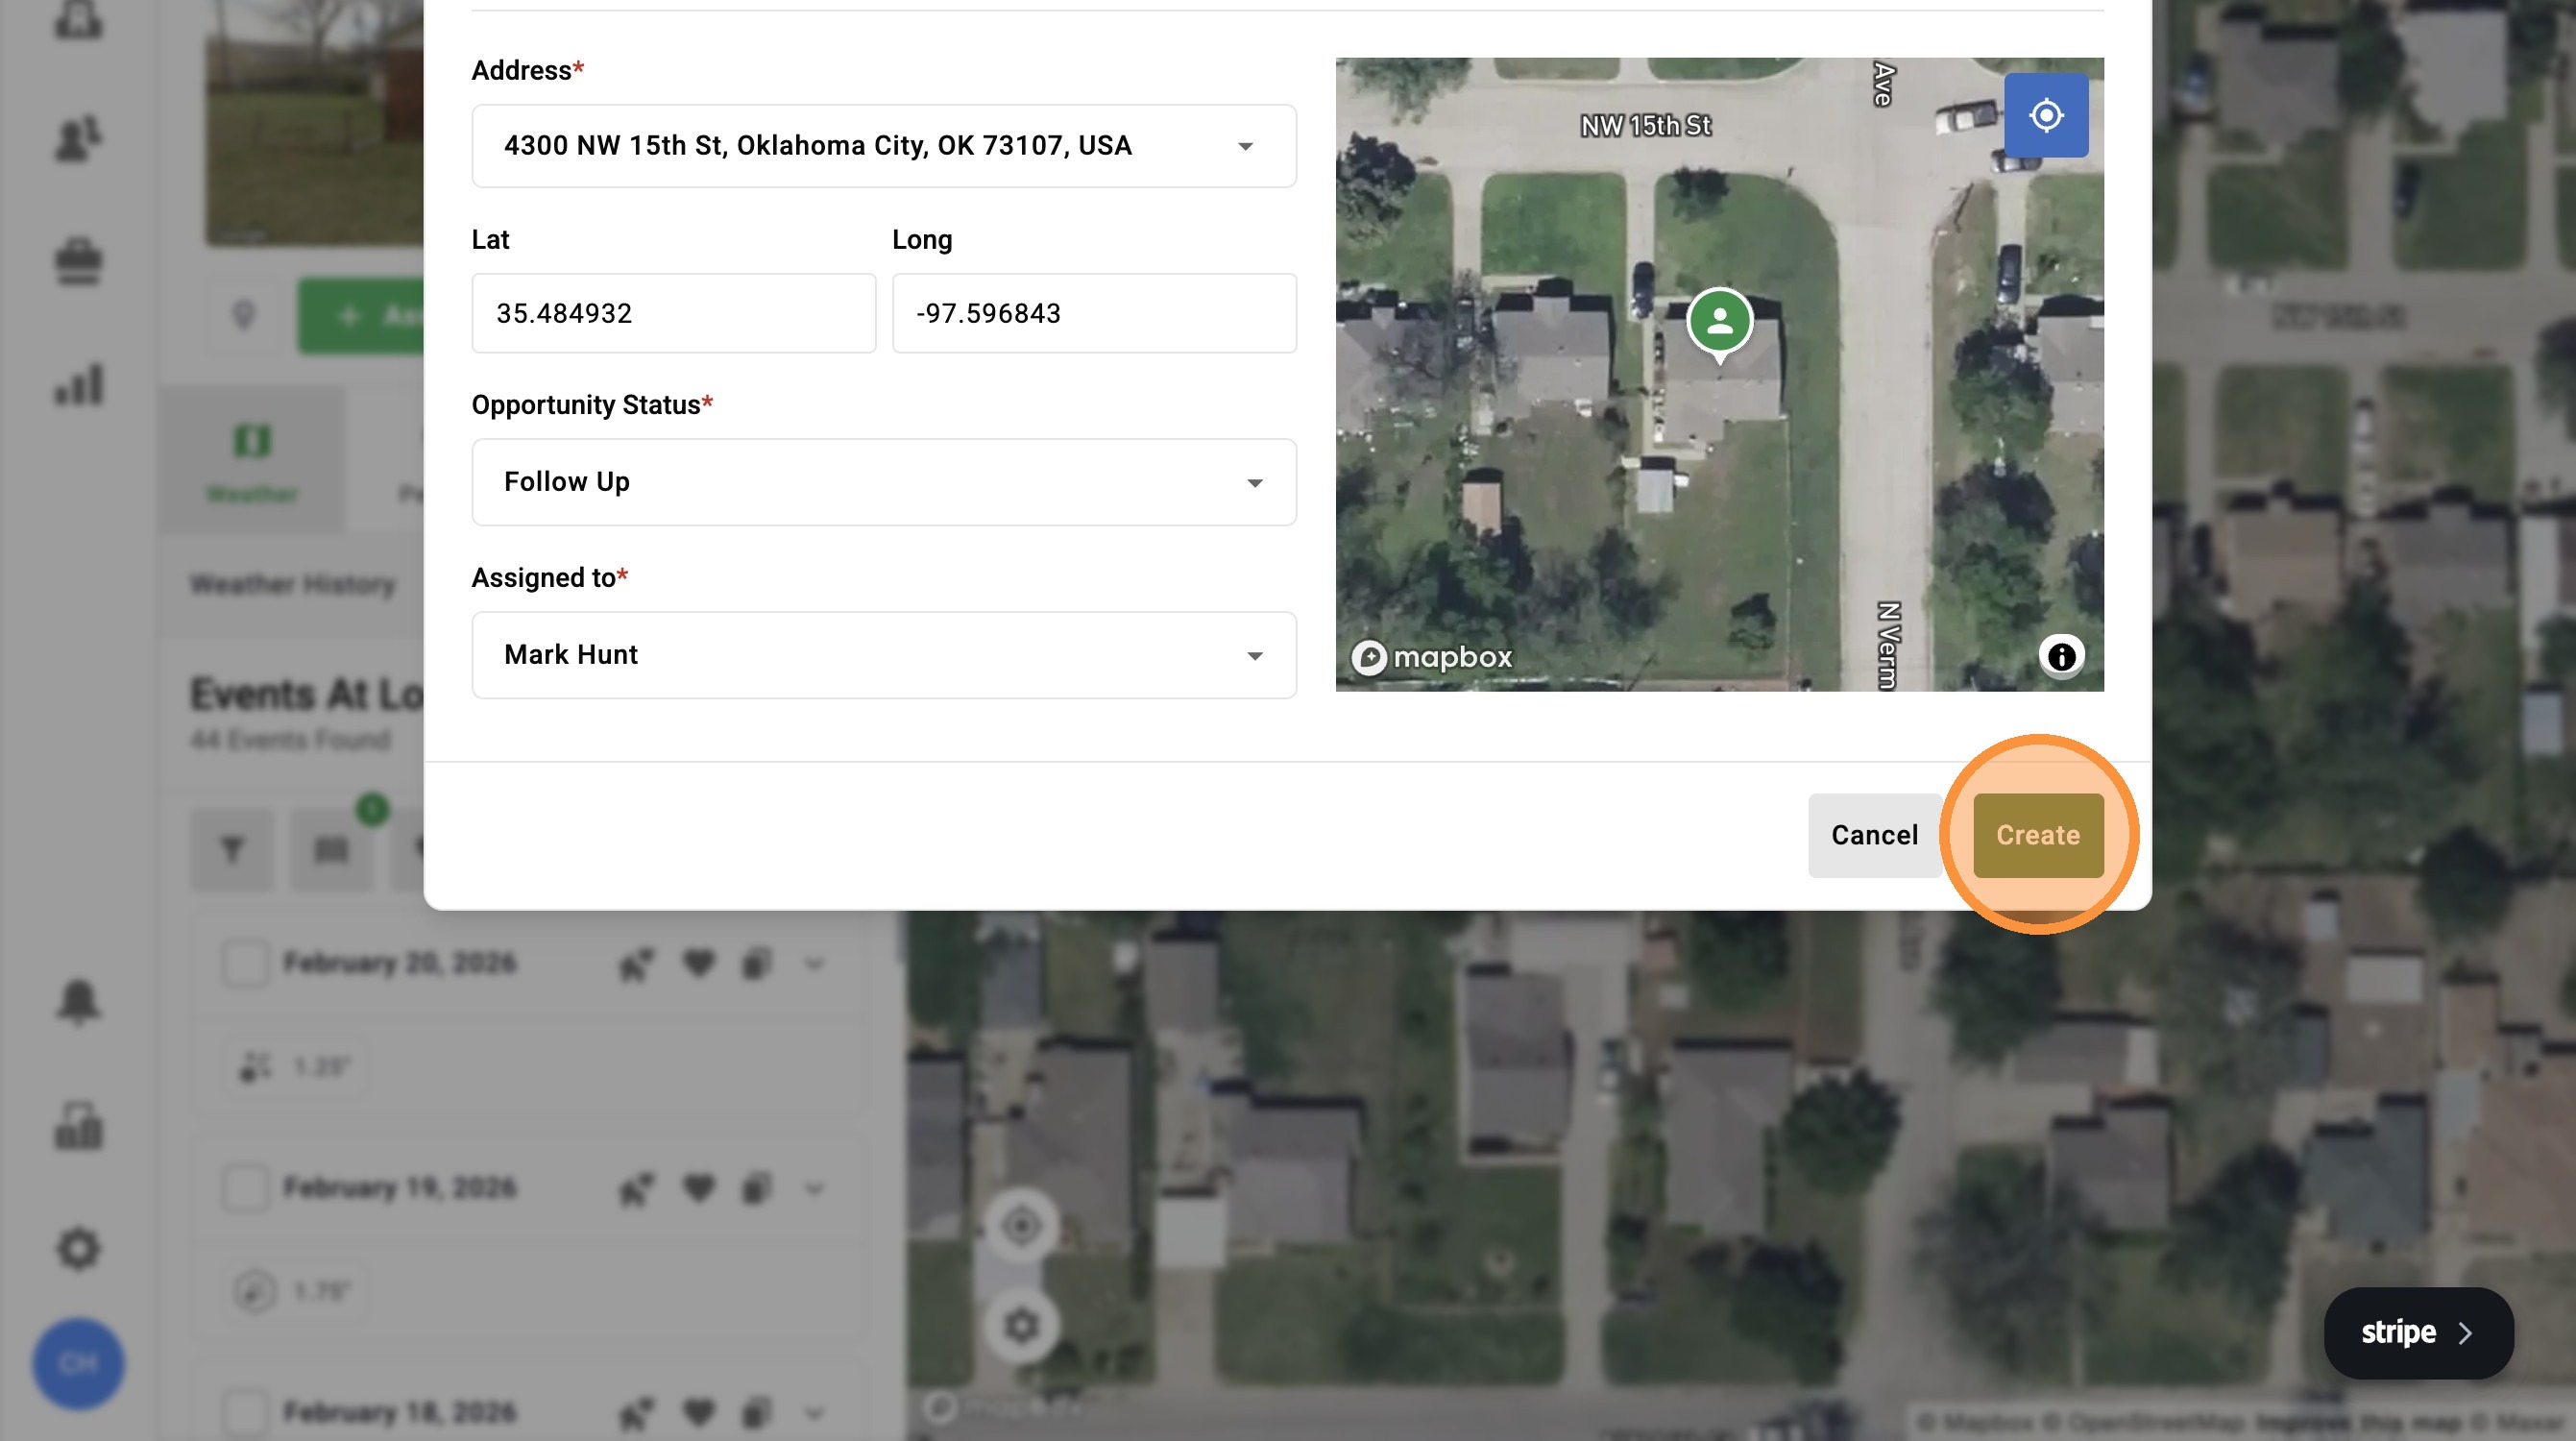
9. Tap "Create." You've created your asset!
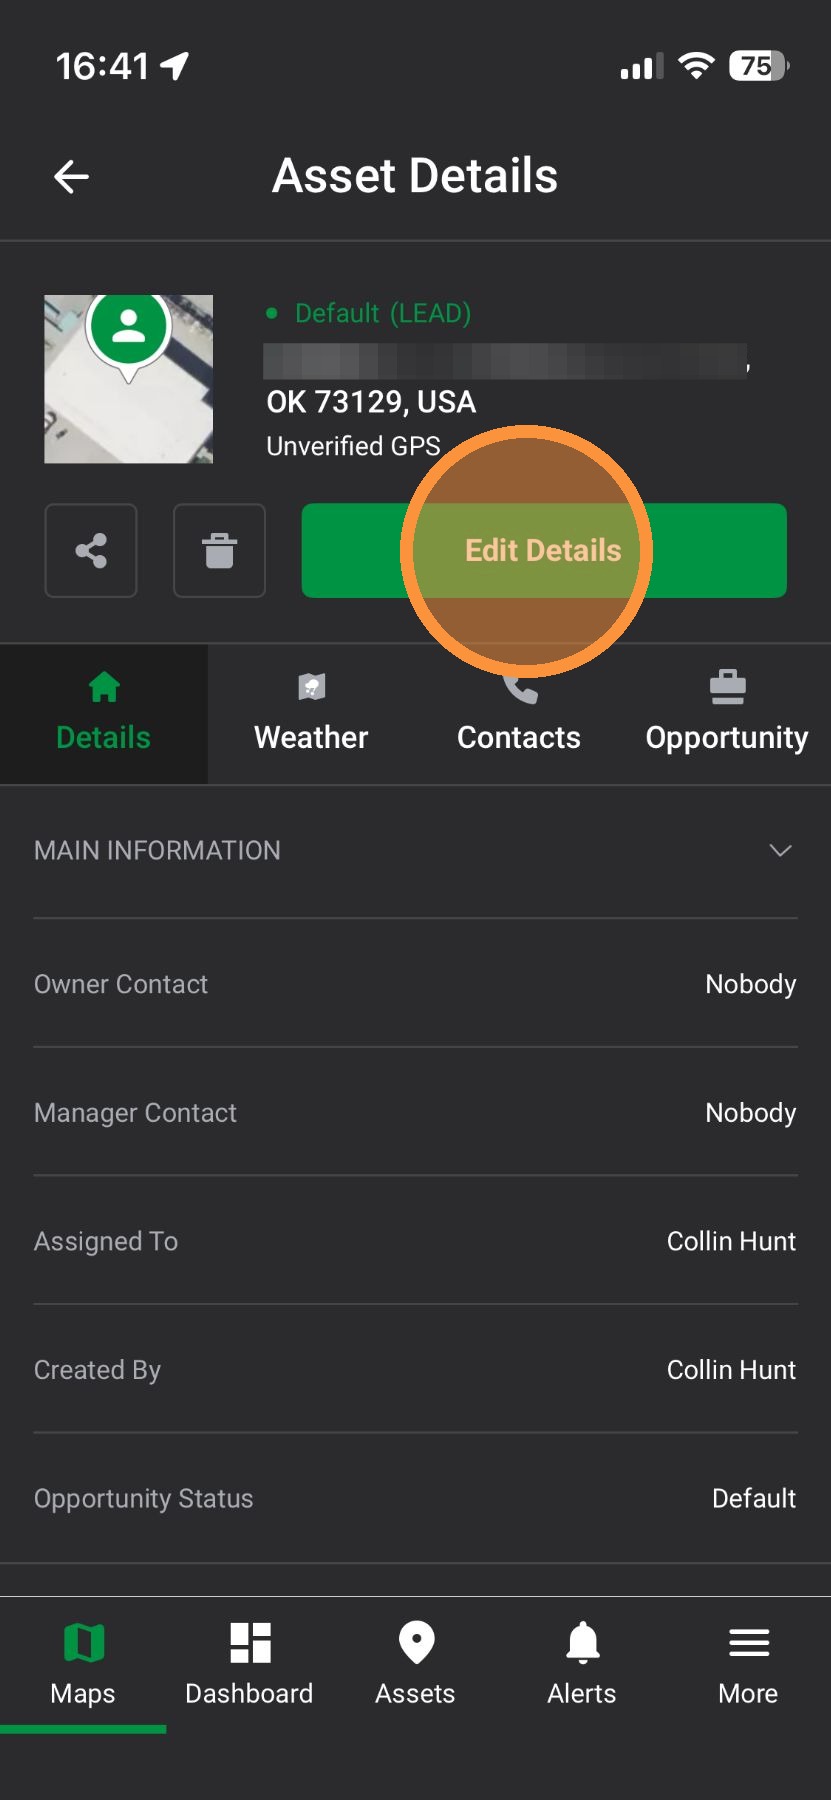
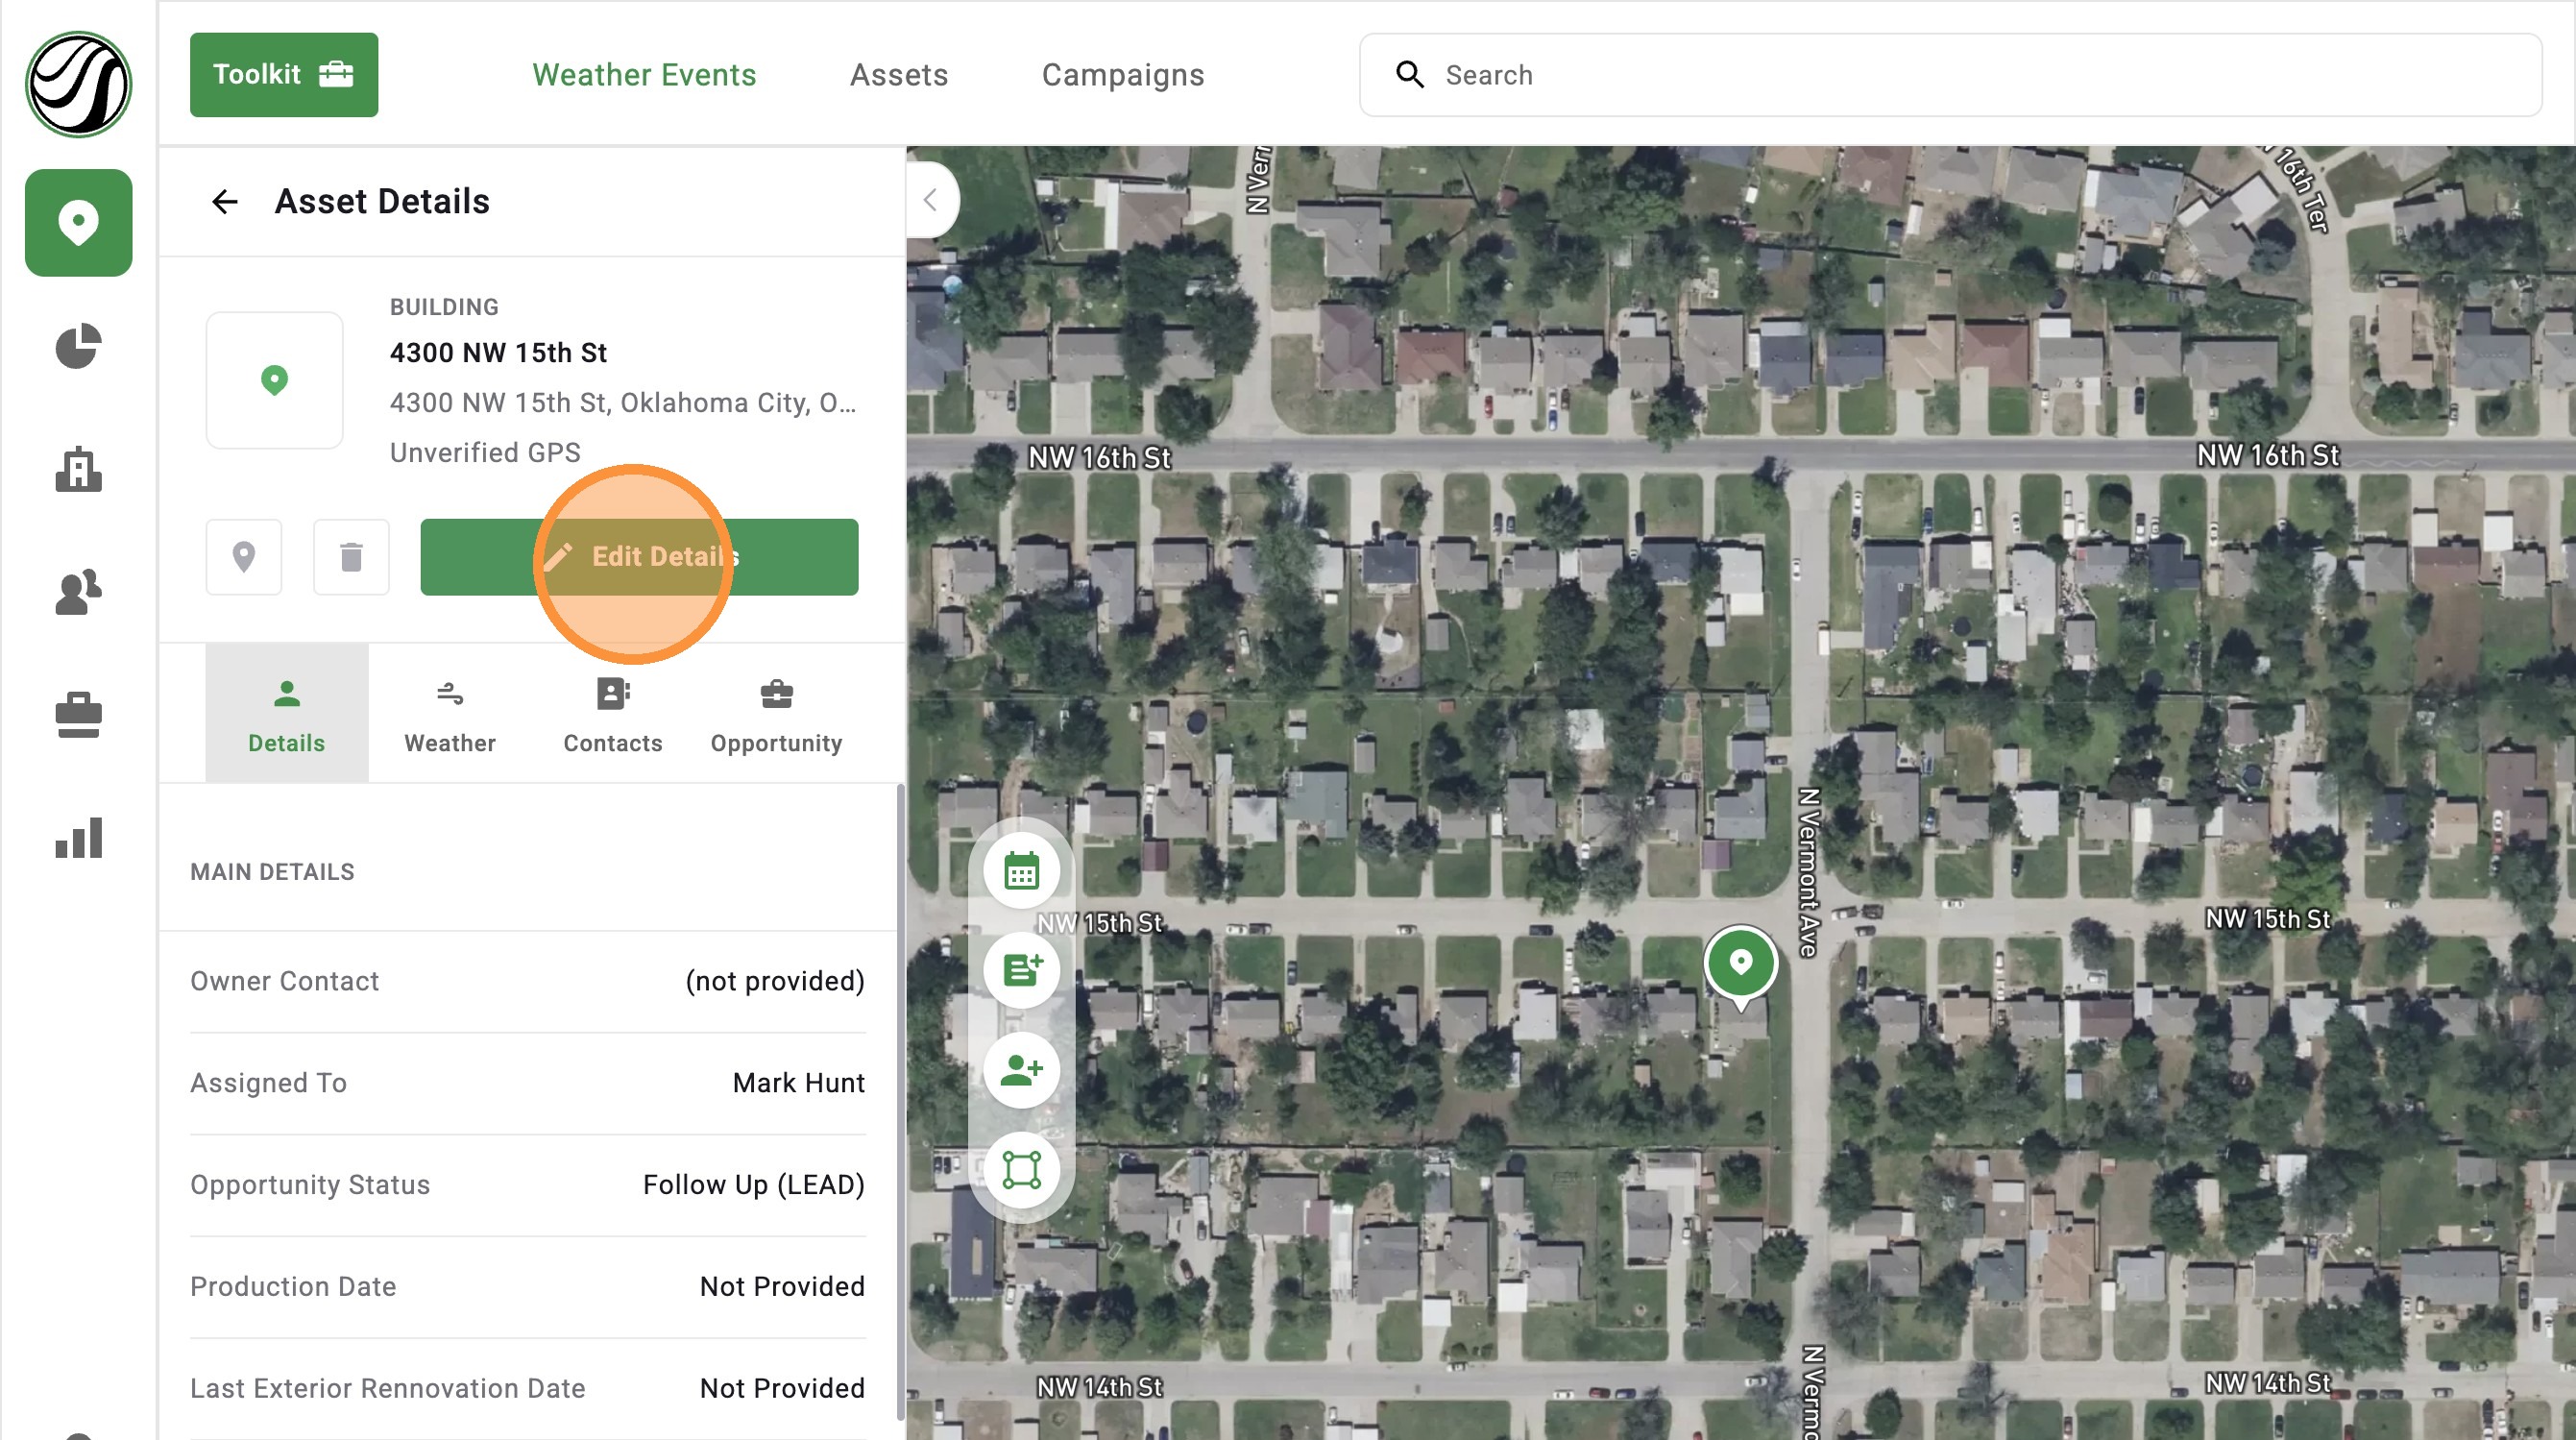
10. To add more details, such as the owner and the roof age, select "Edit Details"
11. If needed, update the Opportunity Status & tap "Next"

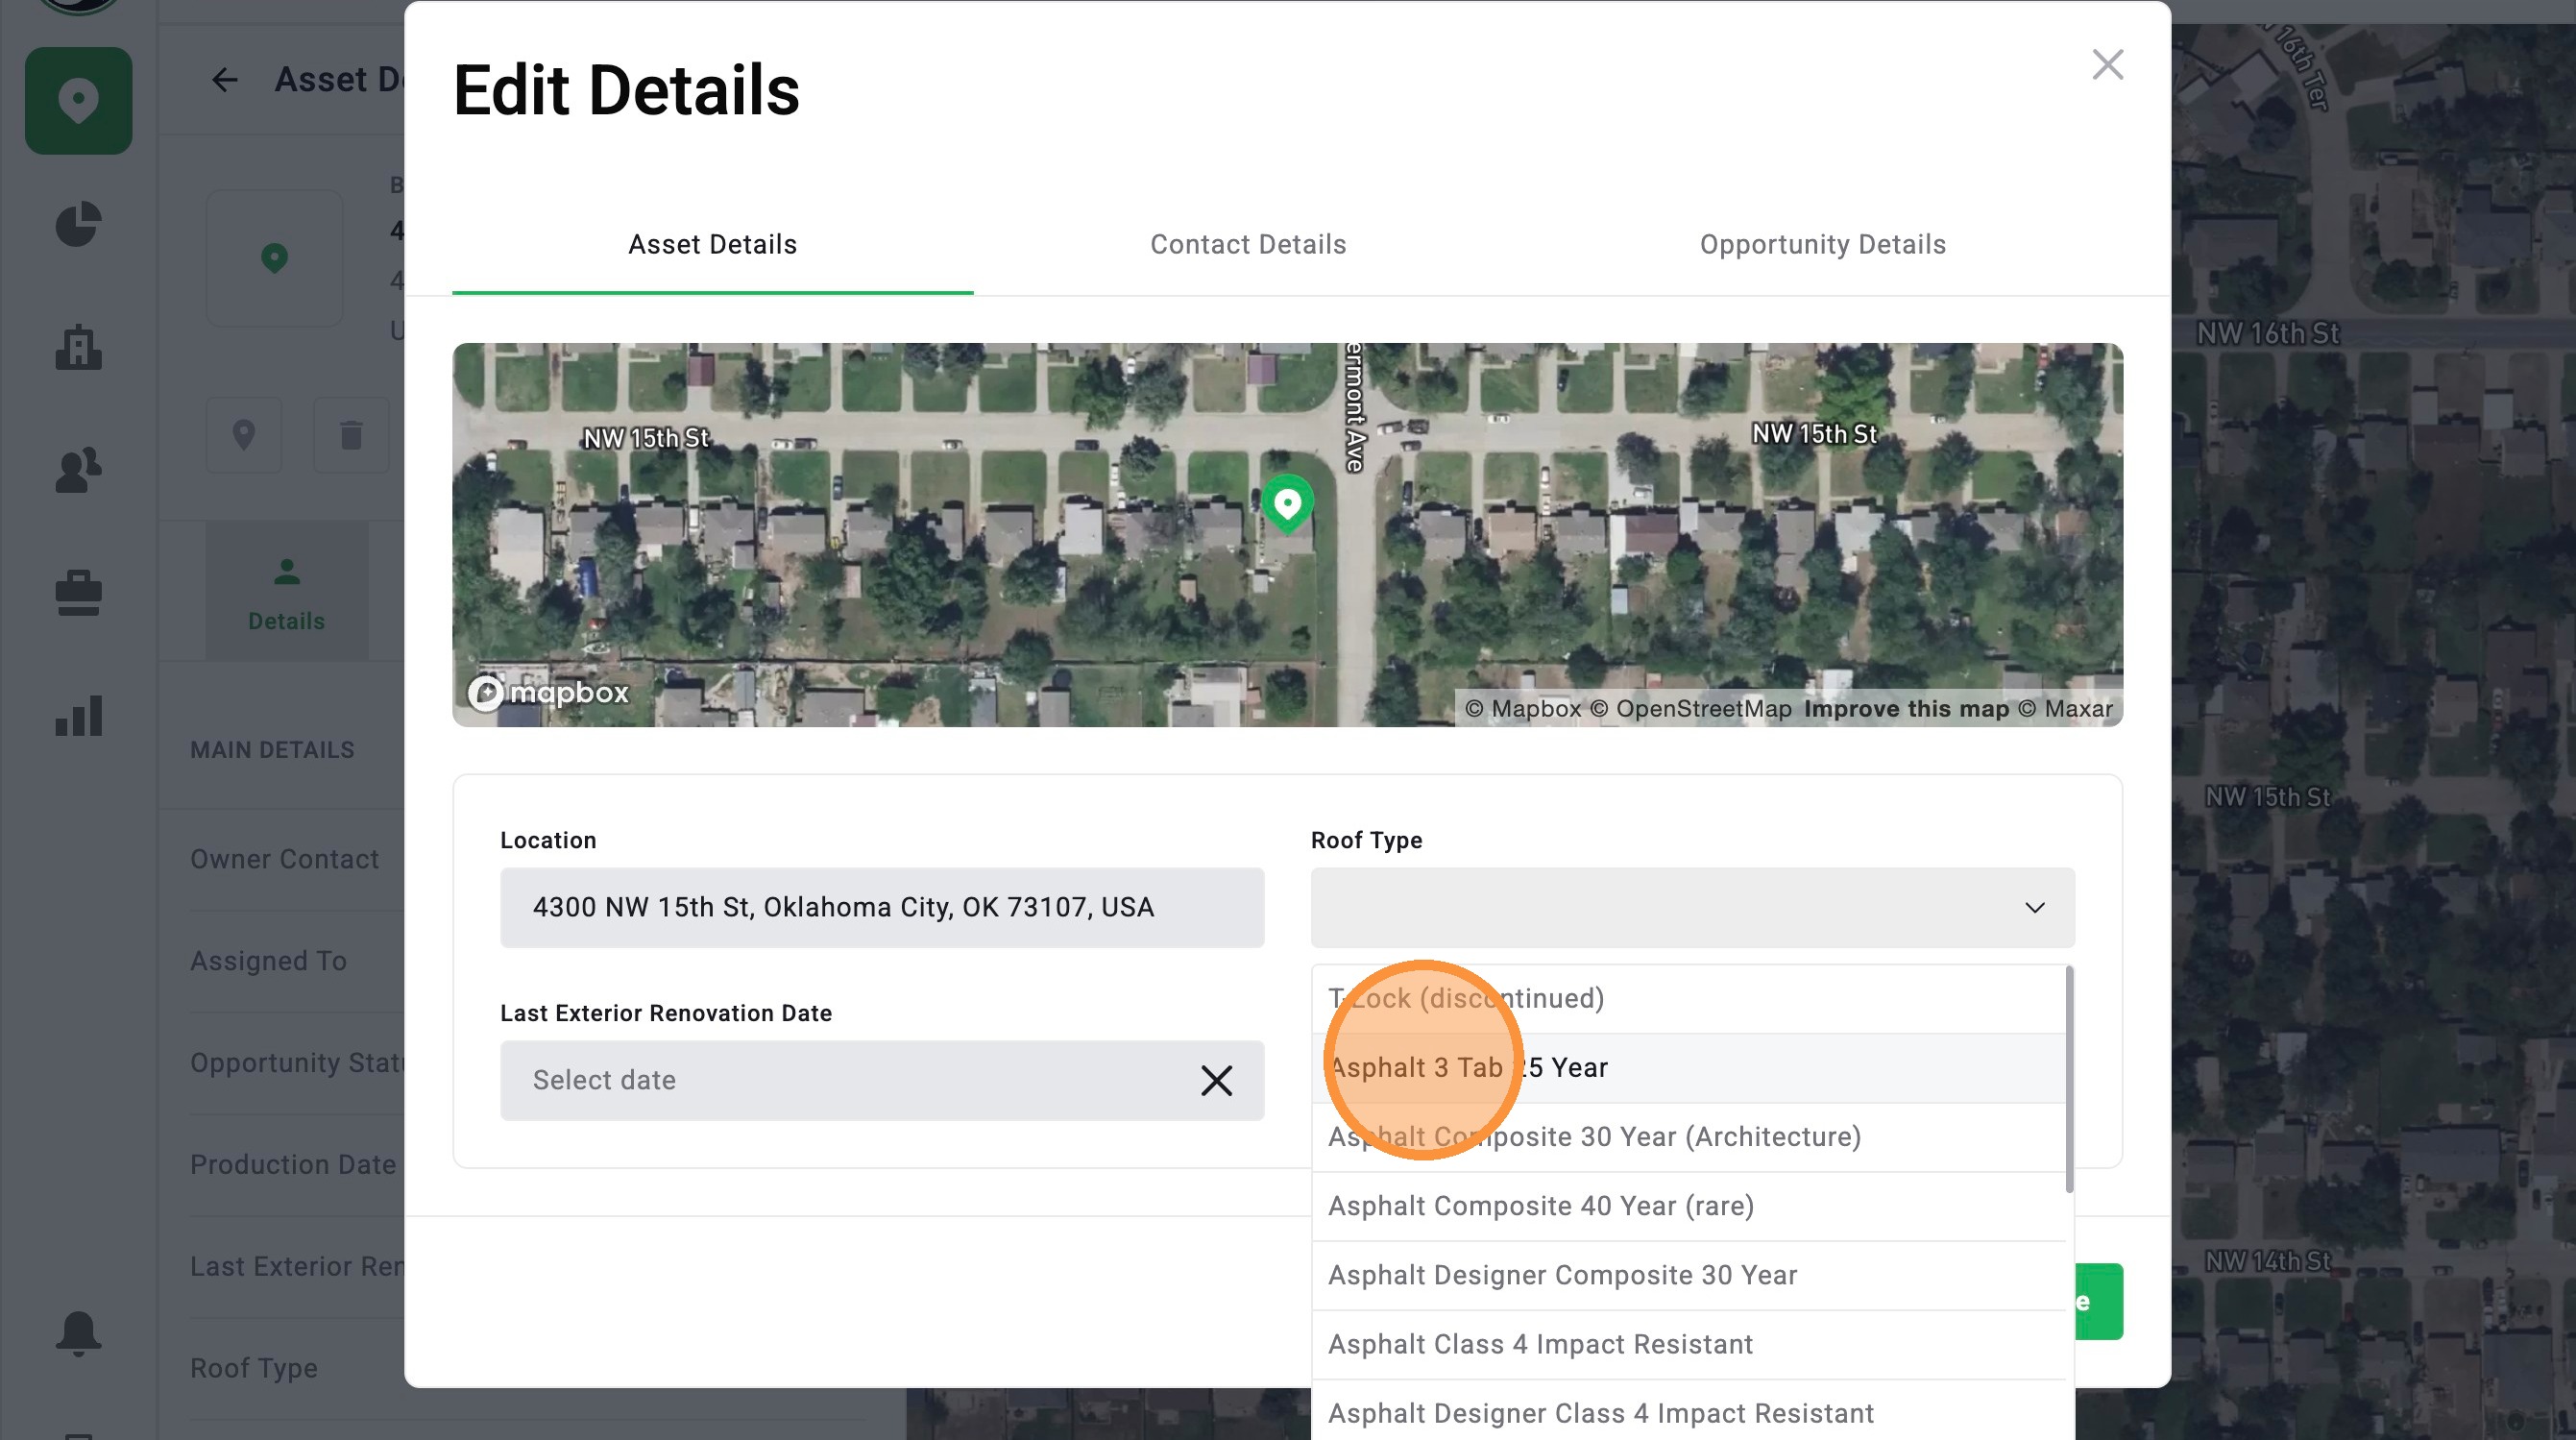
12. Under "Asset Details," you can add Roof Type and Last Exterior Renovation Date
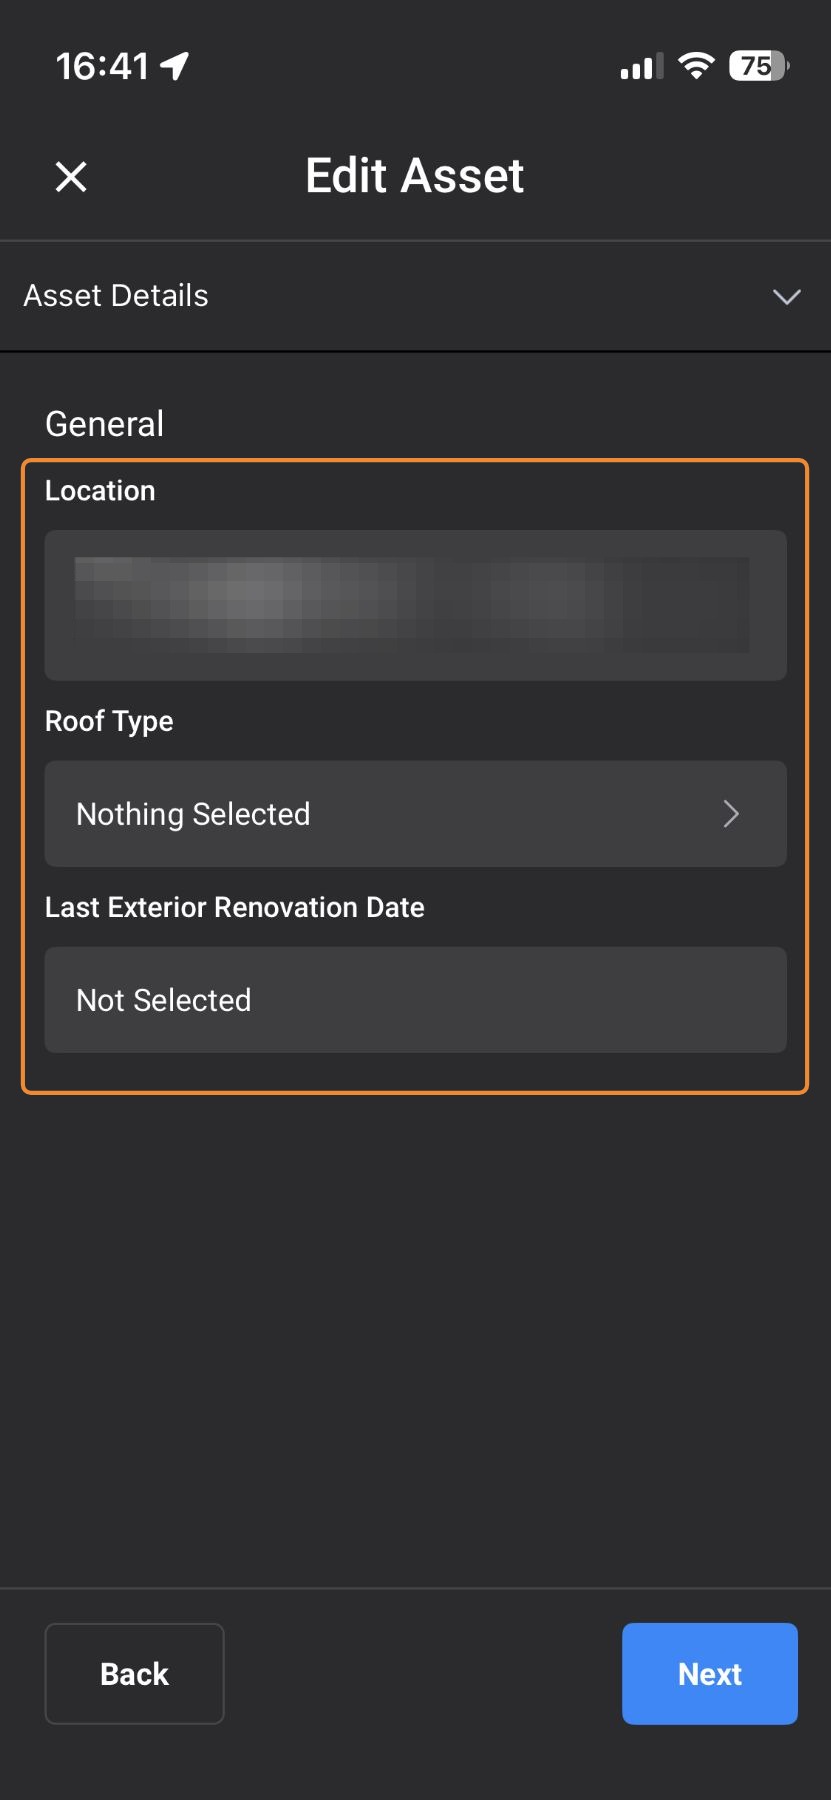
13. Tap "Next"

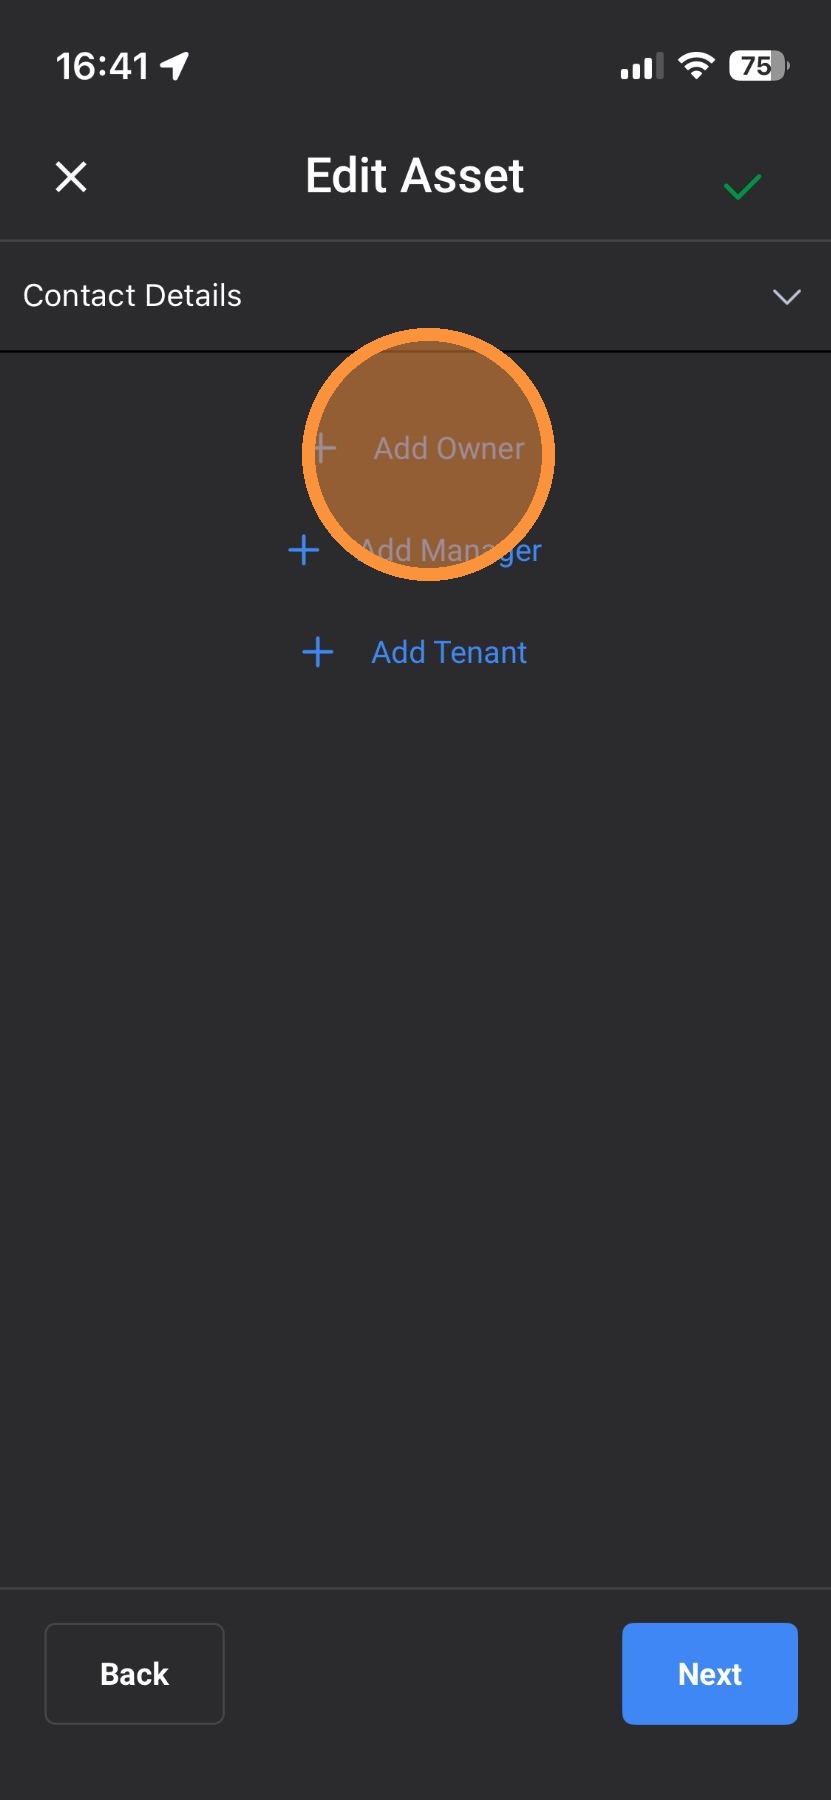
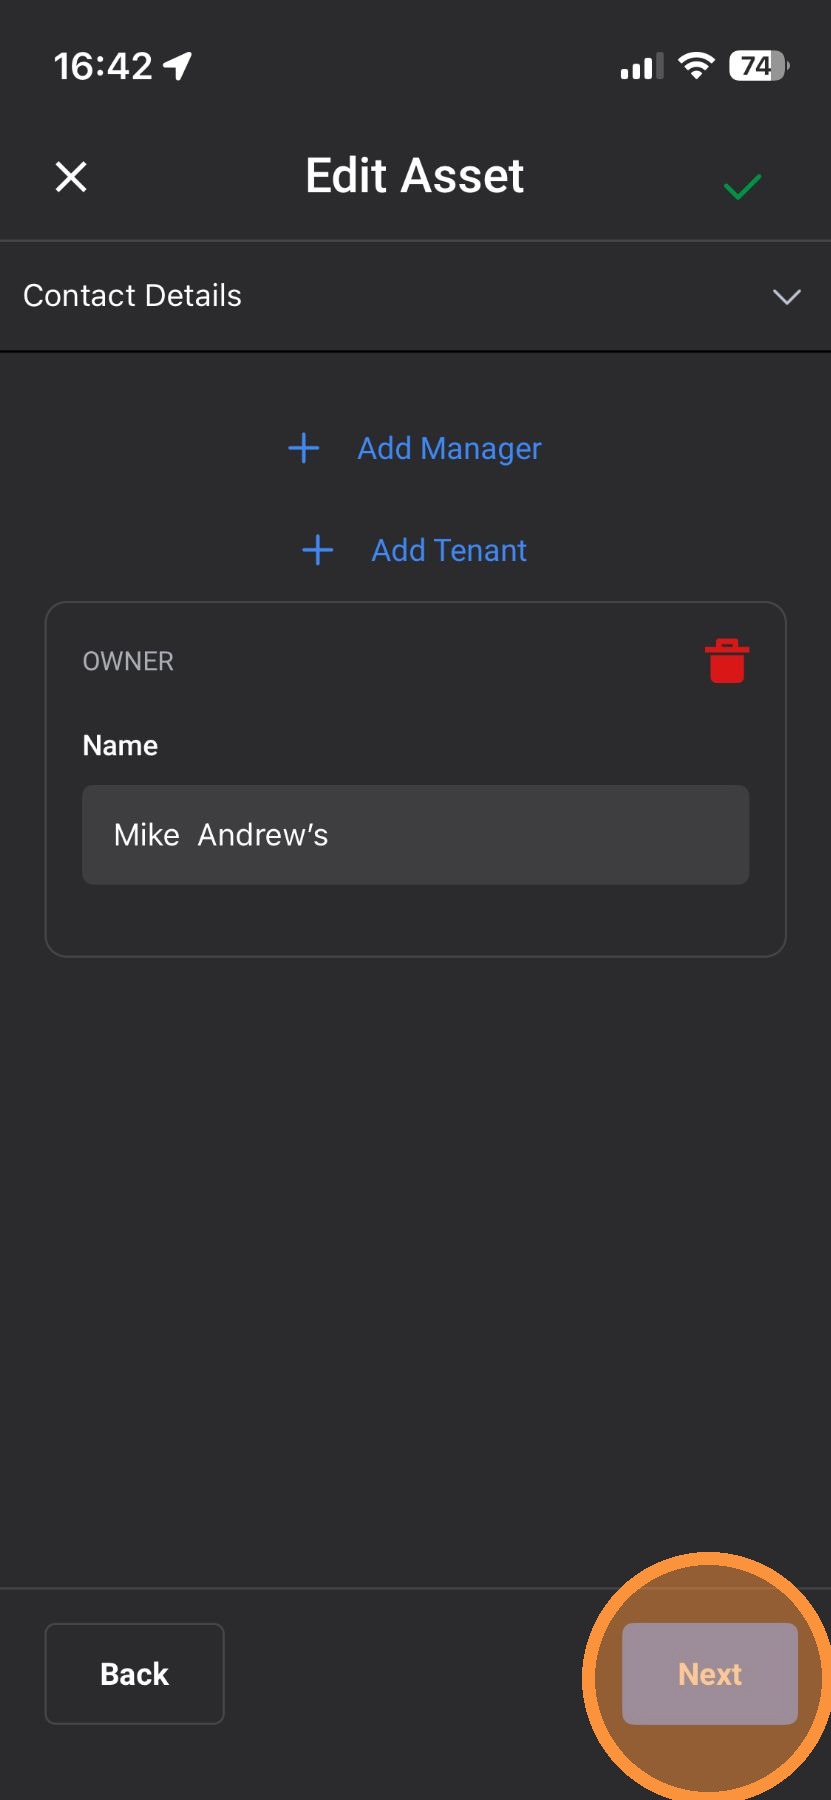
14. Under "Contact Details," add an Owner, Manager, or Tenant
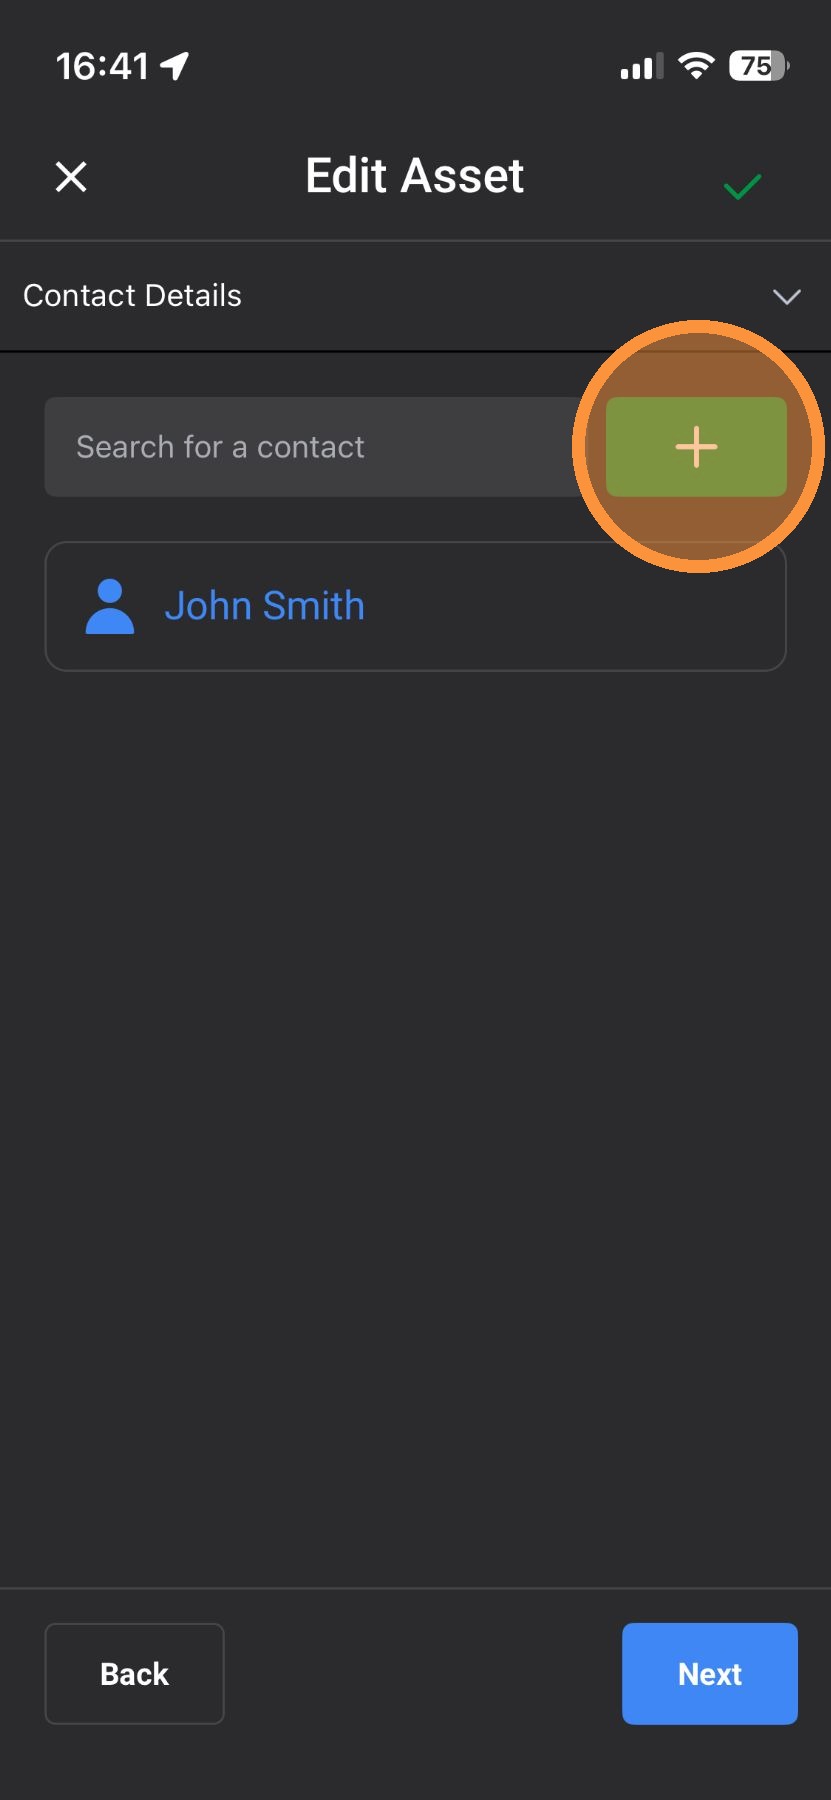
15. Tap "+" to create a new contact OR select a pre-existing contact
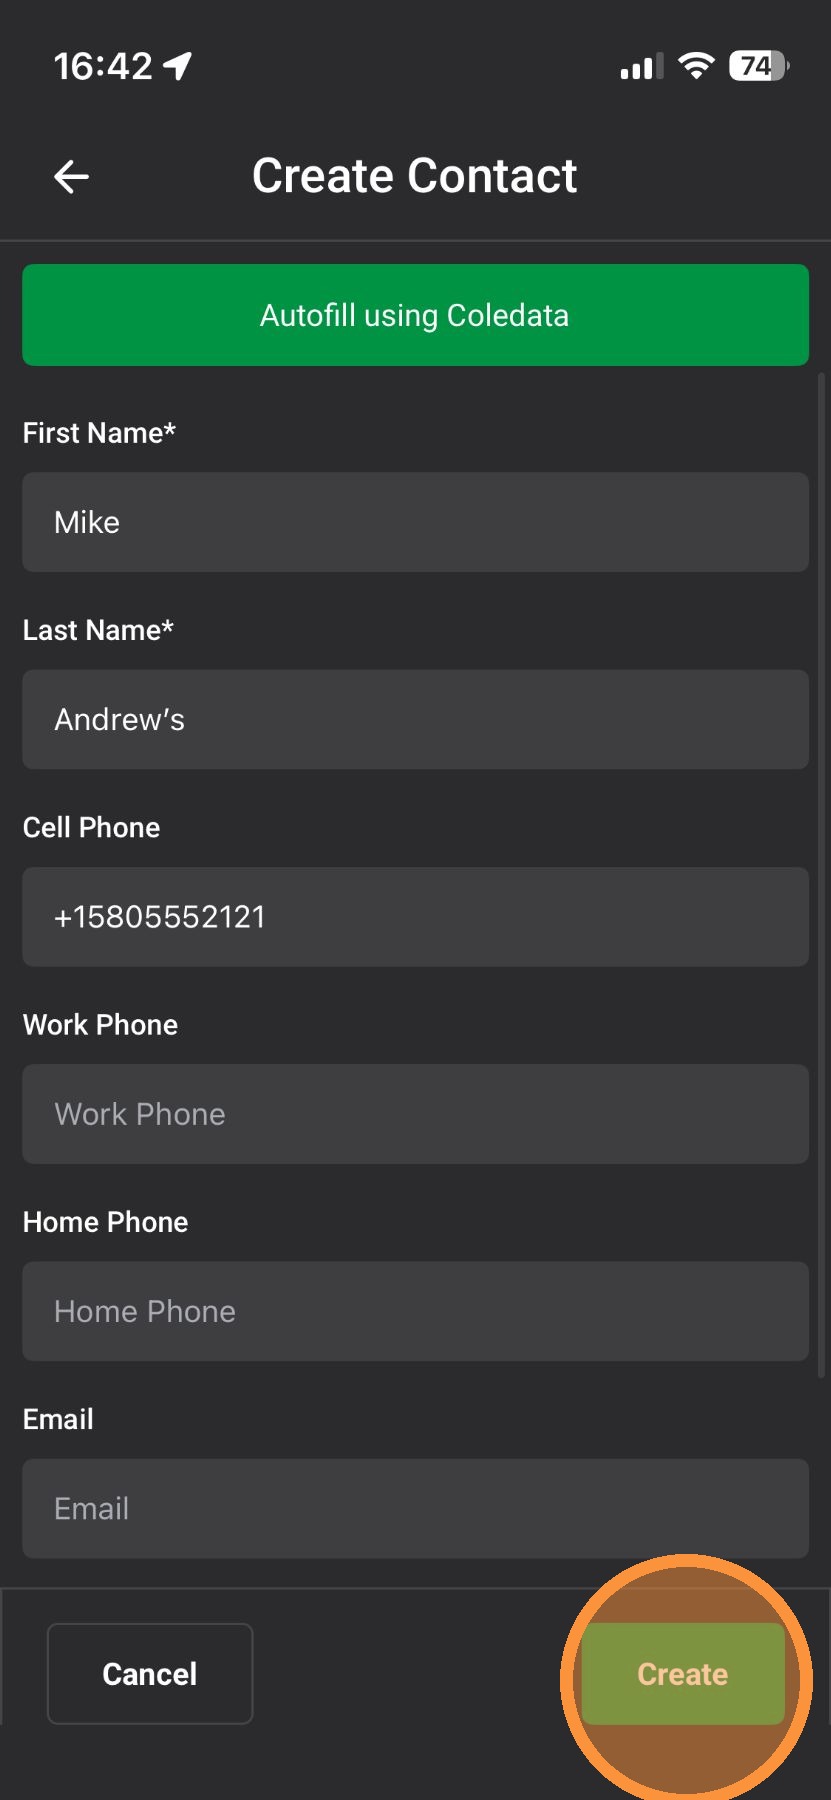
16. Add the Contact details

17. Tap "Create"
18. Add another contact or tap "Next"
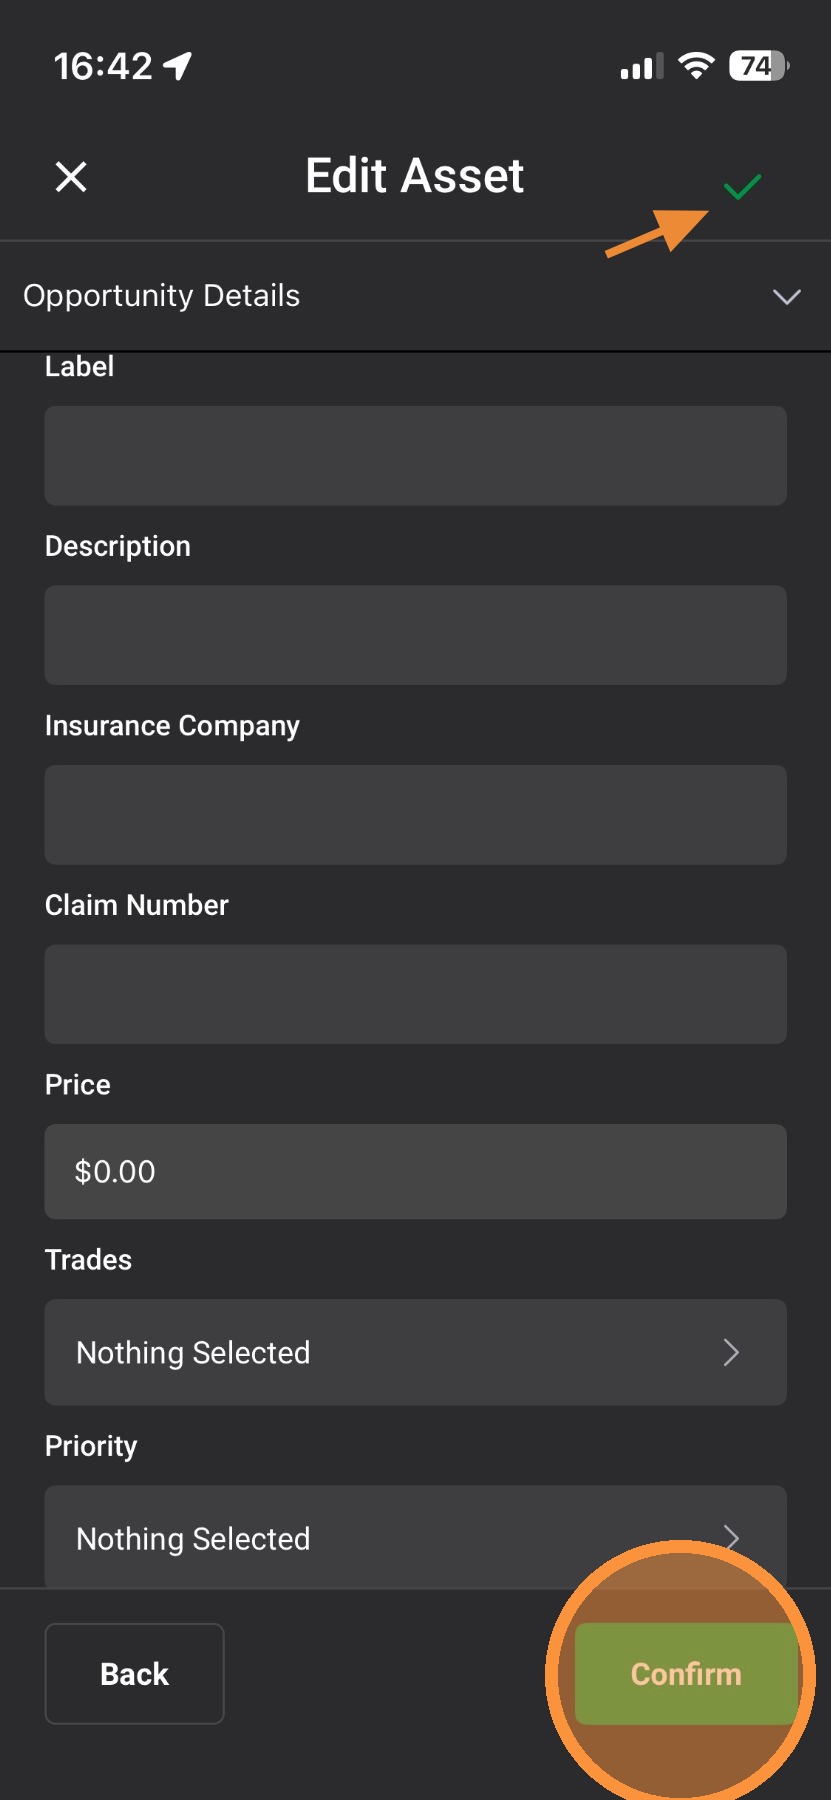
19. If you have DealTrace, add Opportunity Details, such as a note, price of the roof, the priority level, and etc

20. Tap "Confirm" and you are done!
*Note: At any point, tap the green check mark to save
Search For Address
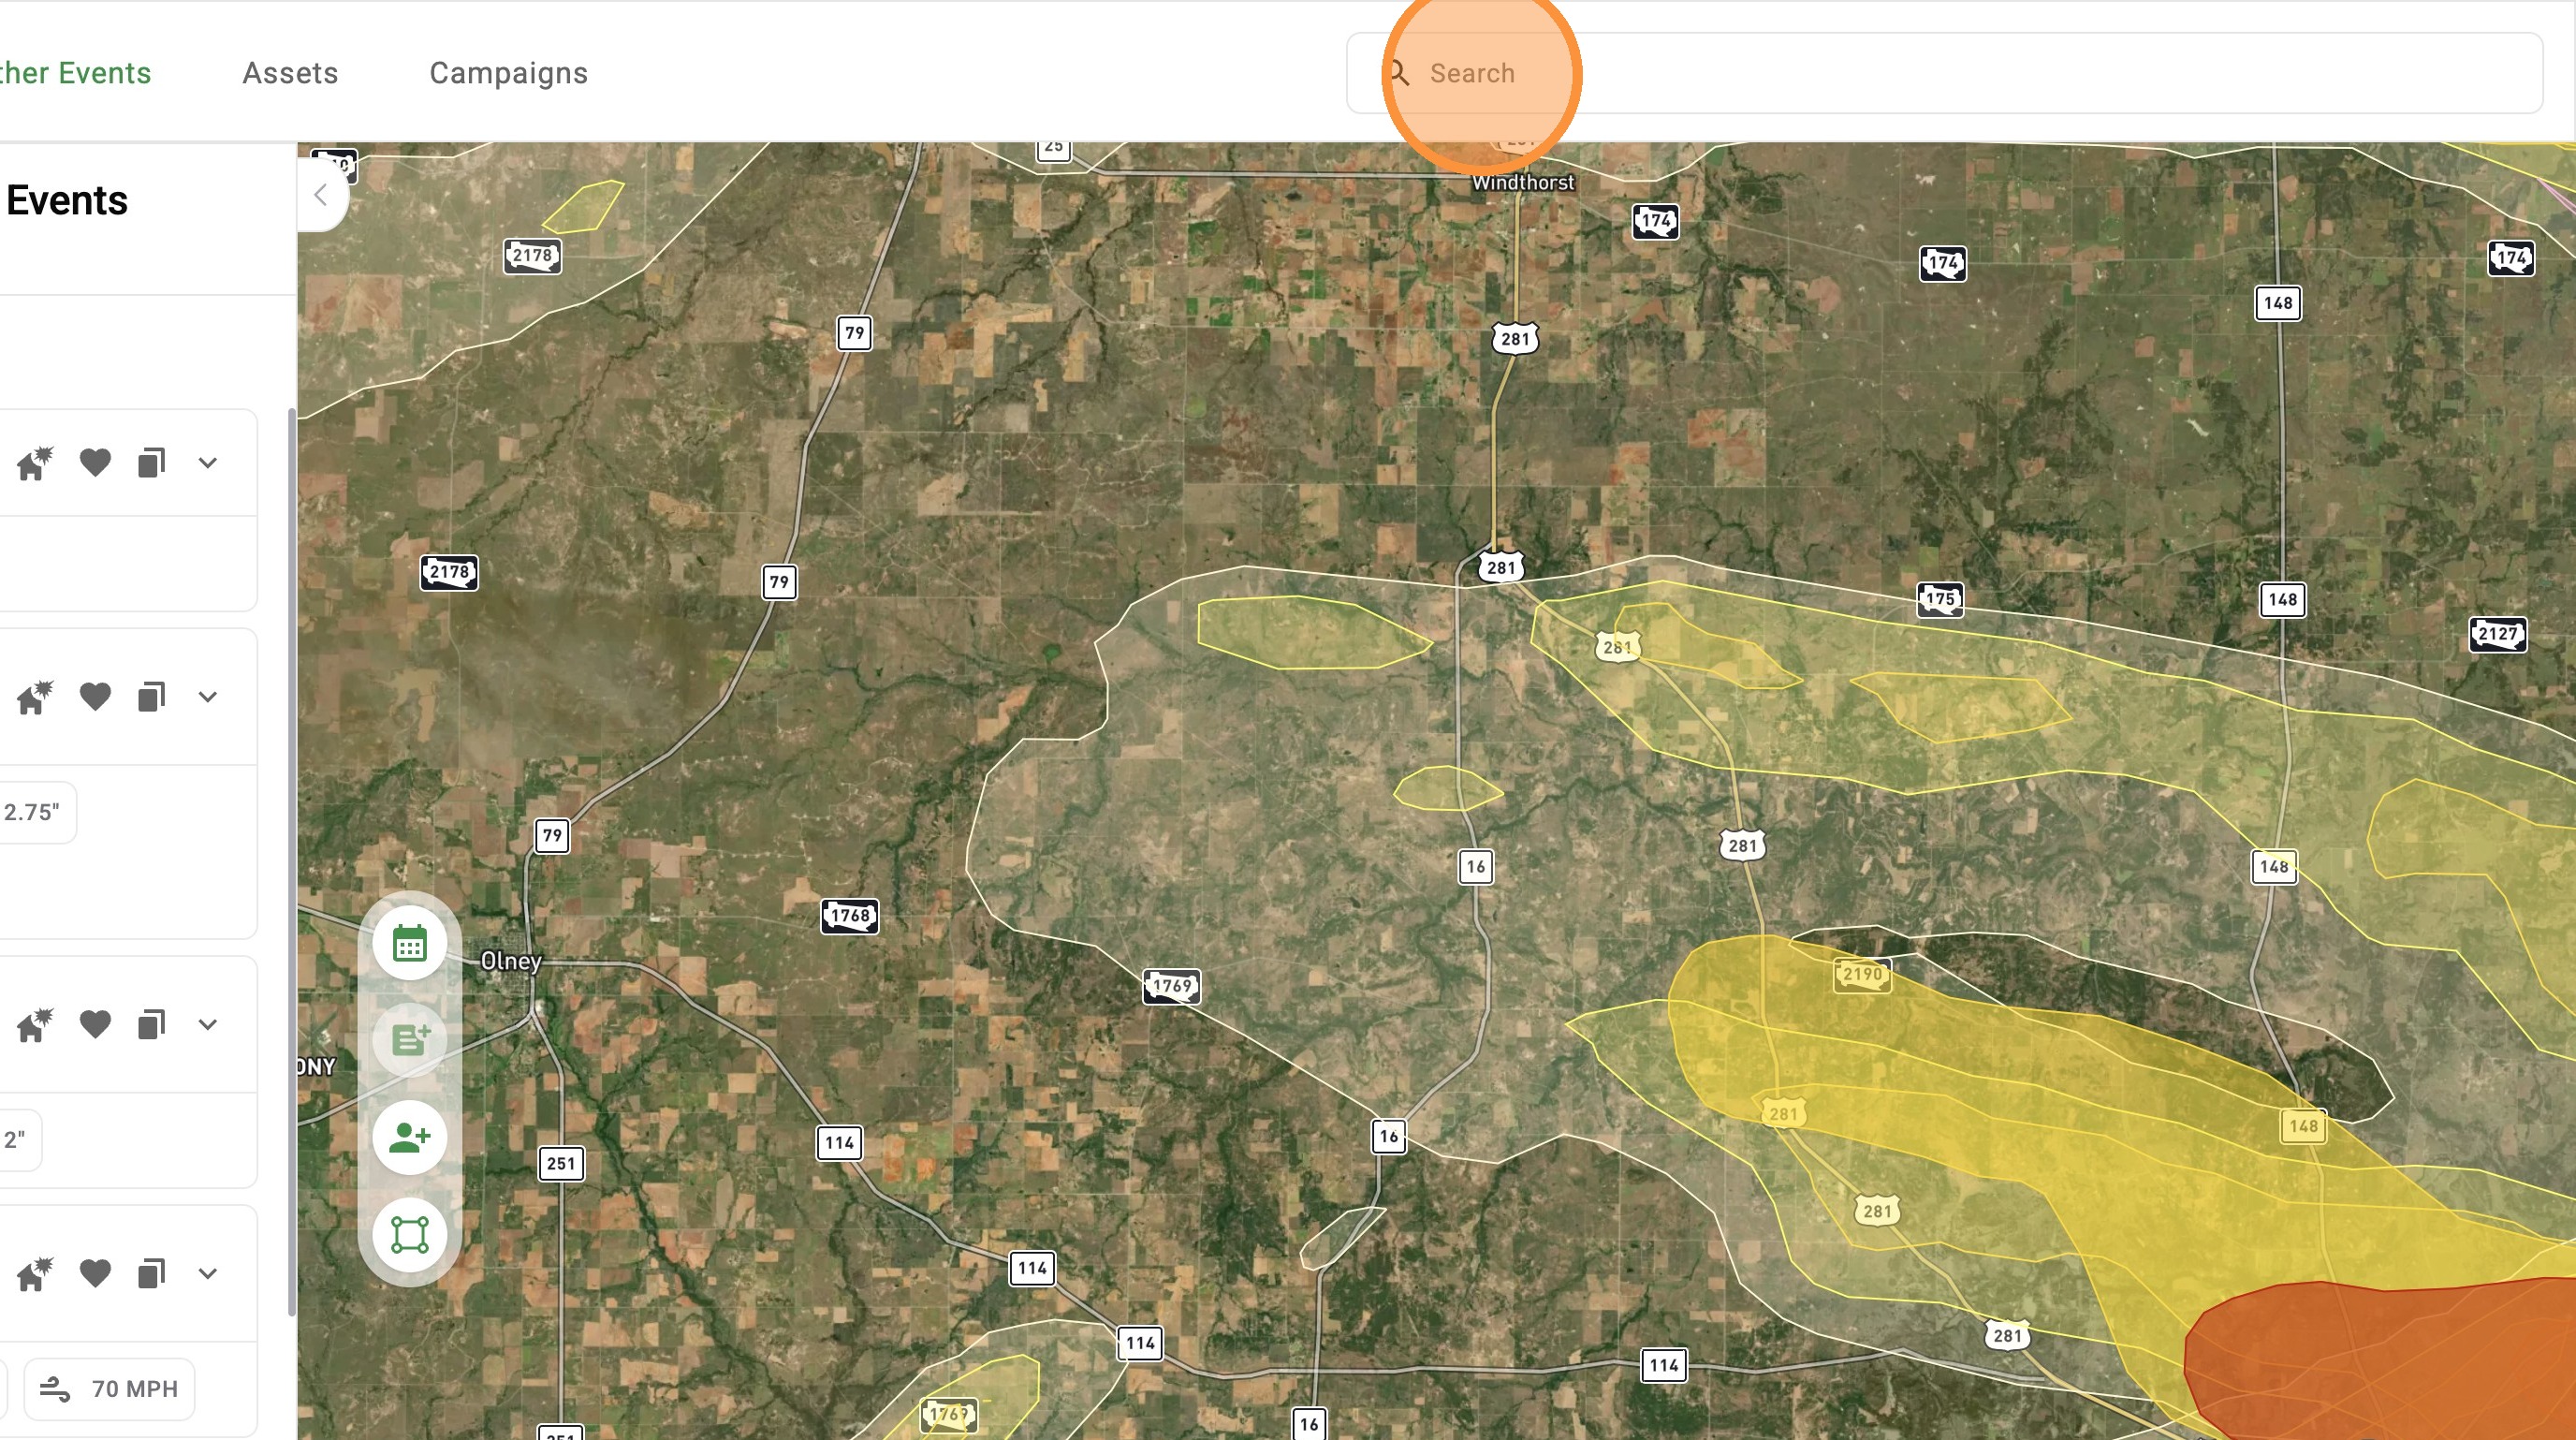
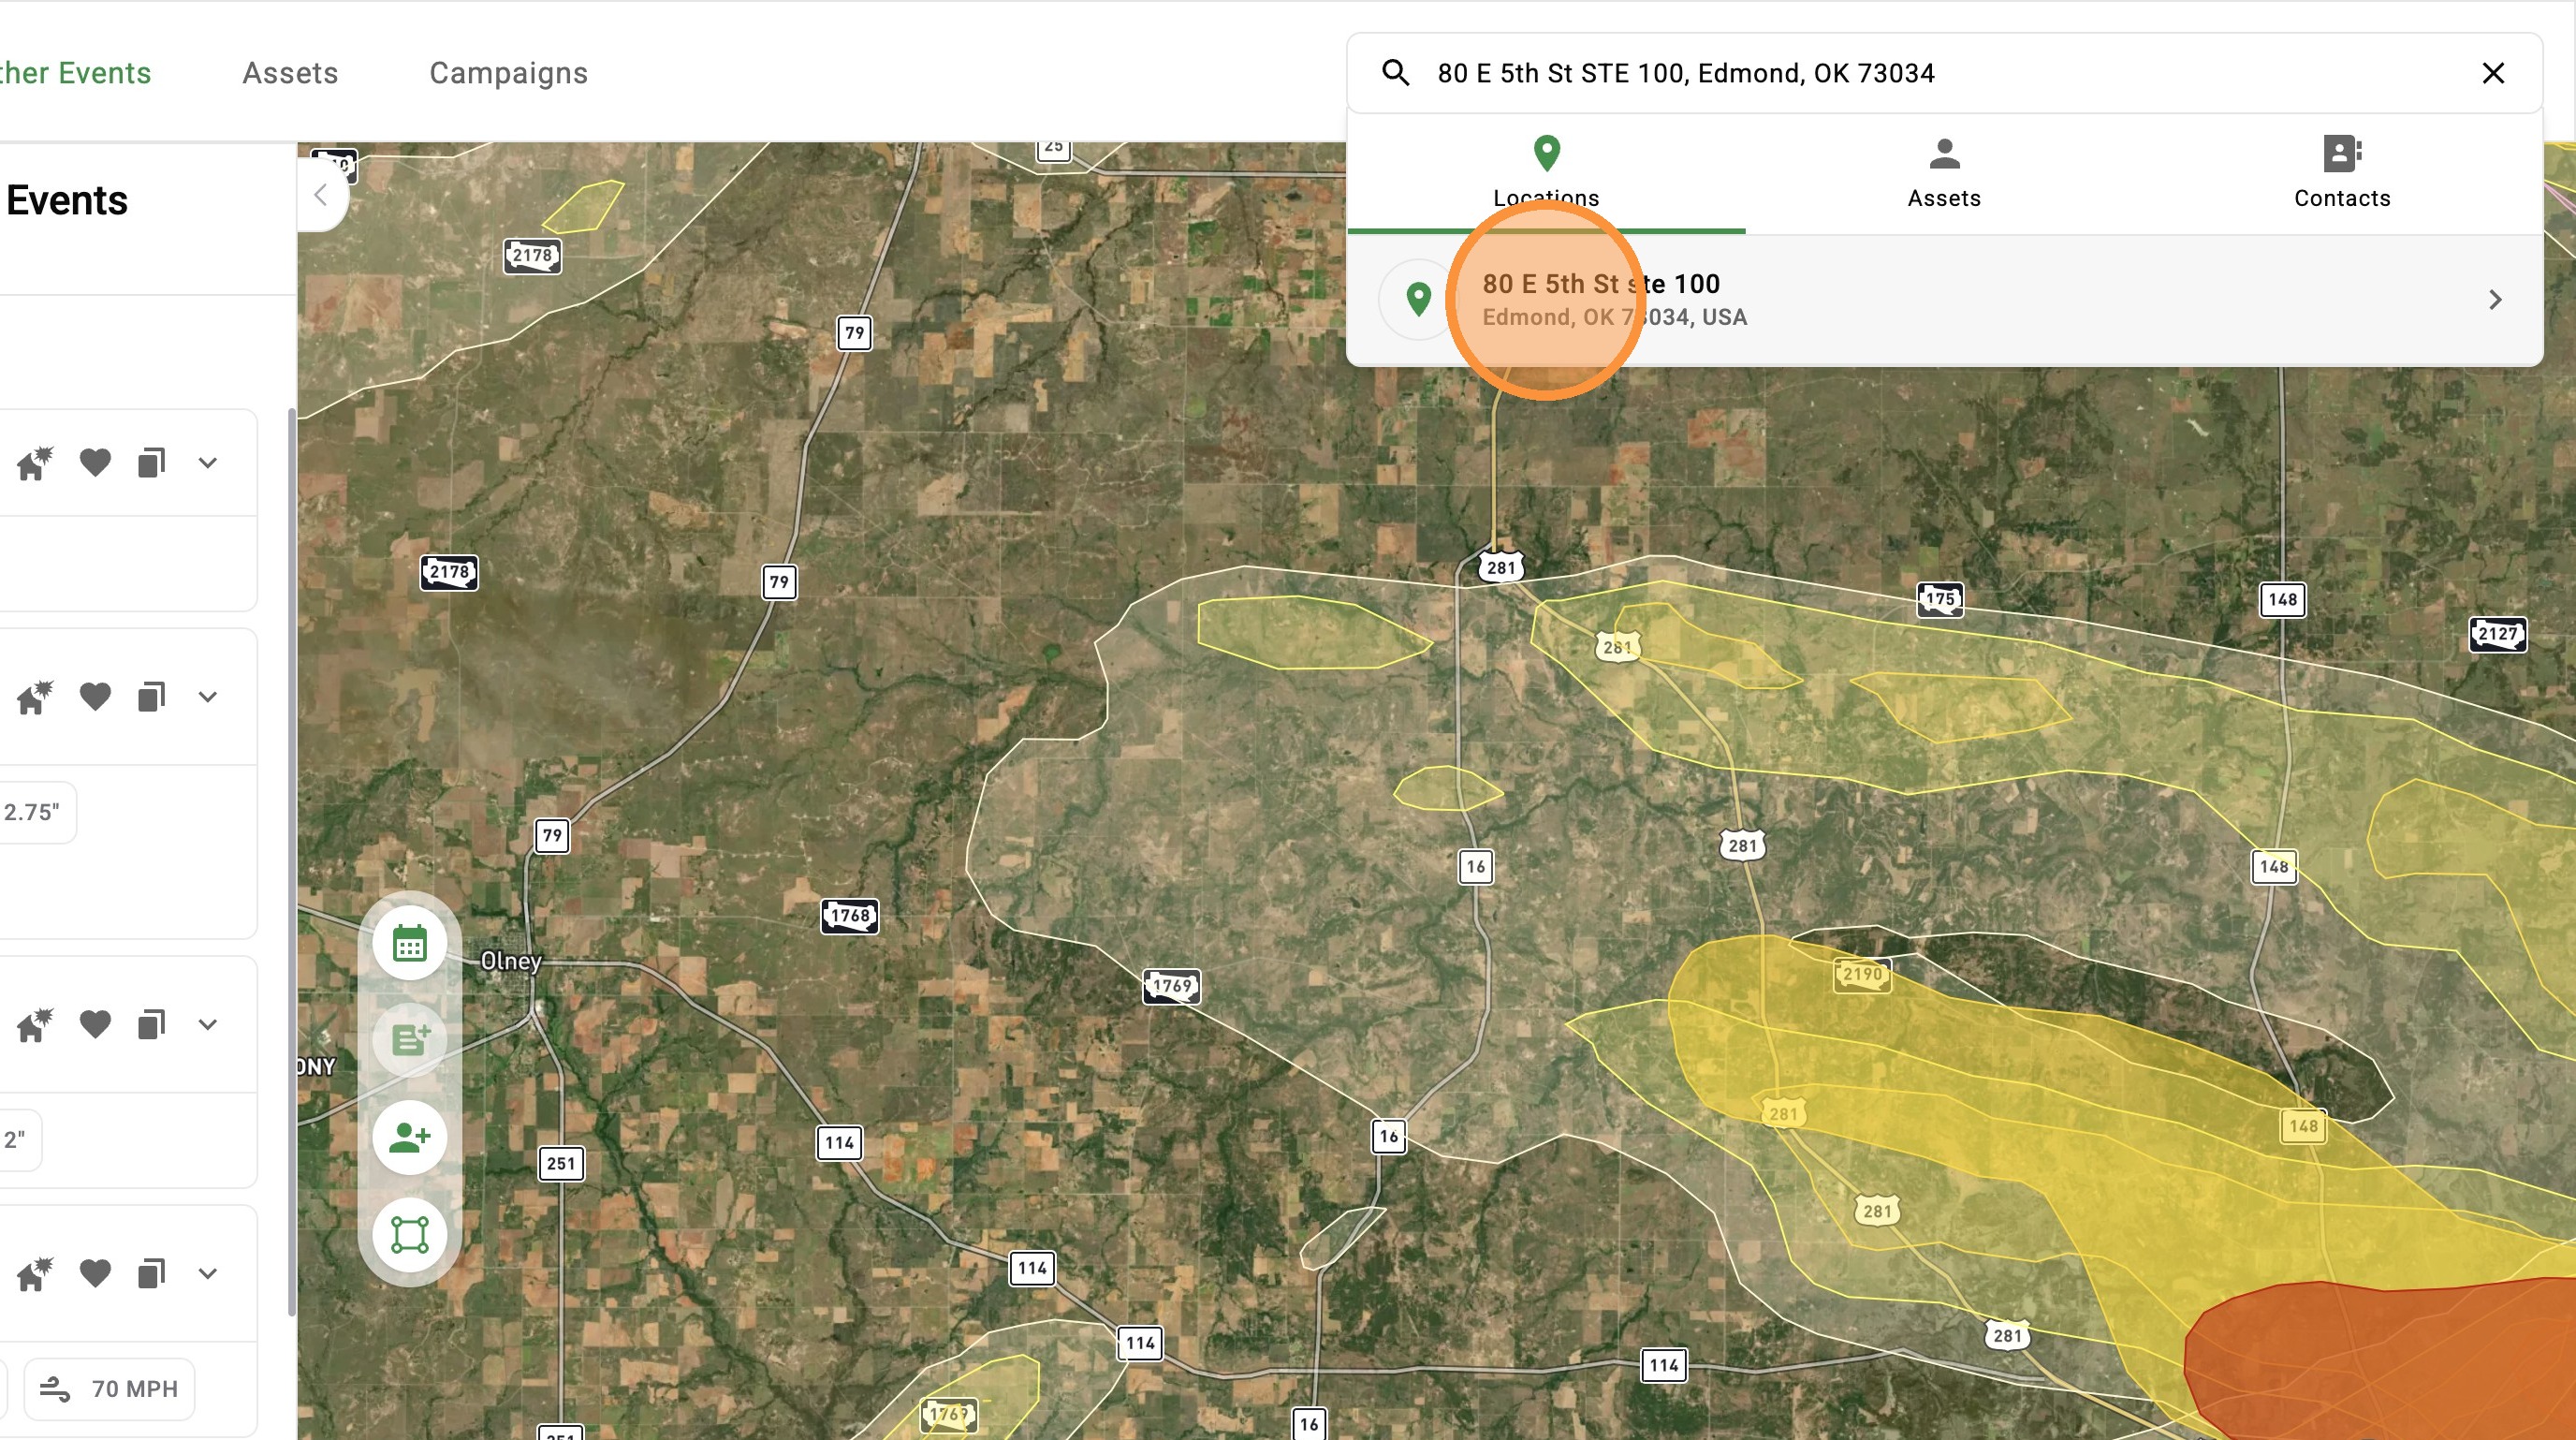
1. Search for an address
2. Tap the address
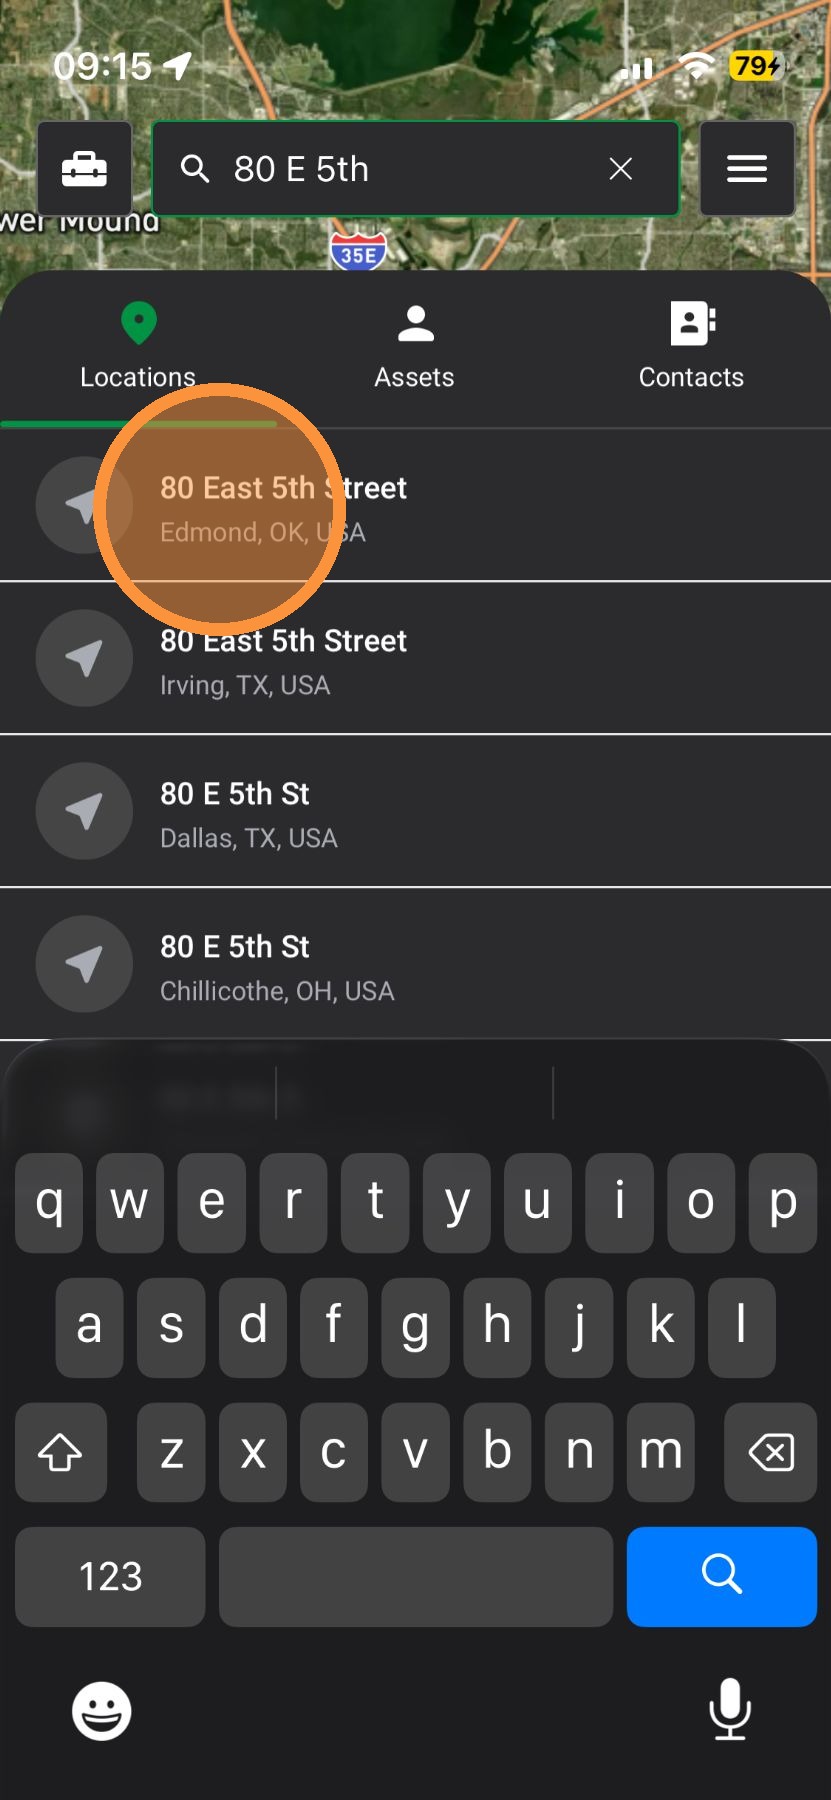
3. Tap "Create Asset"
4. If the pin placement is incorrect, you can
A. Tap the blue "Location" button to place the pin at your location
B. Tap on the map adjust the pin.
5. If you have DealTrace, you can adjust the Status within your Opportunity Pipeline
6. Tap a new Status
7. If you have DealTrace, you can assign the asset to other people on your team
8. Tap to select a person
9. Tap "Create." You've created your asset!
10. To add more details, such as the owner and the roof age, select "Edit Details"
11. If needed, update the Opportunity Status & tap "Next"
12. Under "Asset Details," you can add Roof Type and Last Exterior Renovation Date
13. Tap "Next"
14. Under "Contact Details," add an Owner, Manager, or Tenant
15. Tap "+" to create a new contact OR select a pre-existing contact
16. Add the Contact details
17. Tap "Create"
18. Add another contact or tap "Next"
19. If you have DealTrace, add Opportunity Details, such as a note, price of the roof, the priority level, and etc
20. Tap "Confirm" and you are done!
*Note: At any point, tap the green check mark to save
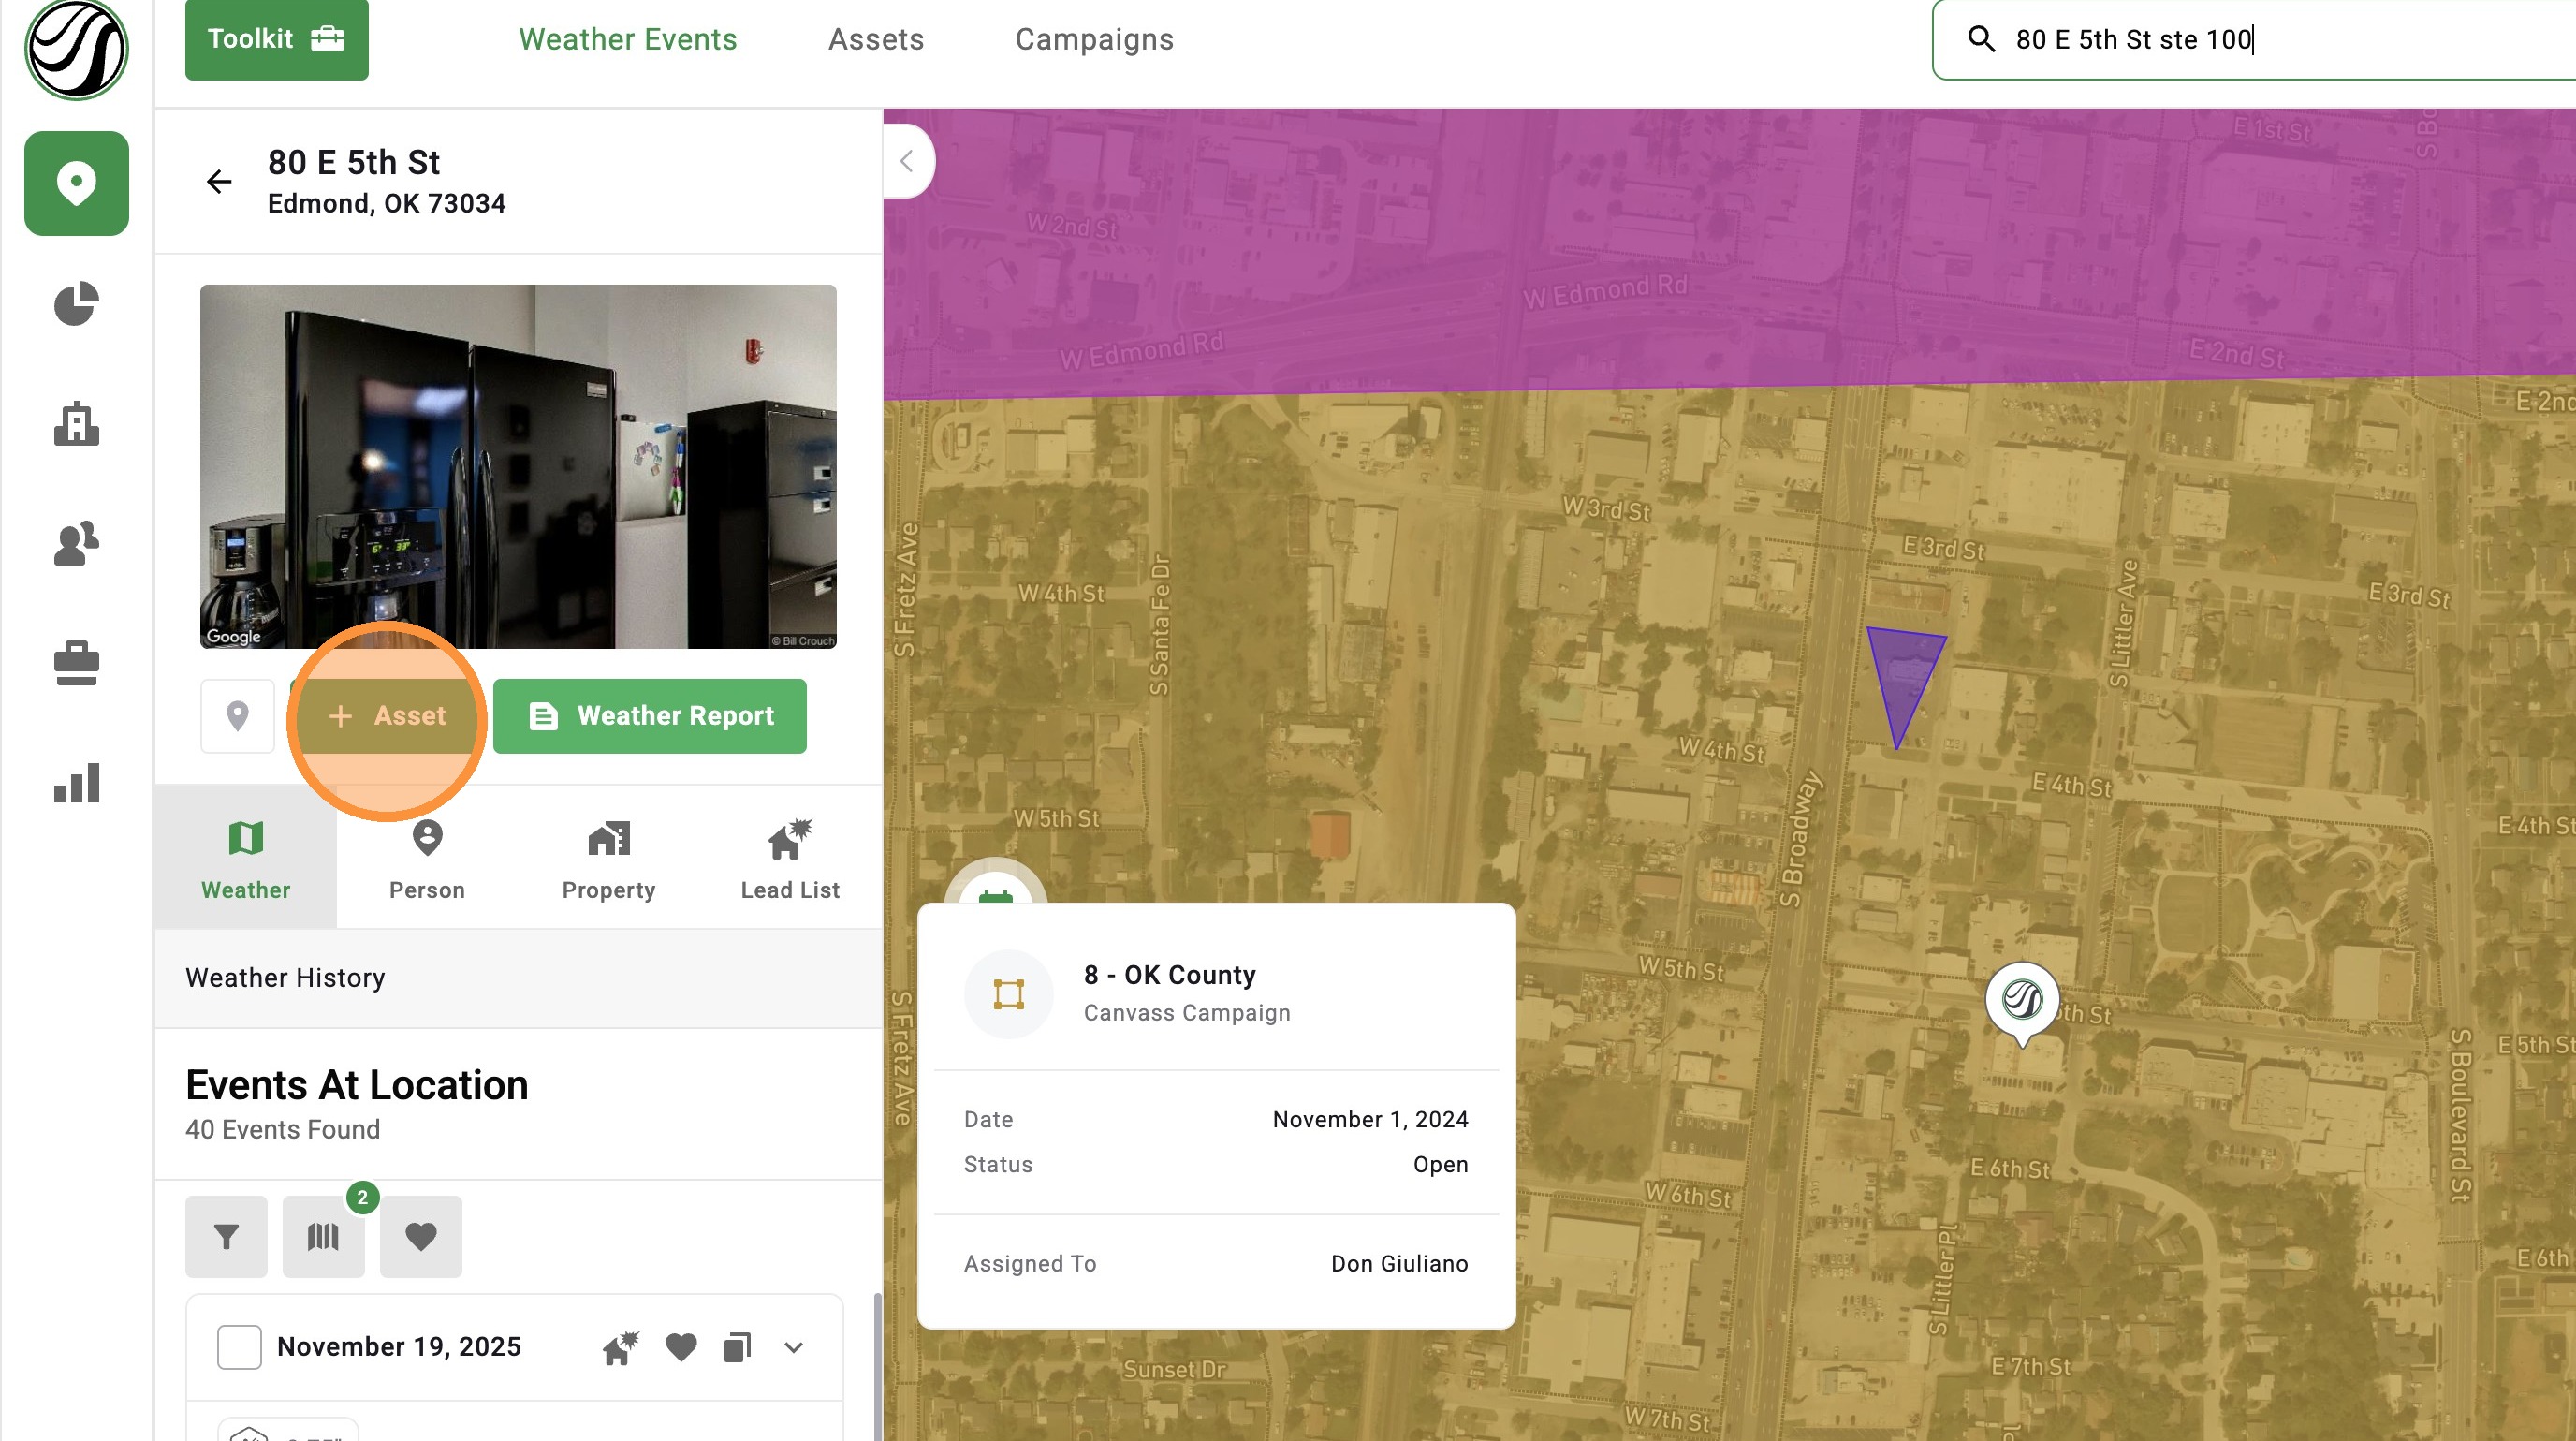
Browser App
Drop A Pin
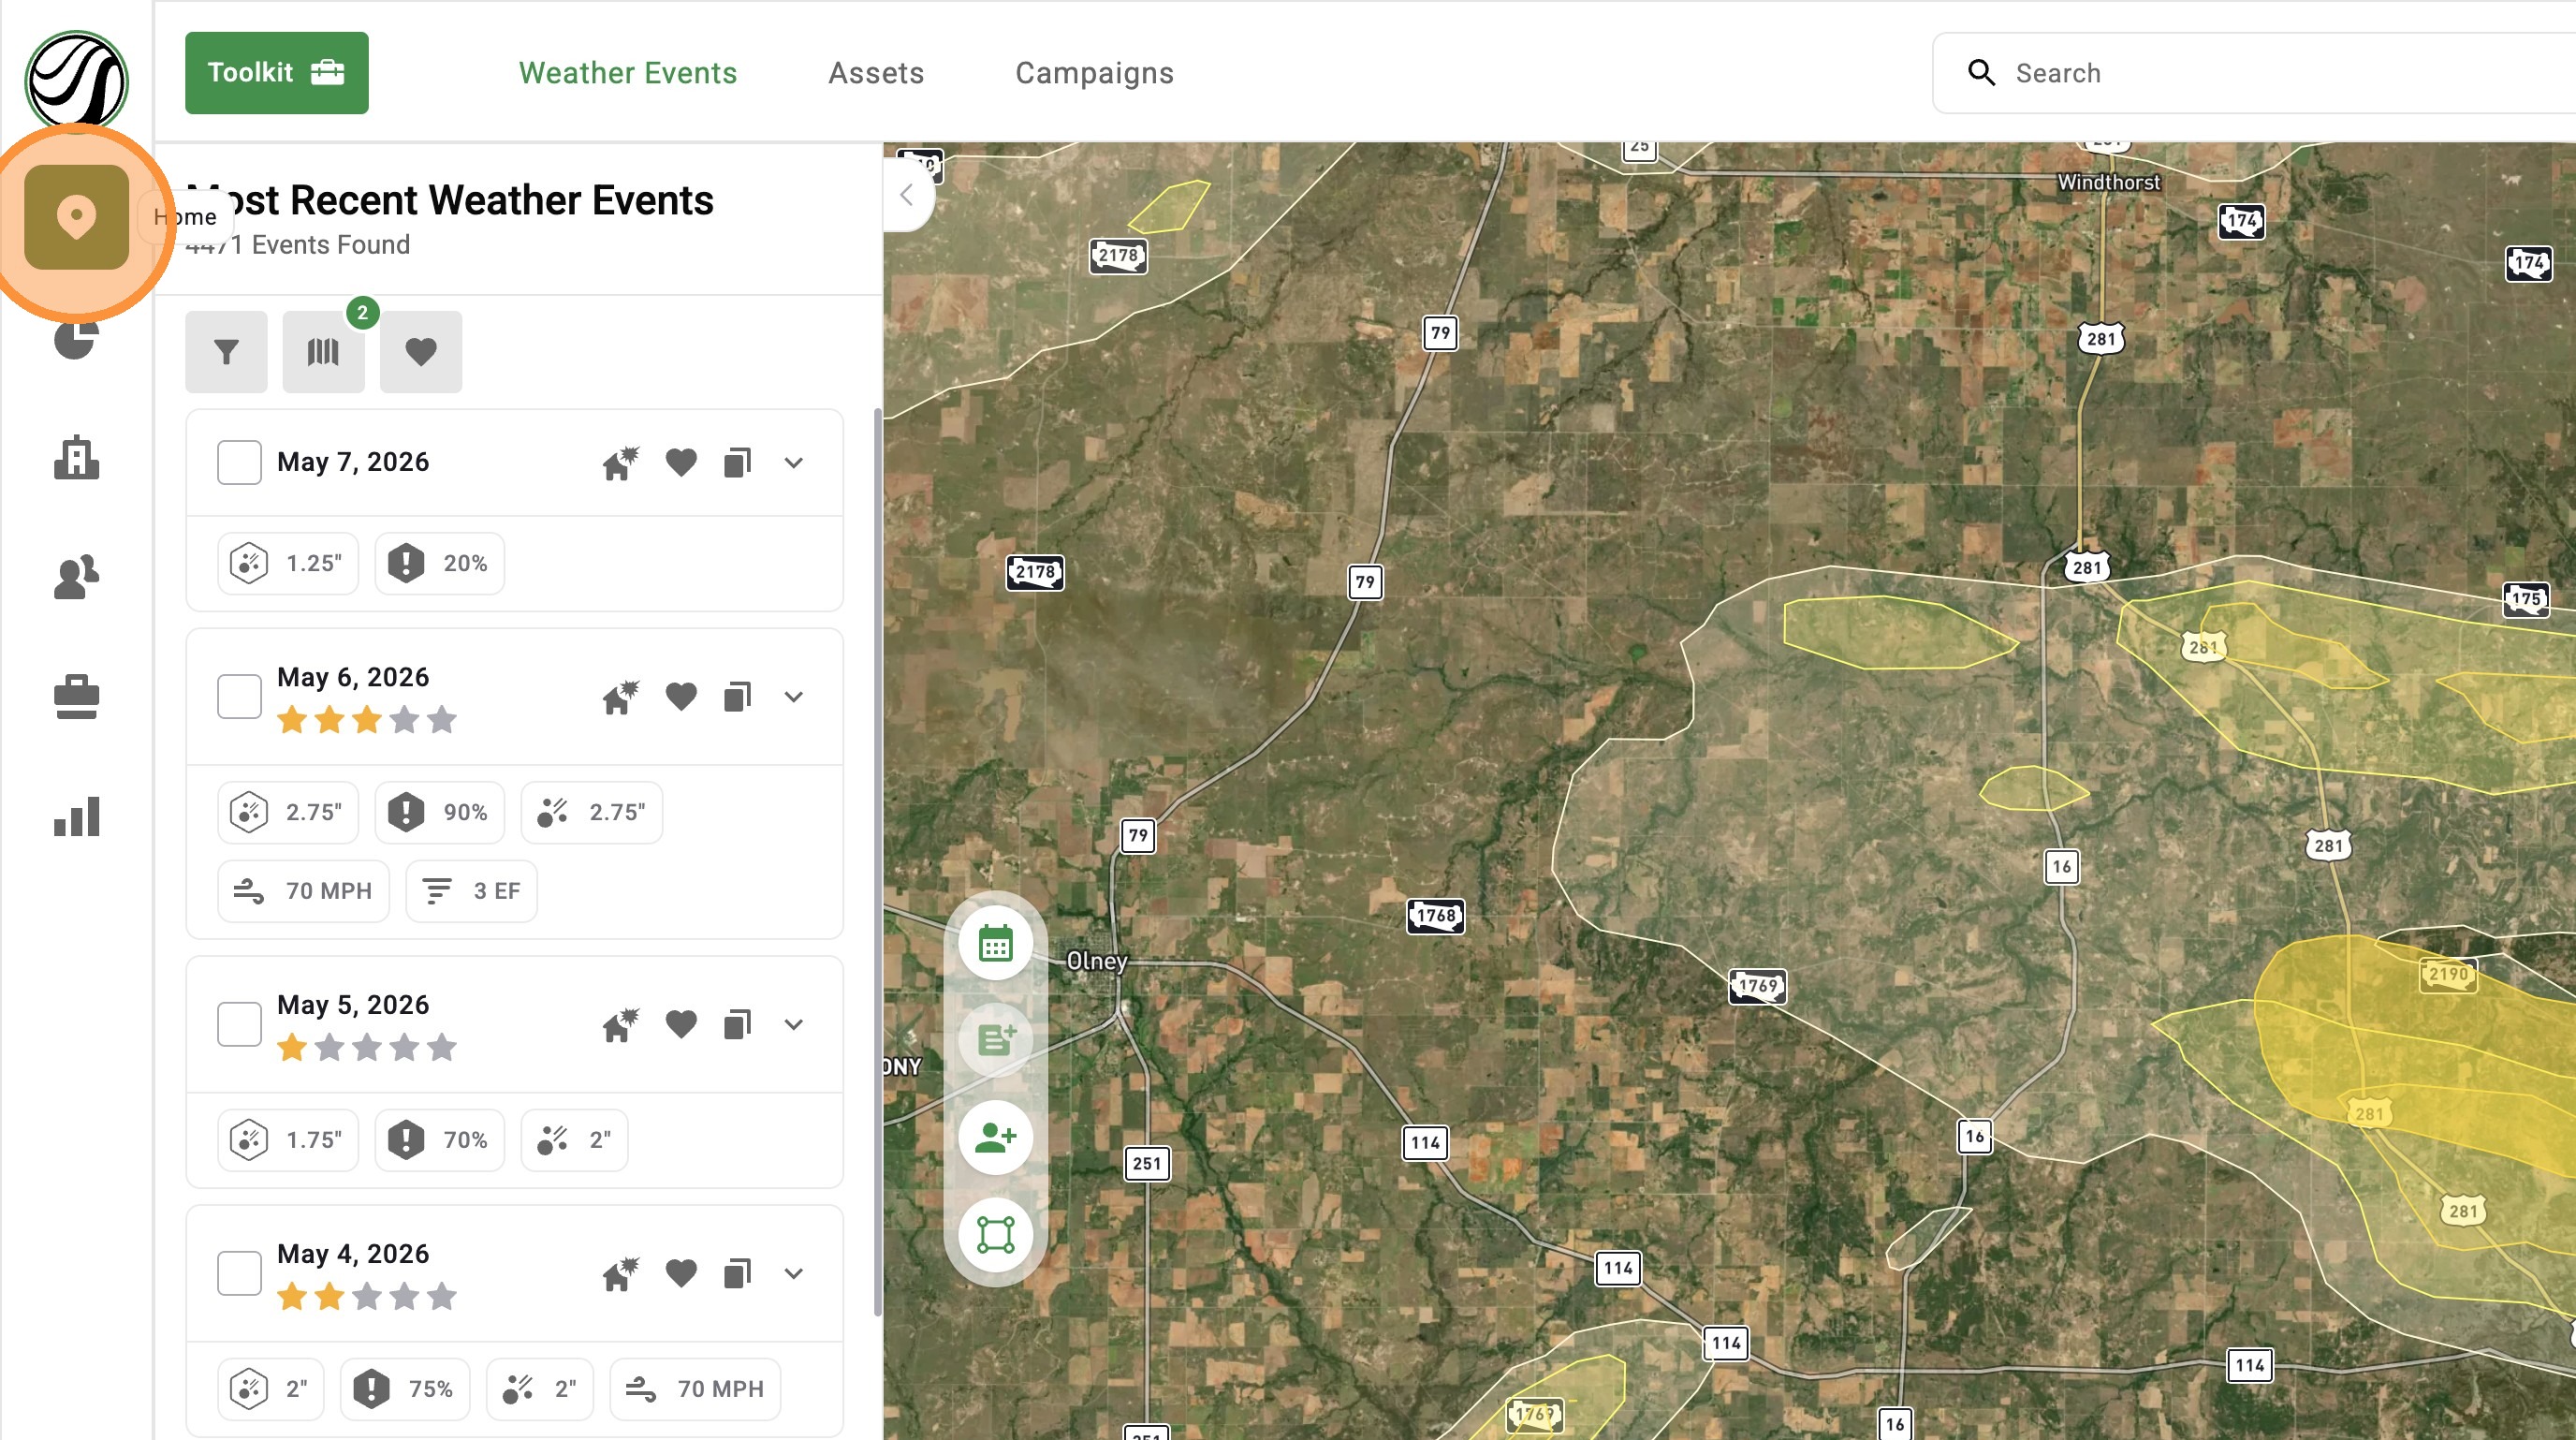
1. Click "Maps" Page
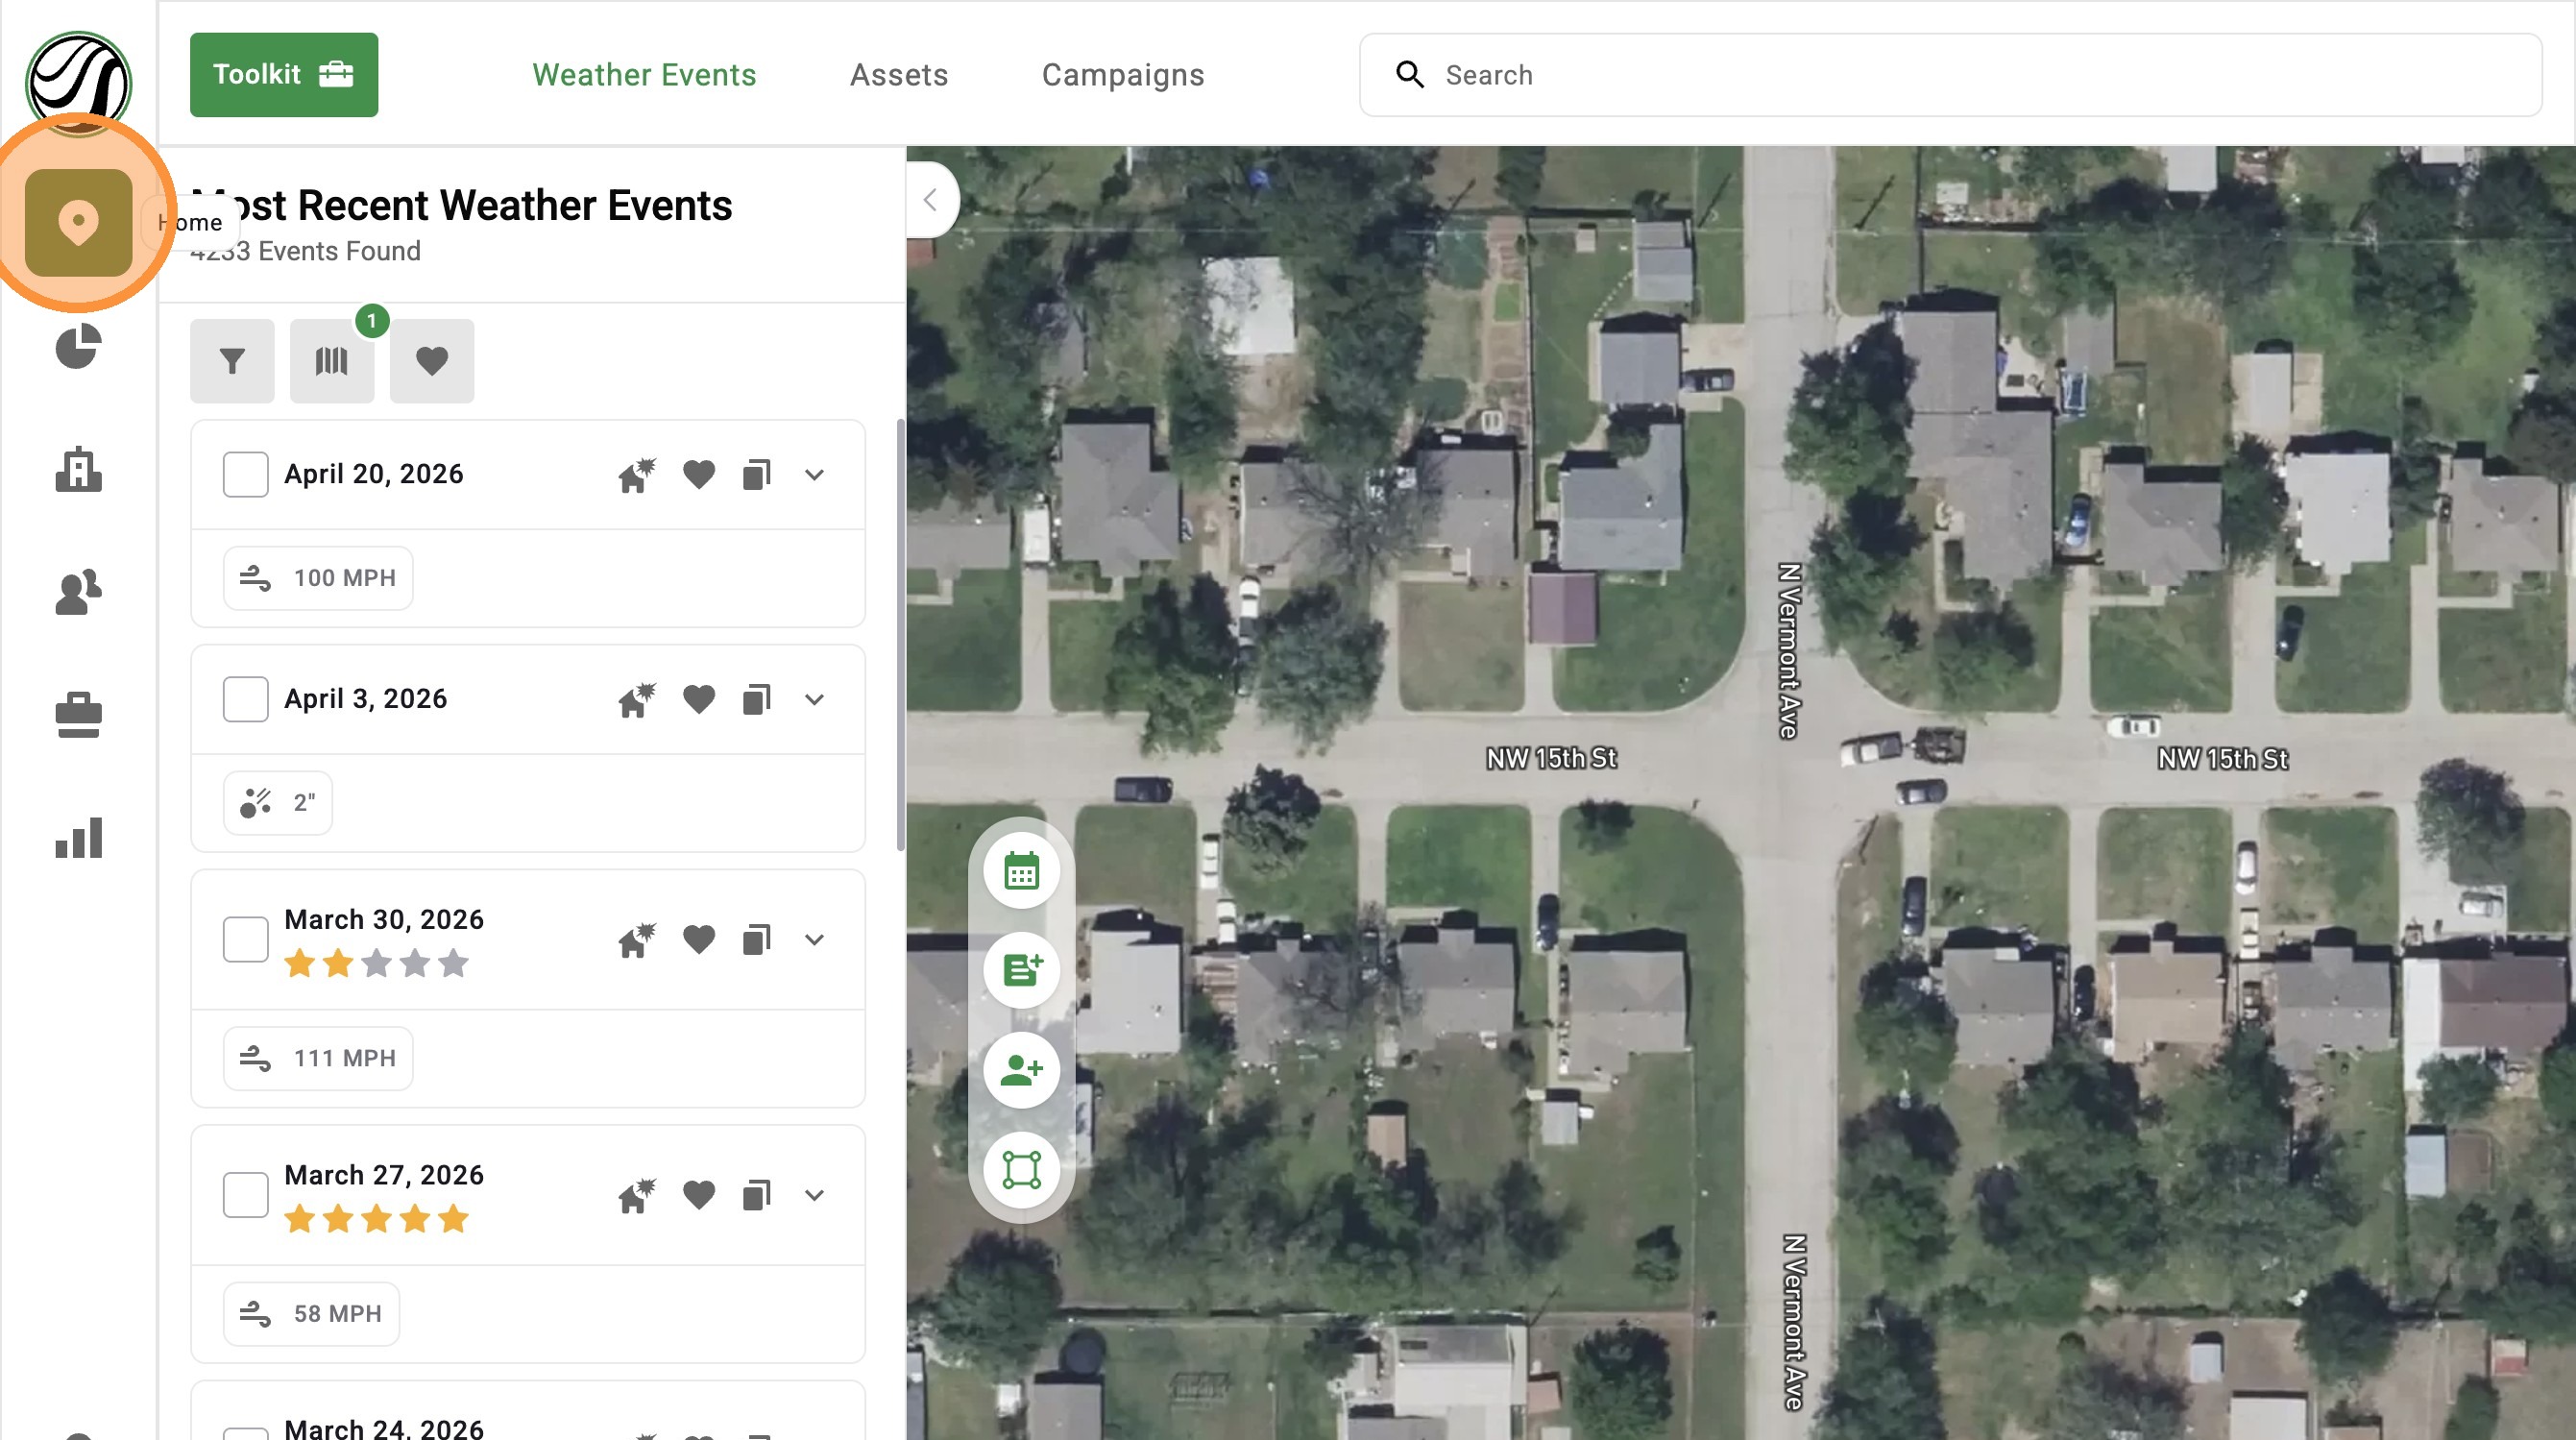
2. Click "Create Asset"
3. Click an address
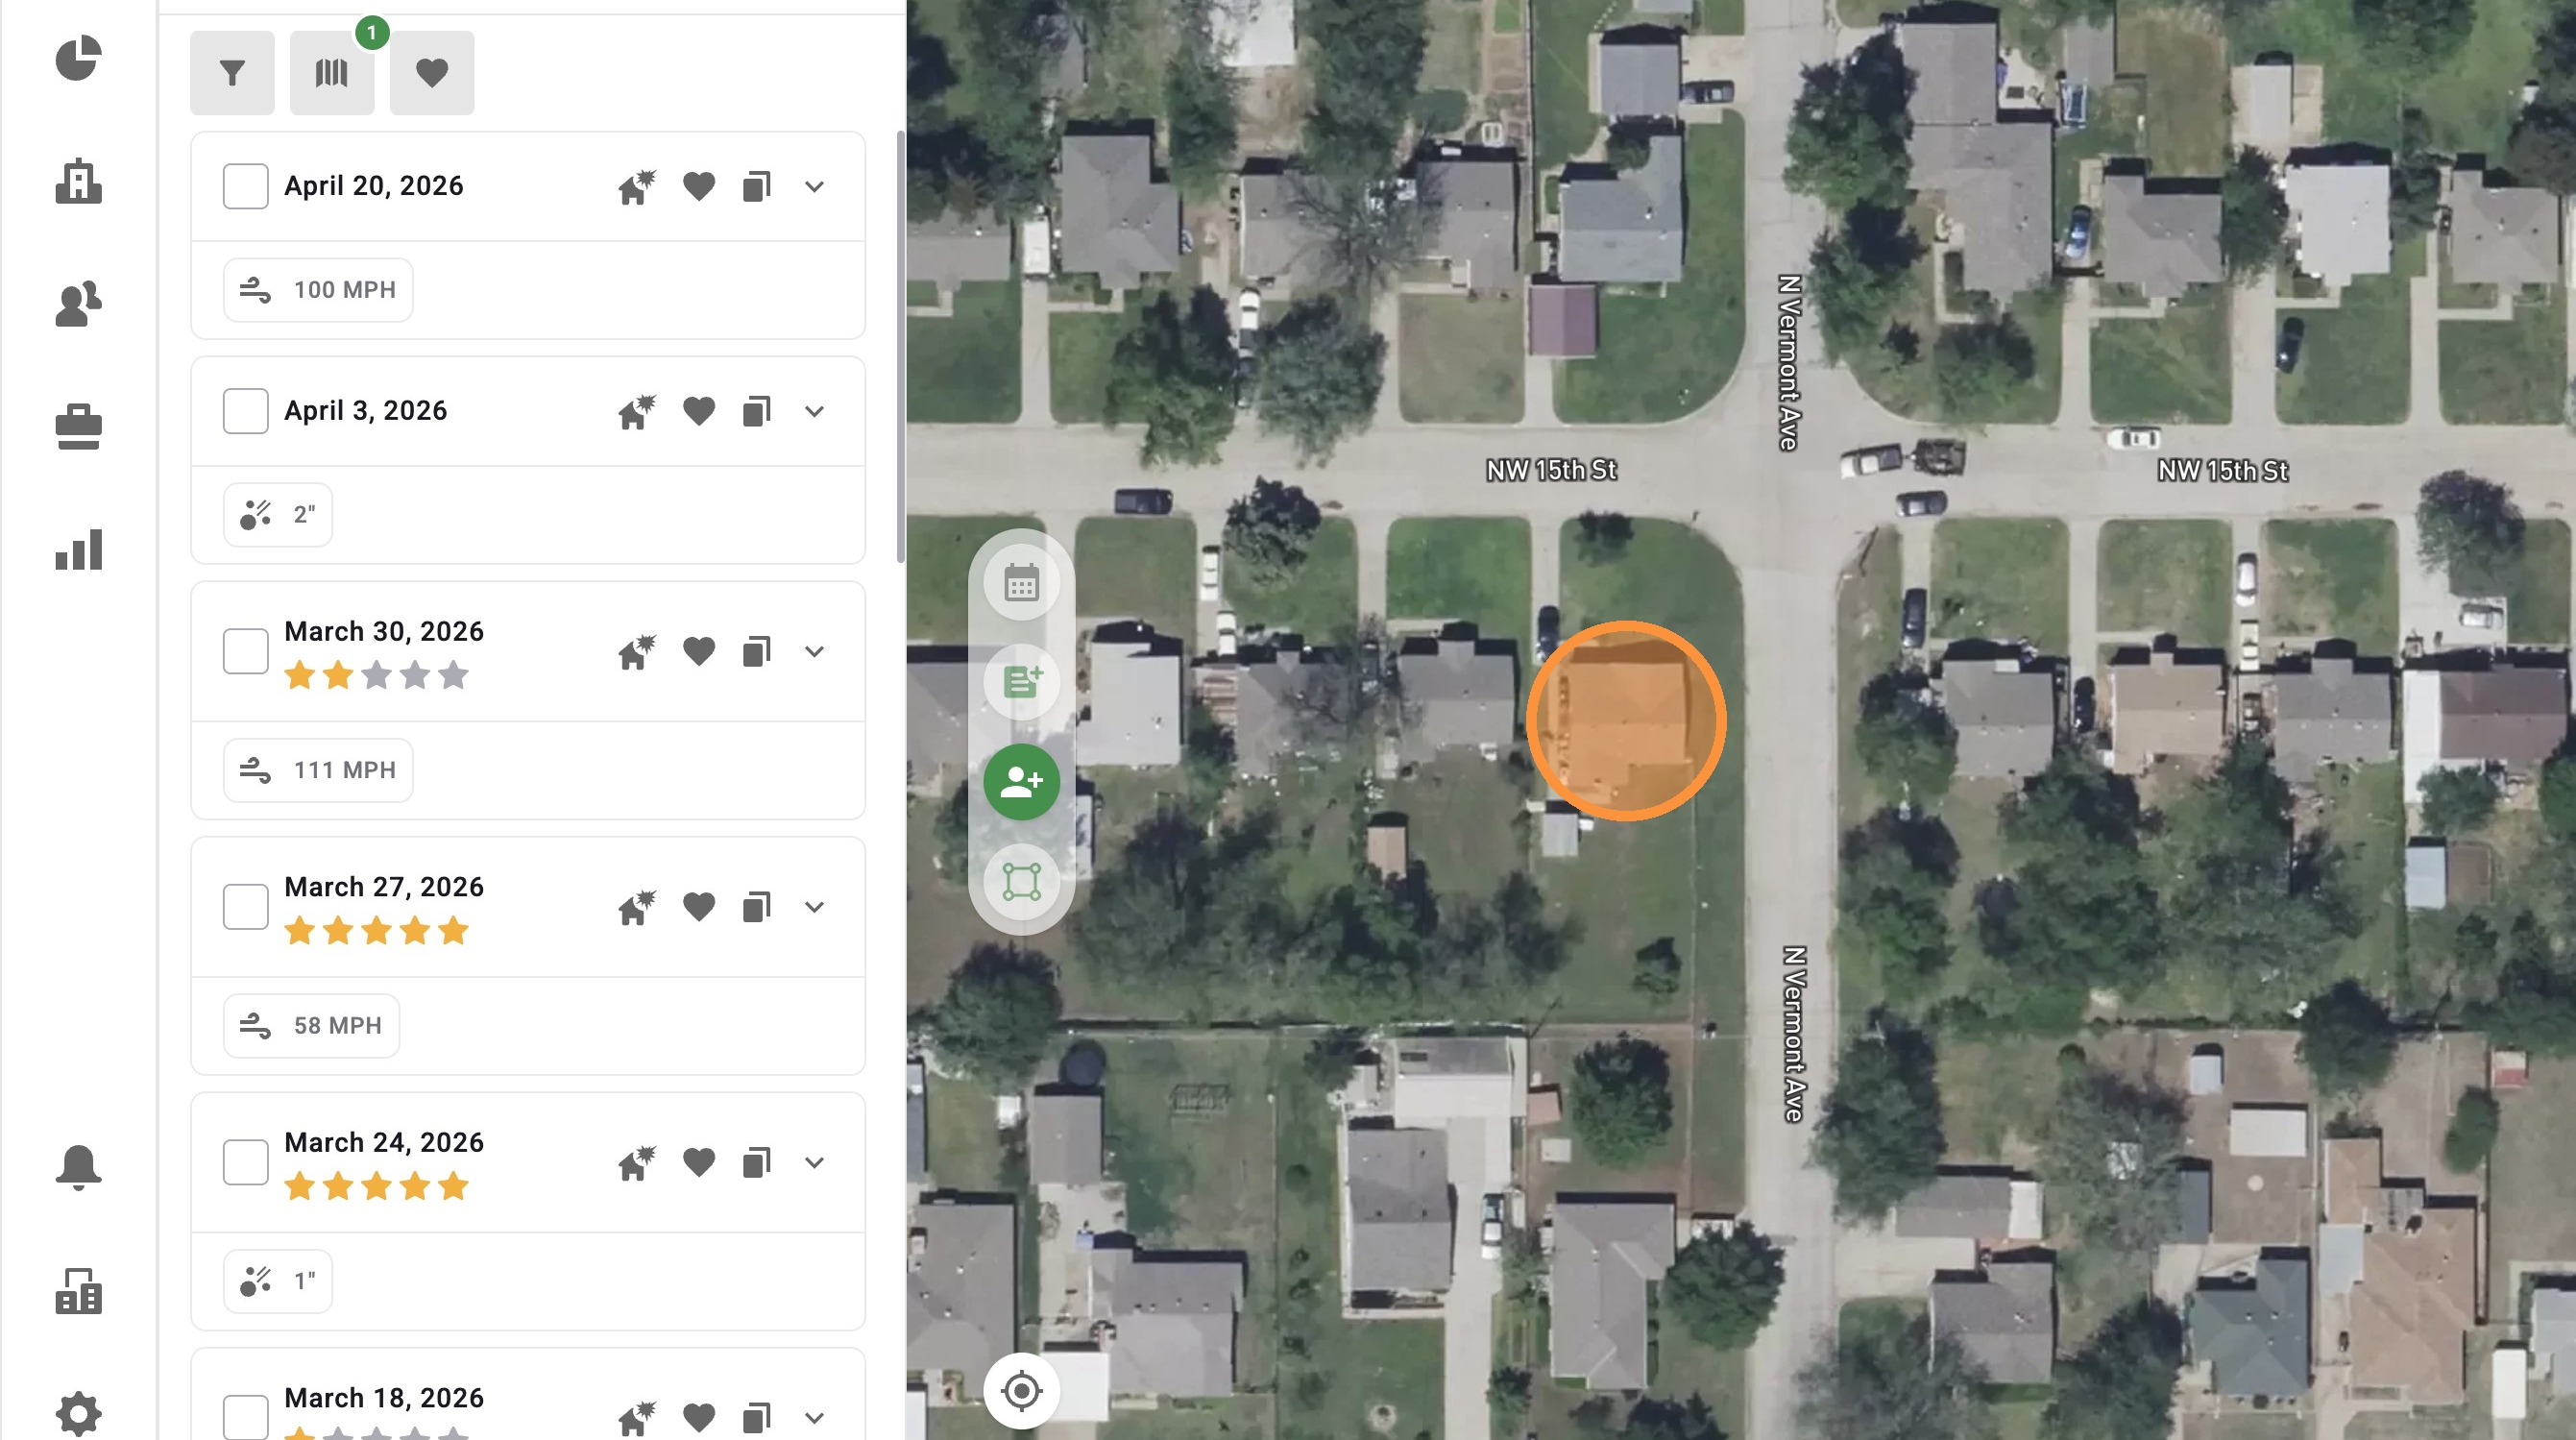
4. If the pin placement is incorrect, you can
B. Click the blue "Location" button to place the pin at your location
5. If you have DealTrace, you can adjust the Status within your Opportunity Pipeline
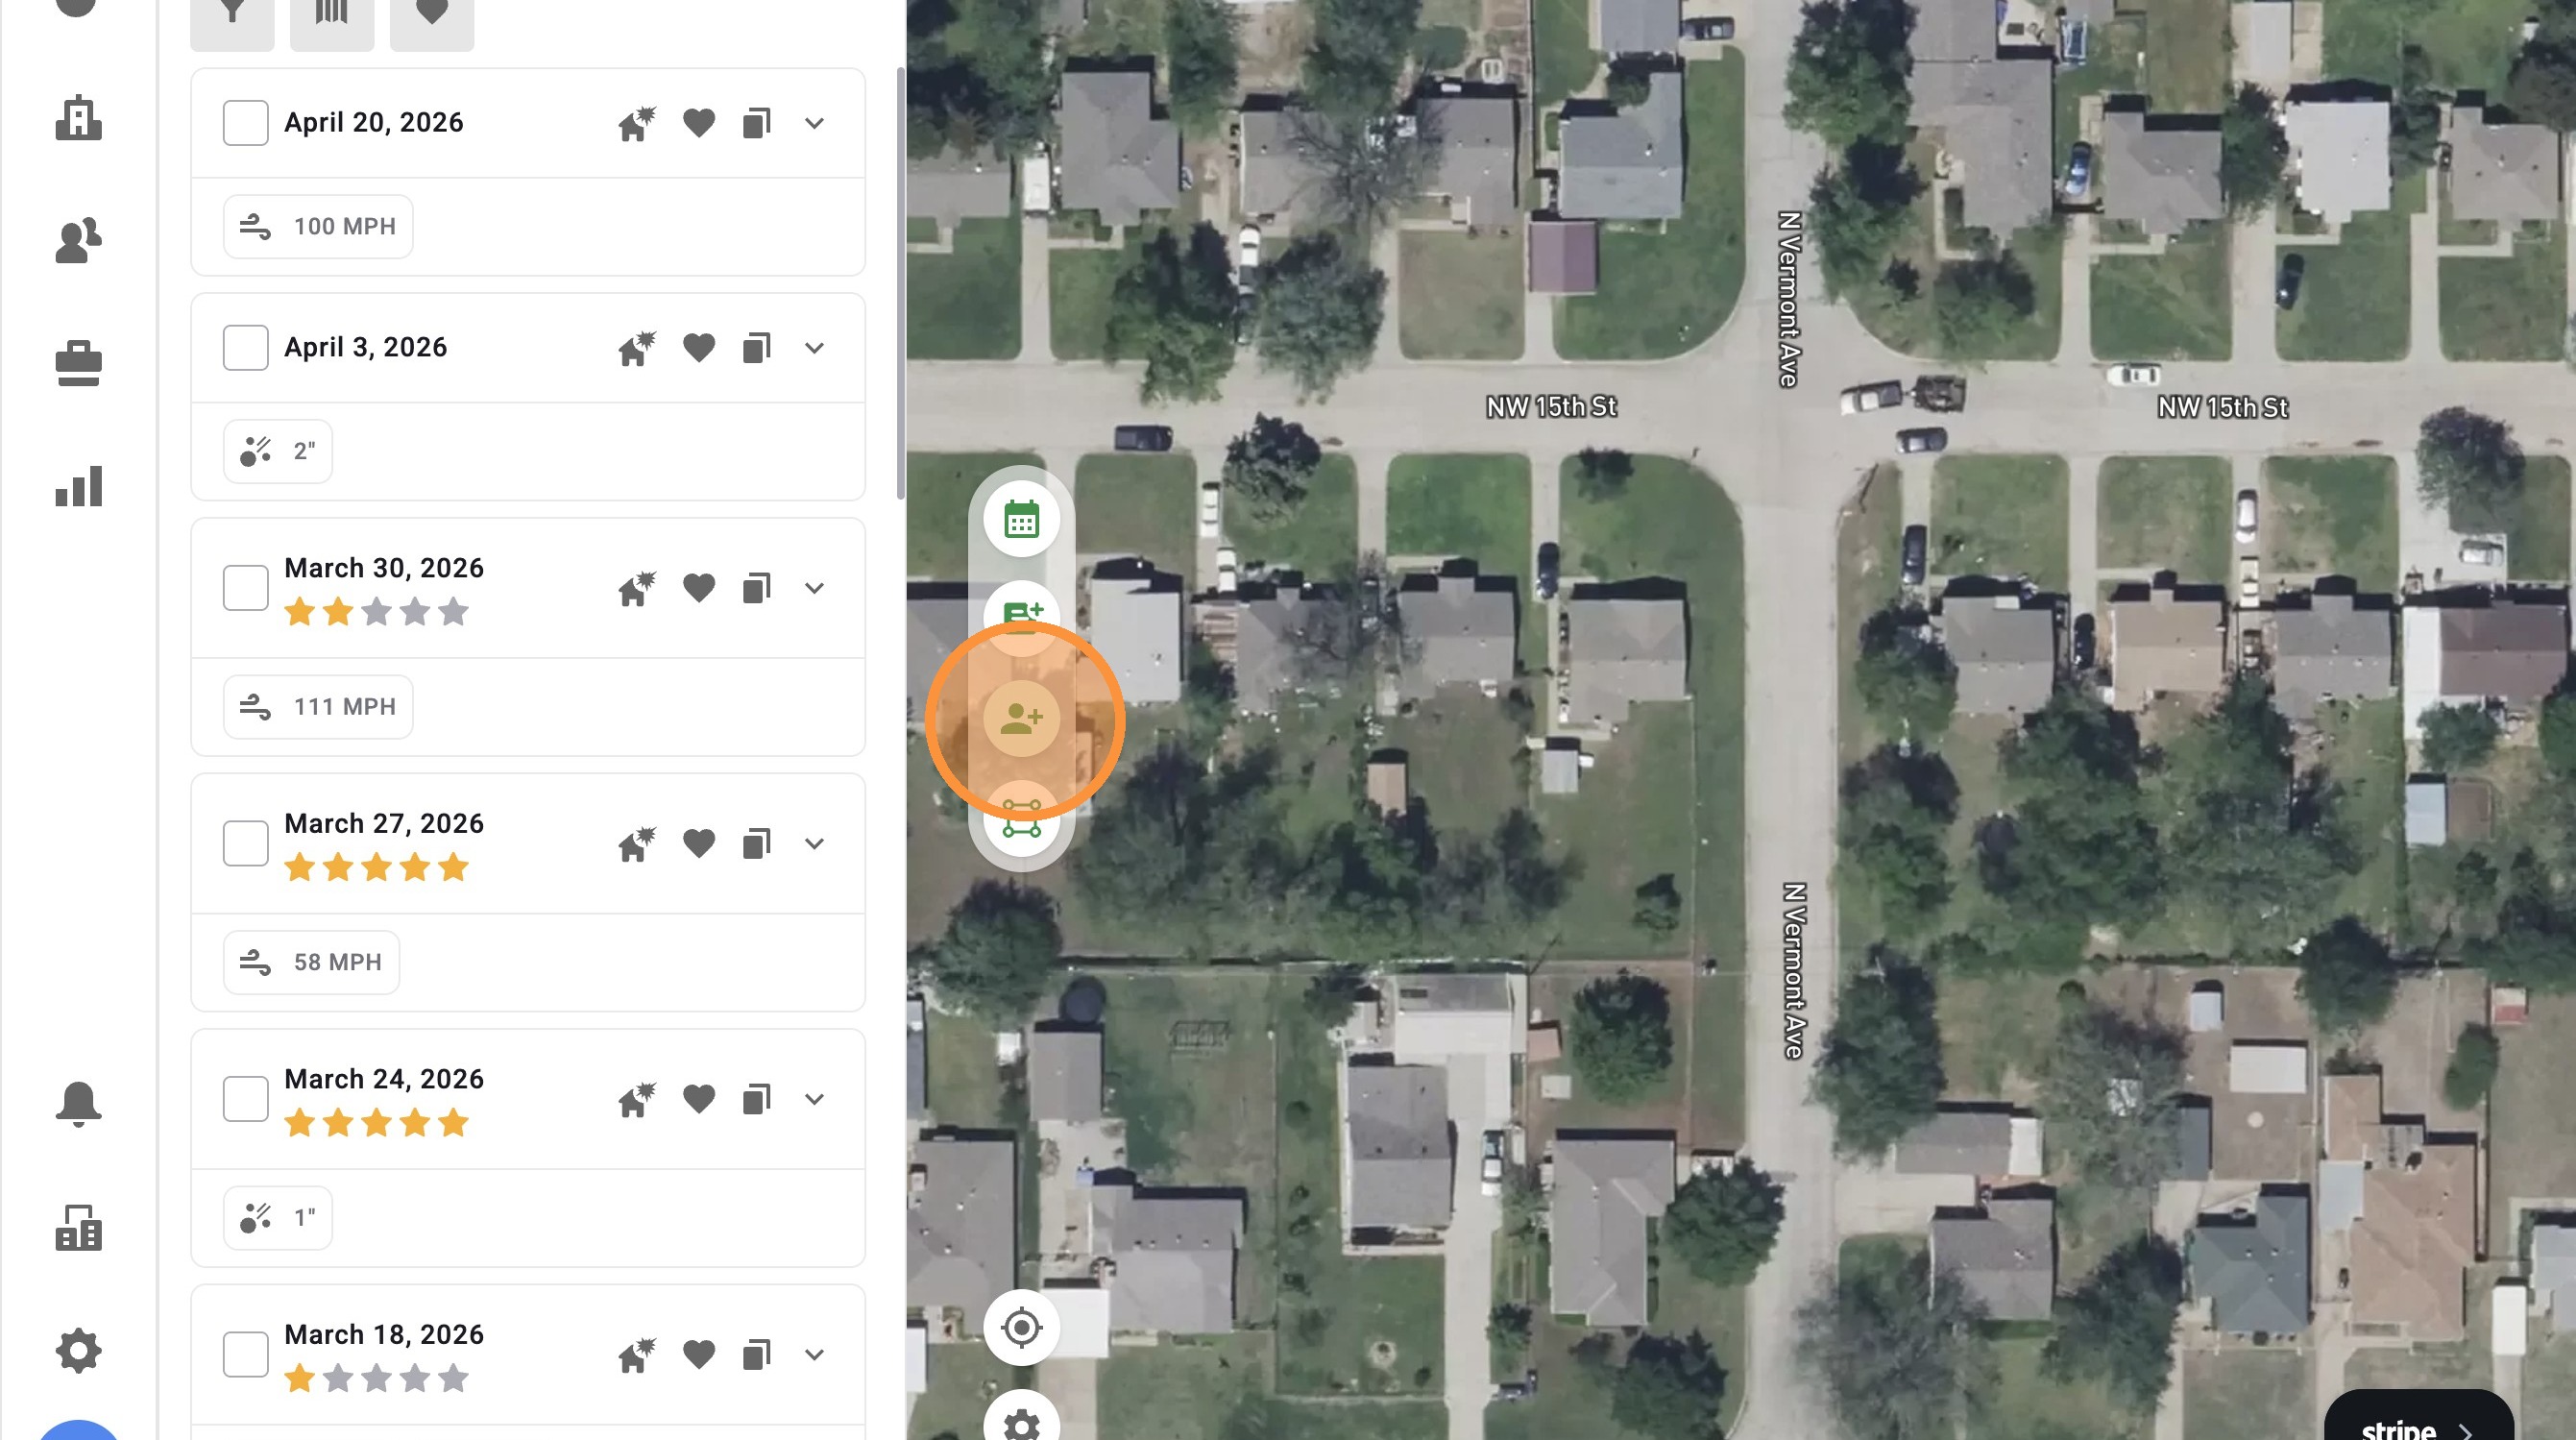
6. If you have DealTrace, you can assign the asset to other people on your team
7. Click "Create." You've created your asset!
8. To add more details, such as the owner and the roof age, select "Edit Details"
9. Under "Asset Details," you can add Roof Type and Last Exterior Renovation Date
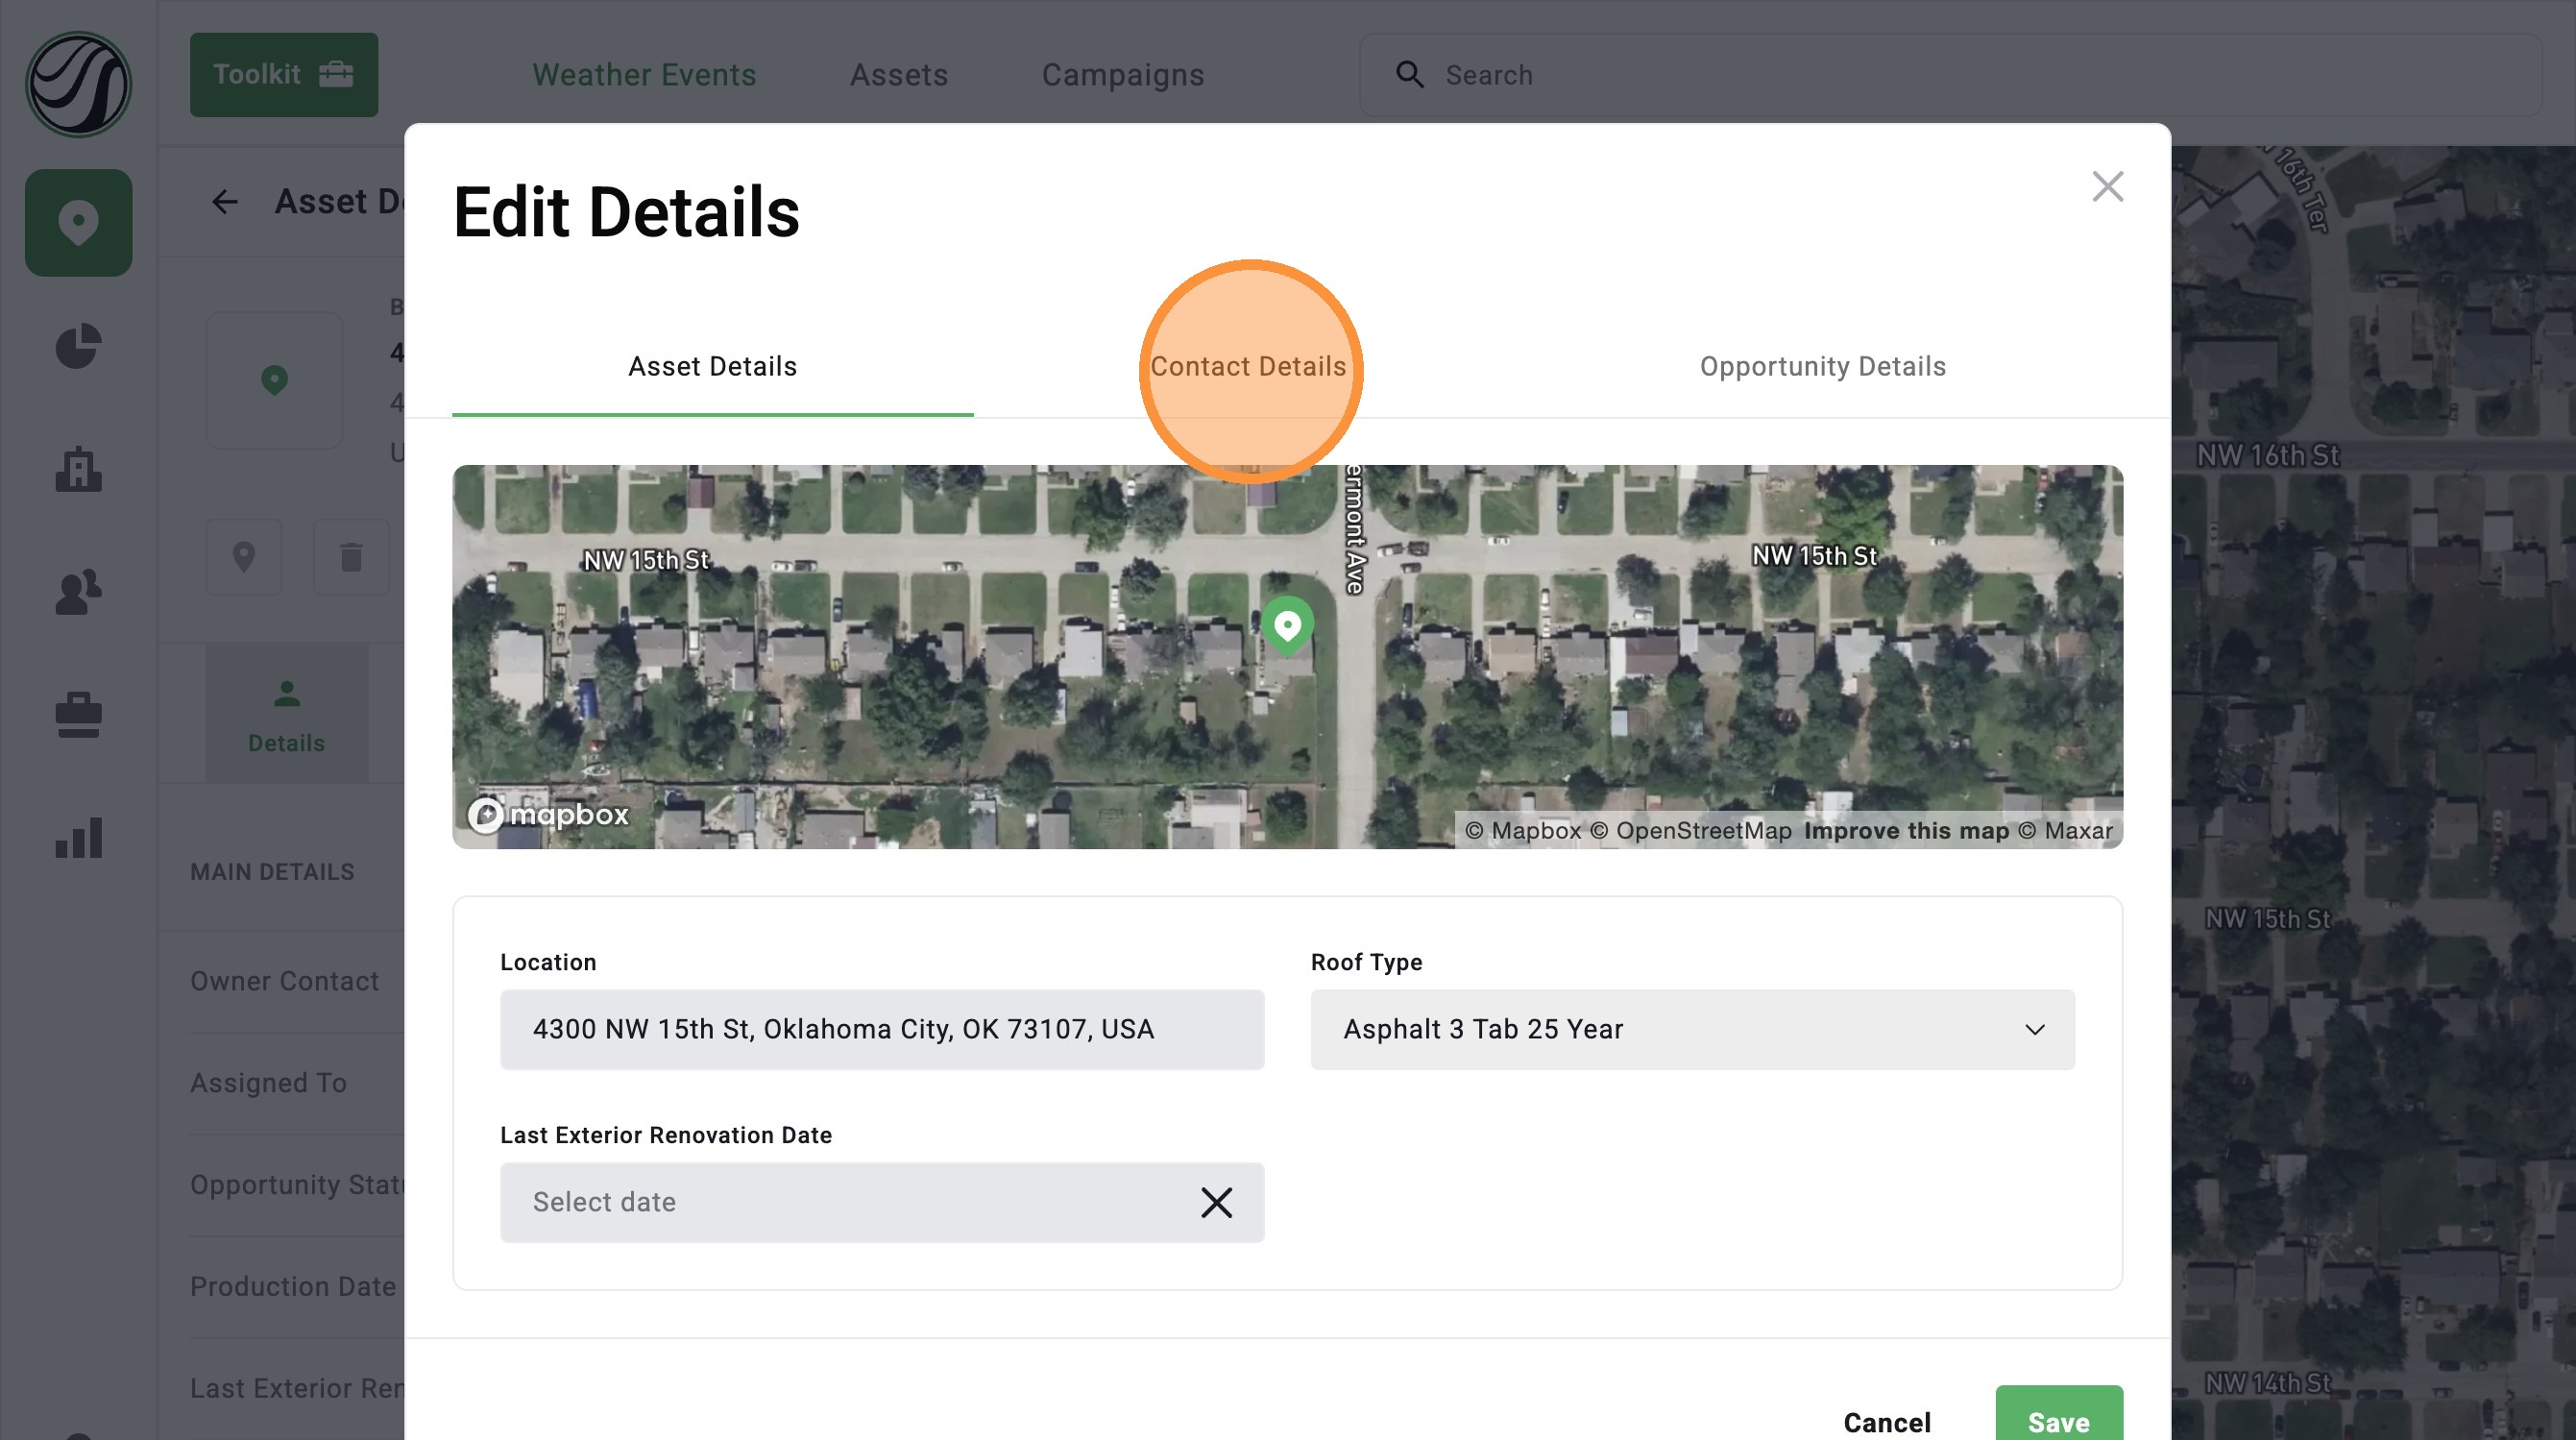
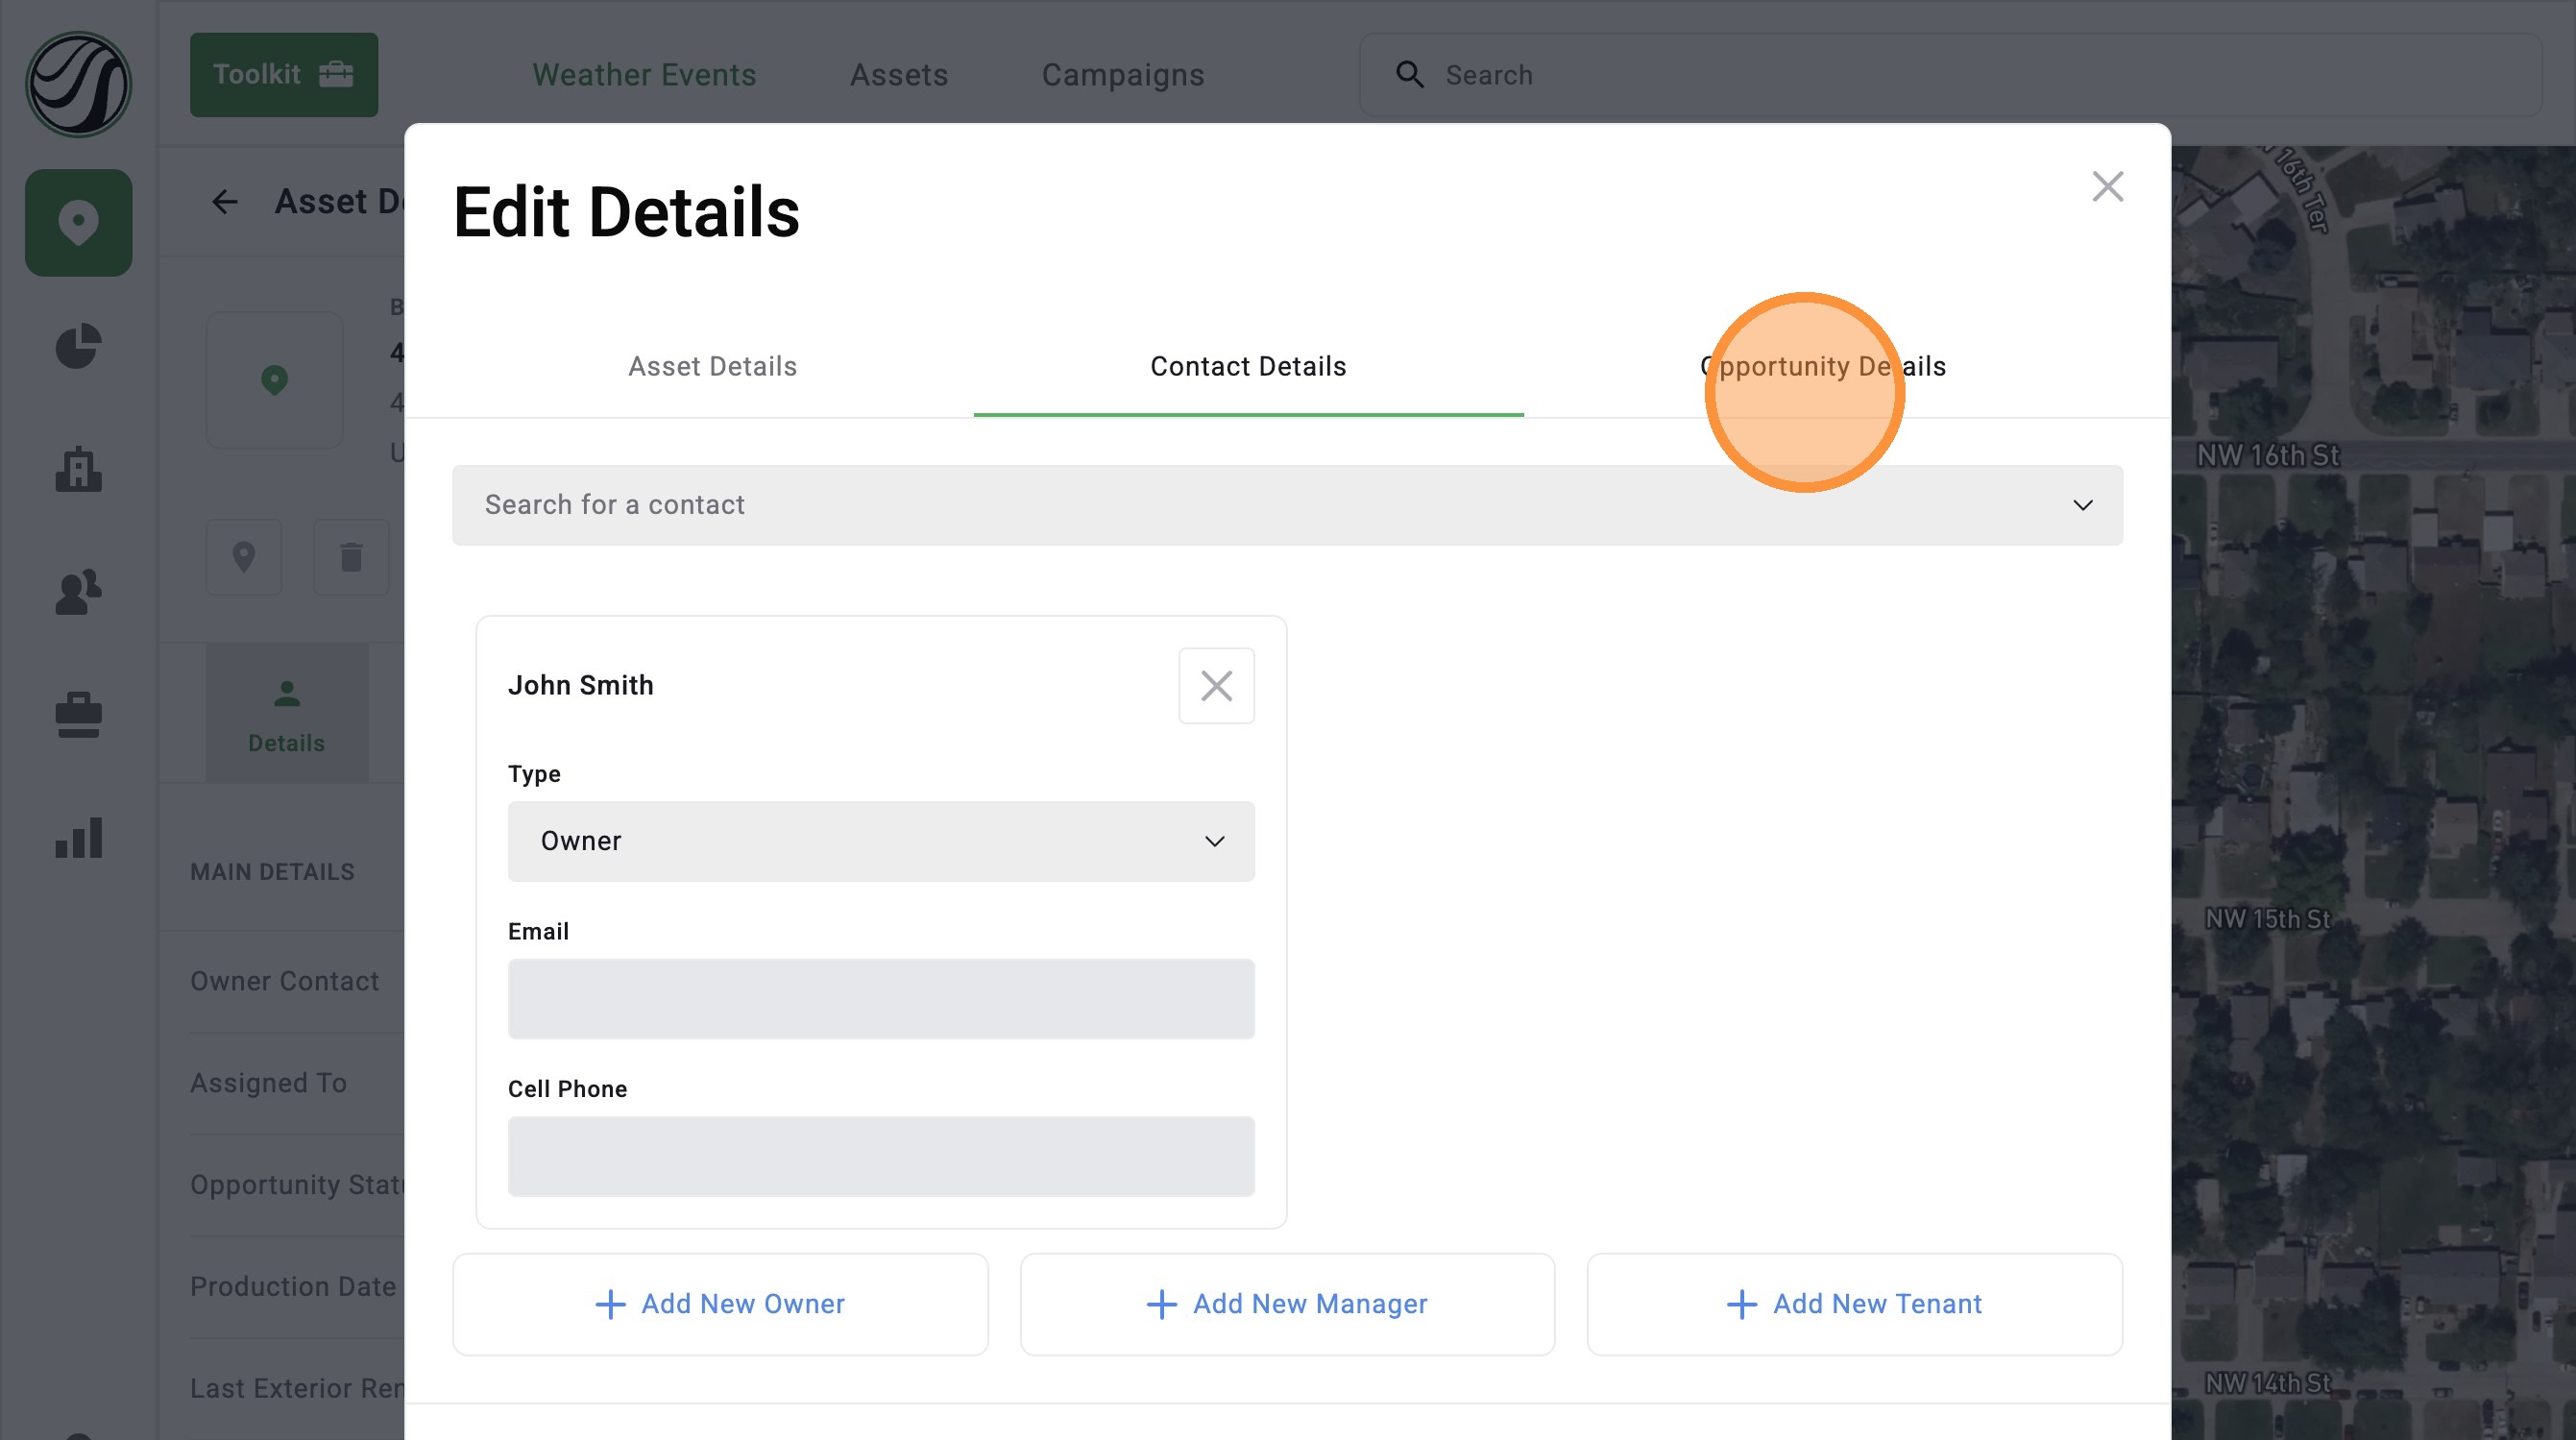
10. Click "Contact Details"
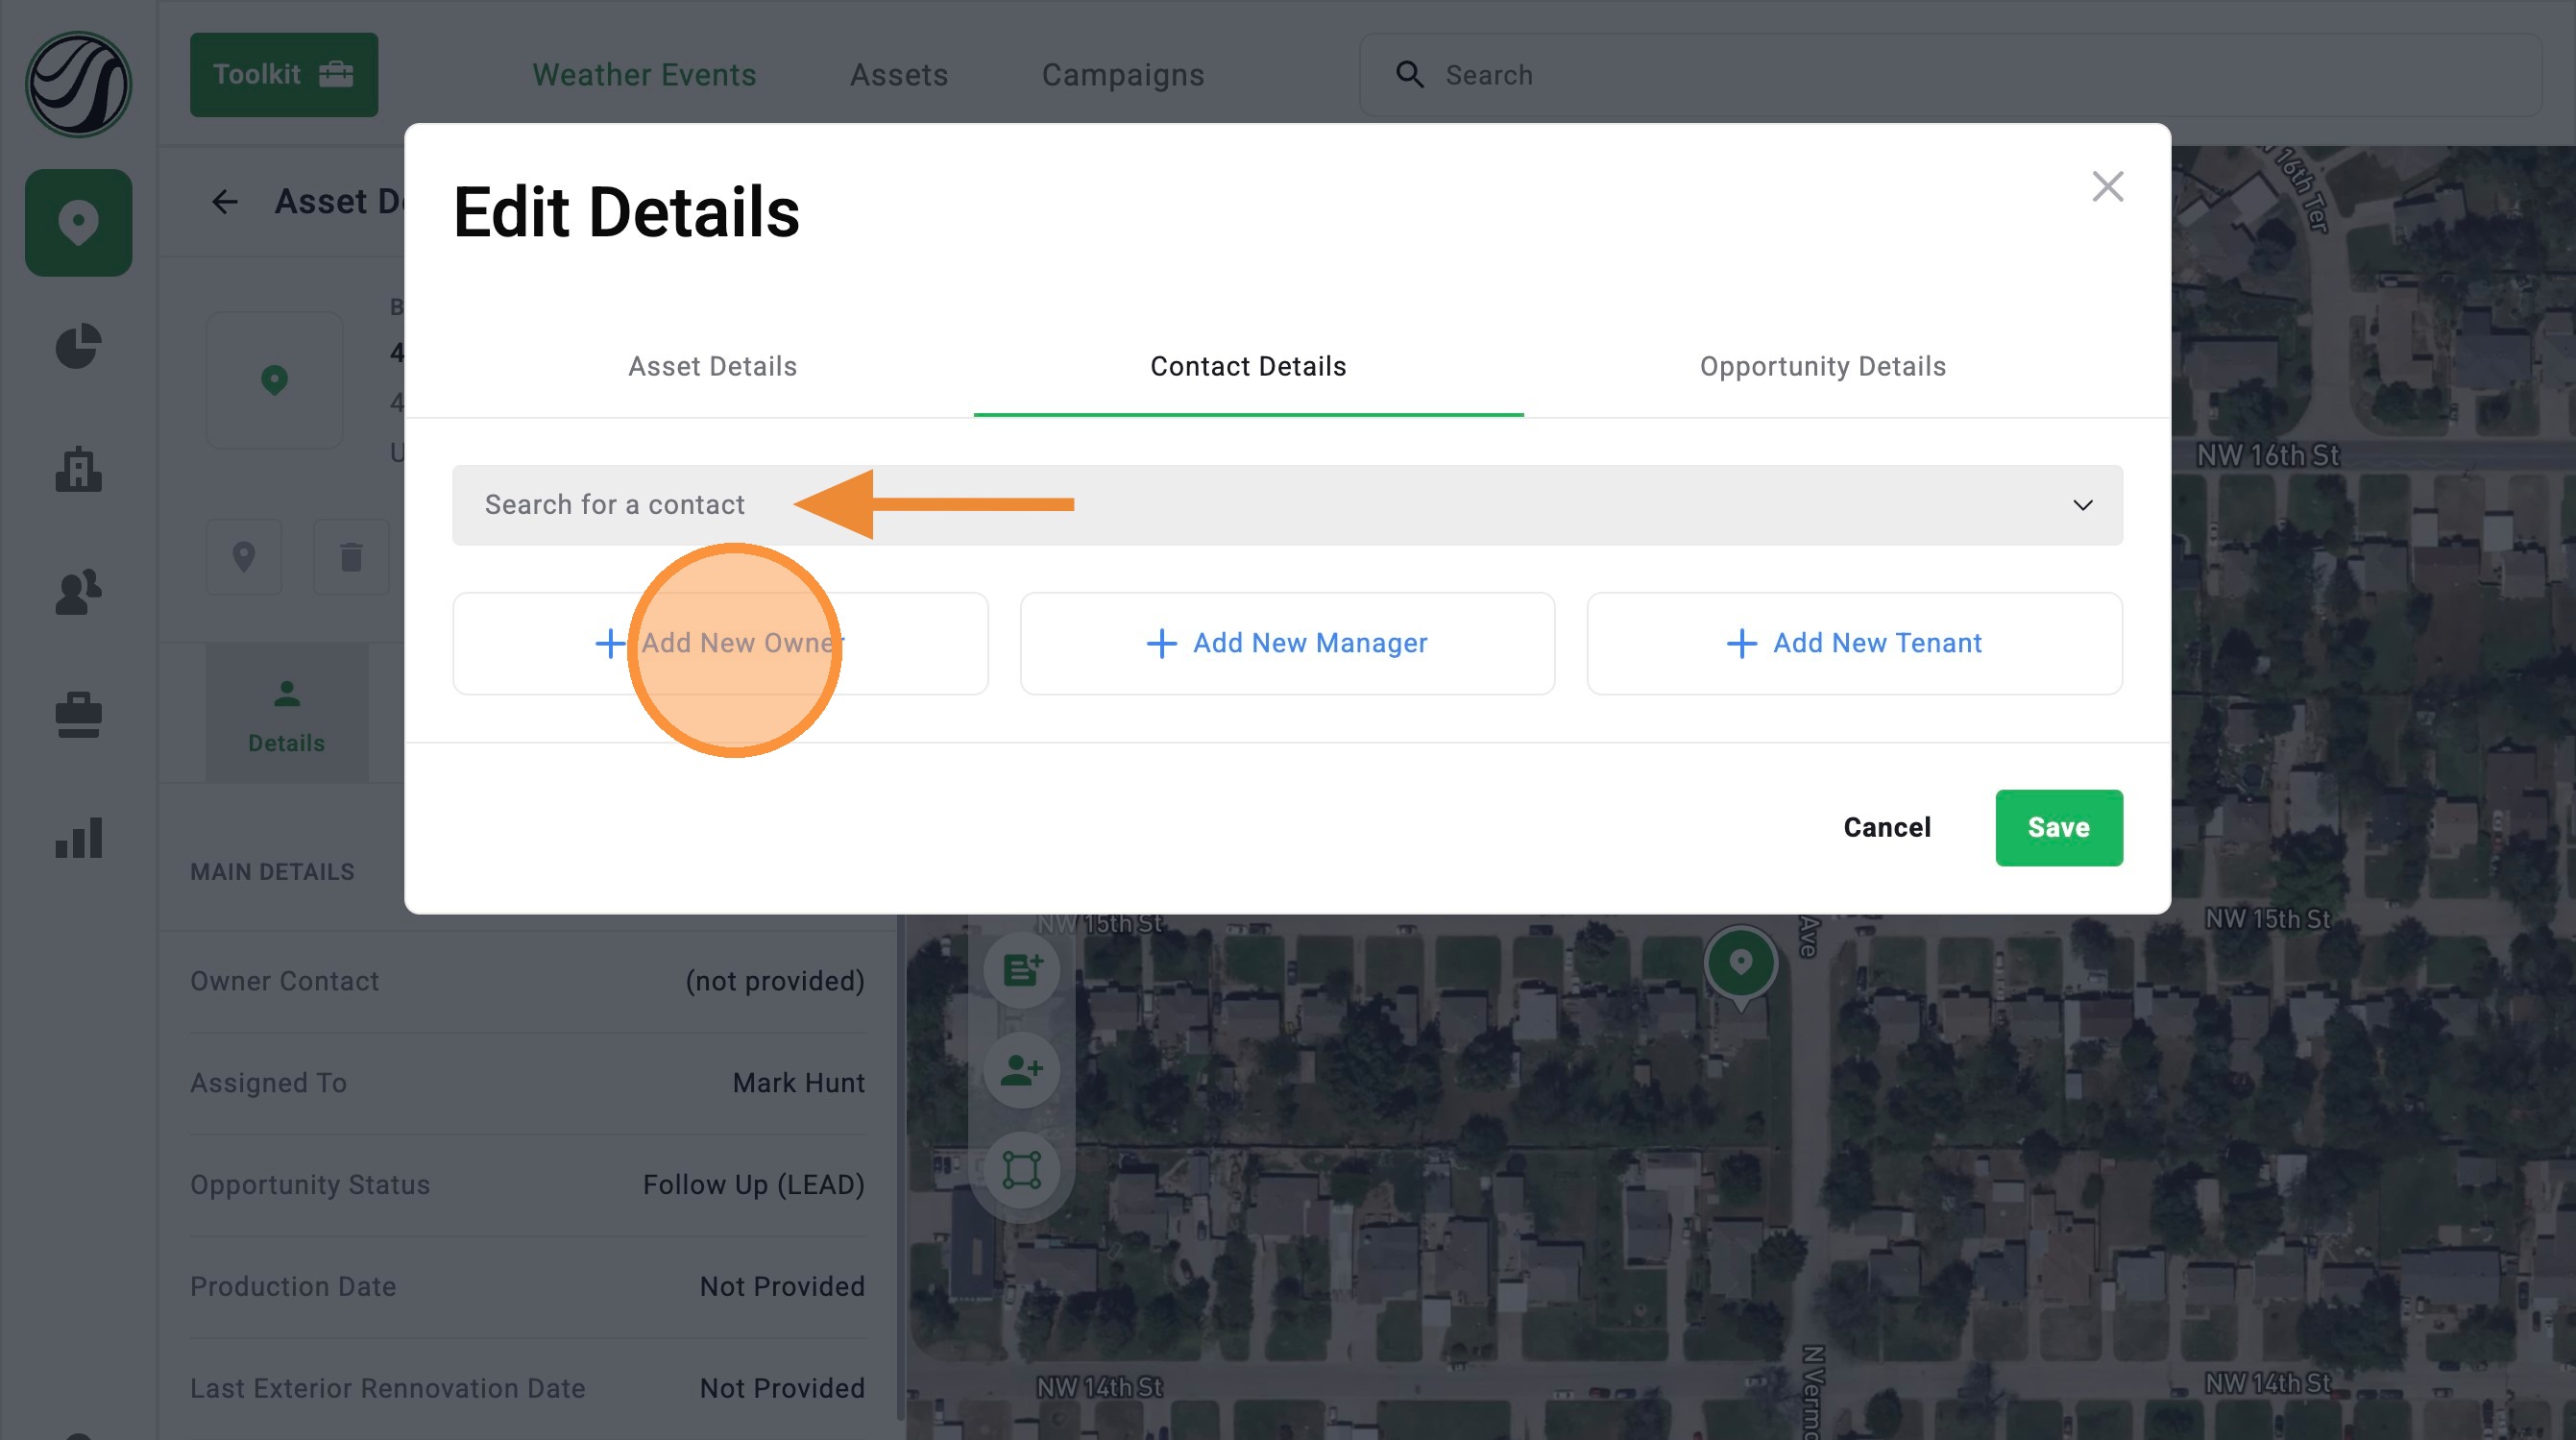
11. Search for a existing contact or add a New Owner, Manager, or Tenant
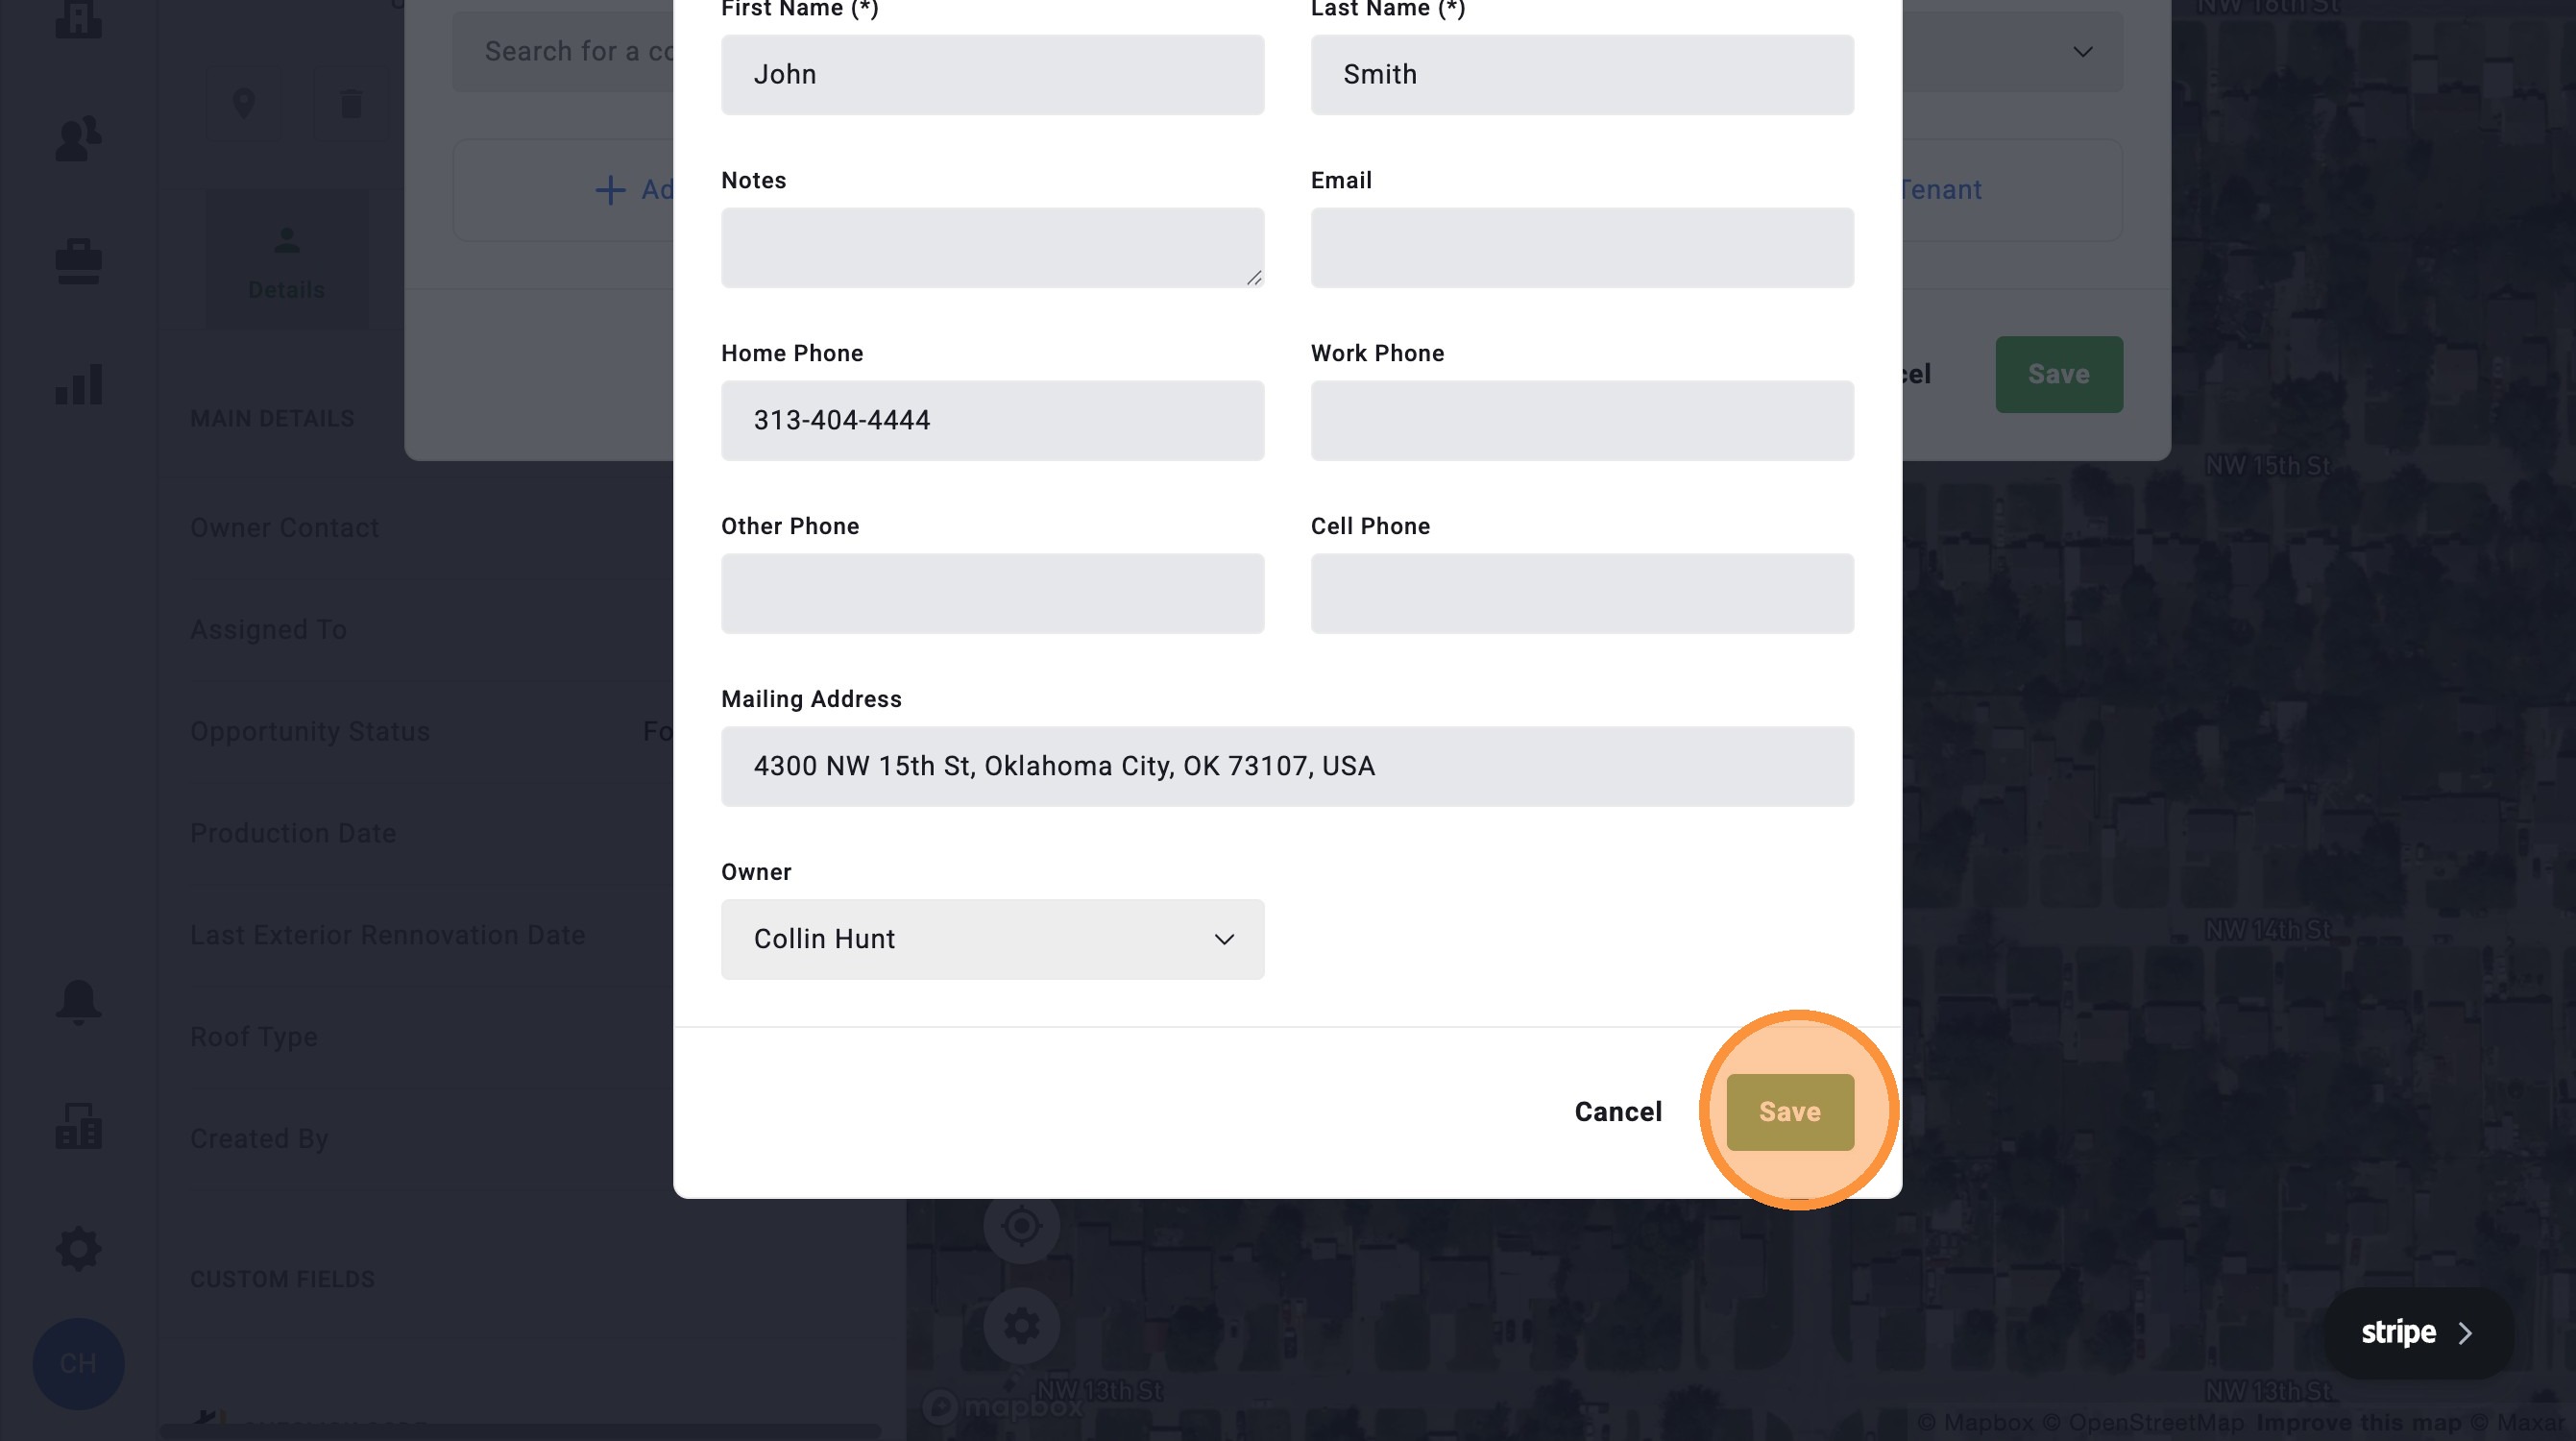
12. Add the Contact details
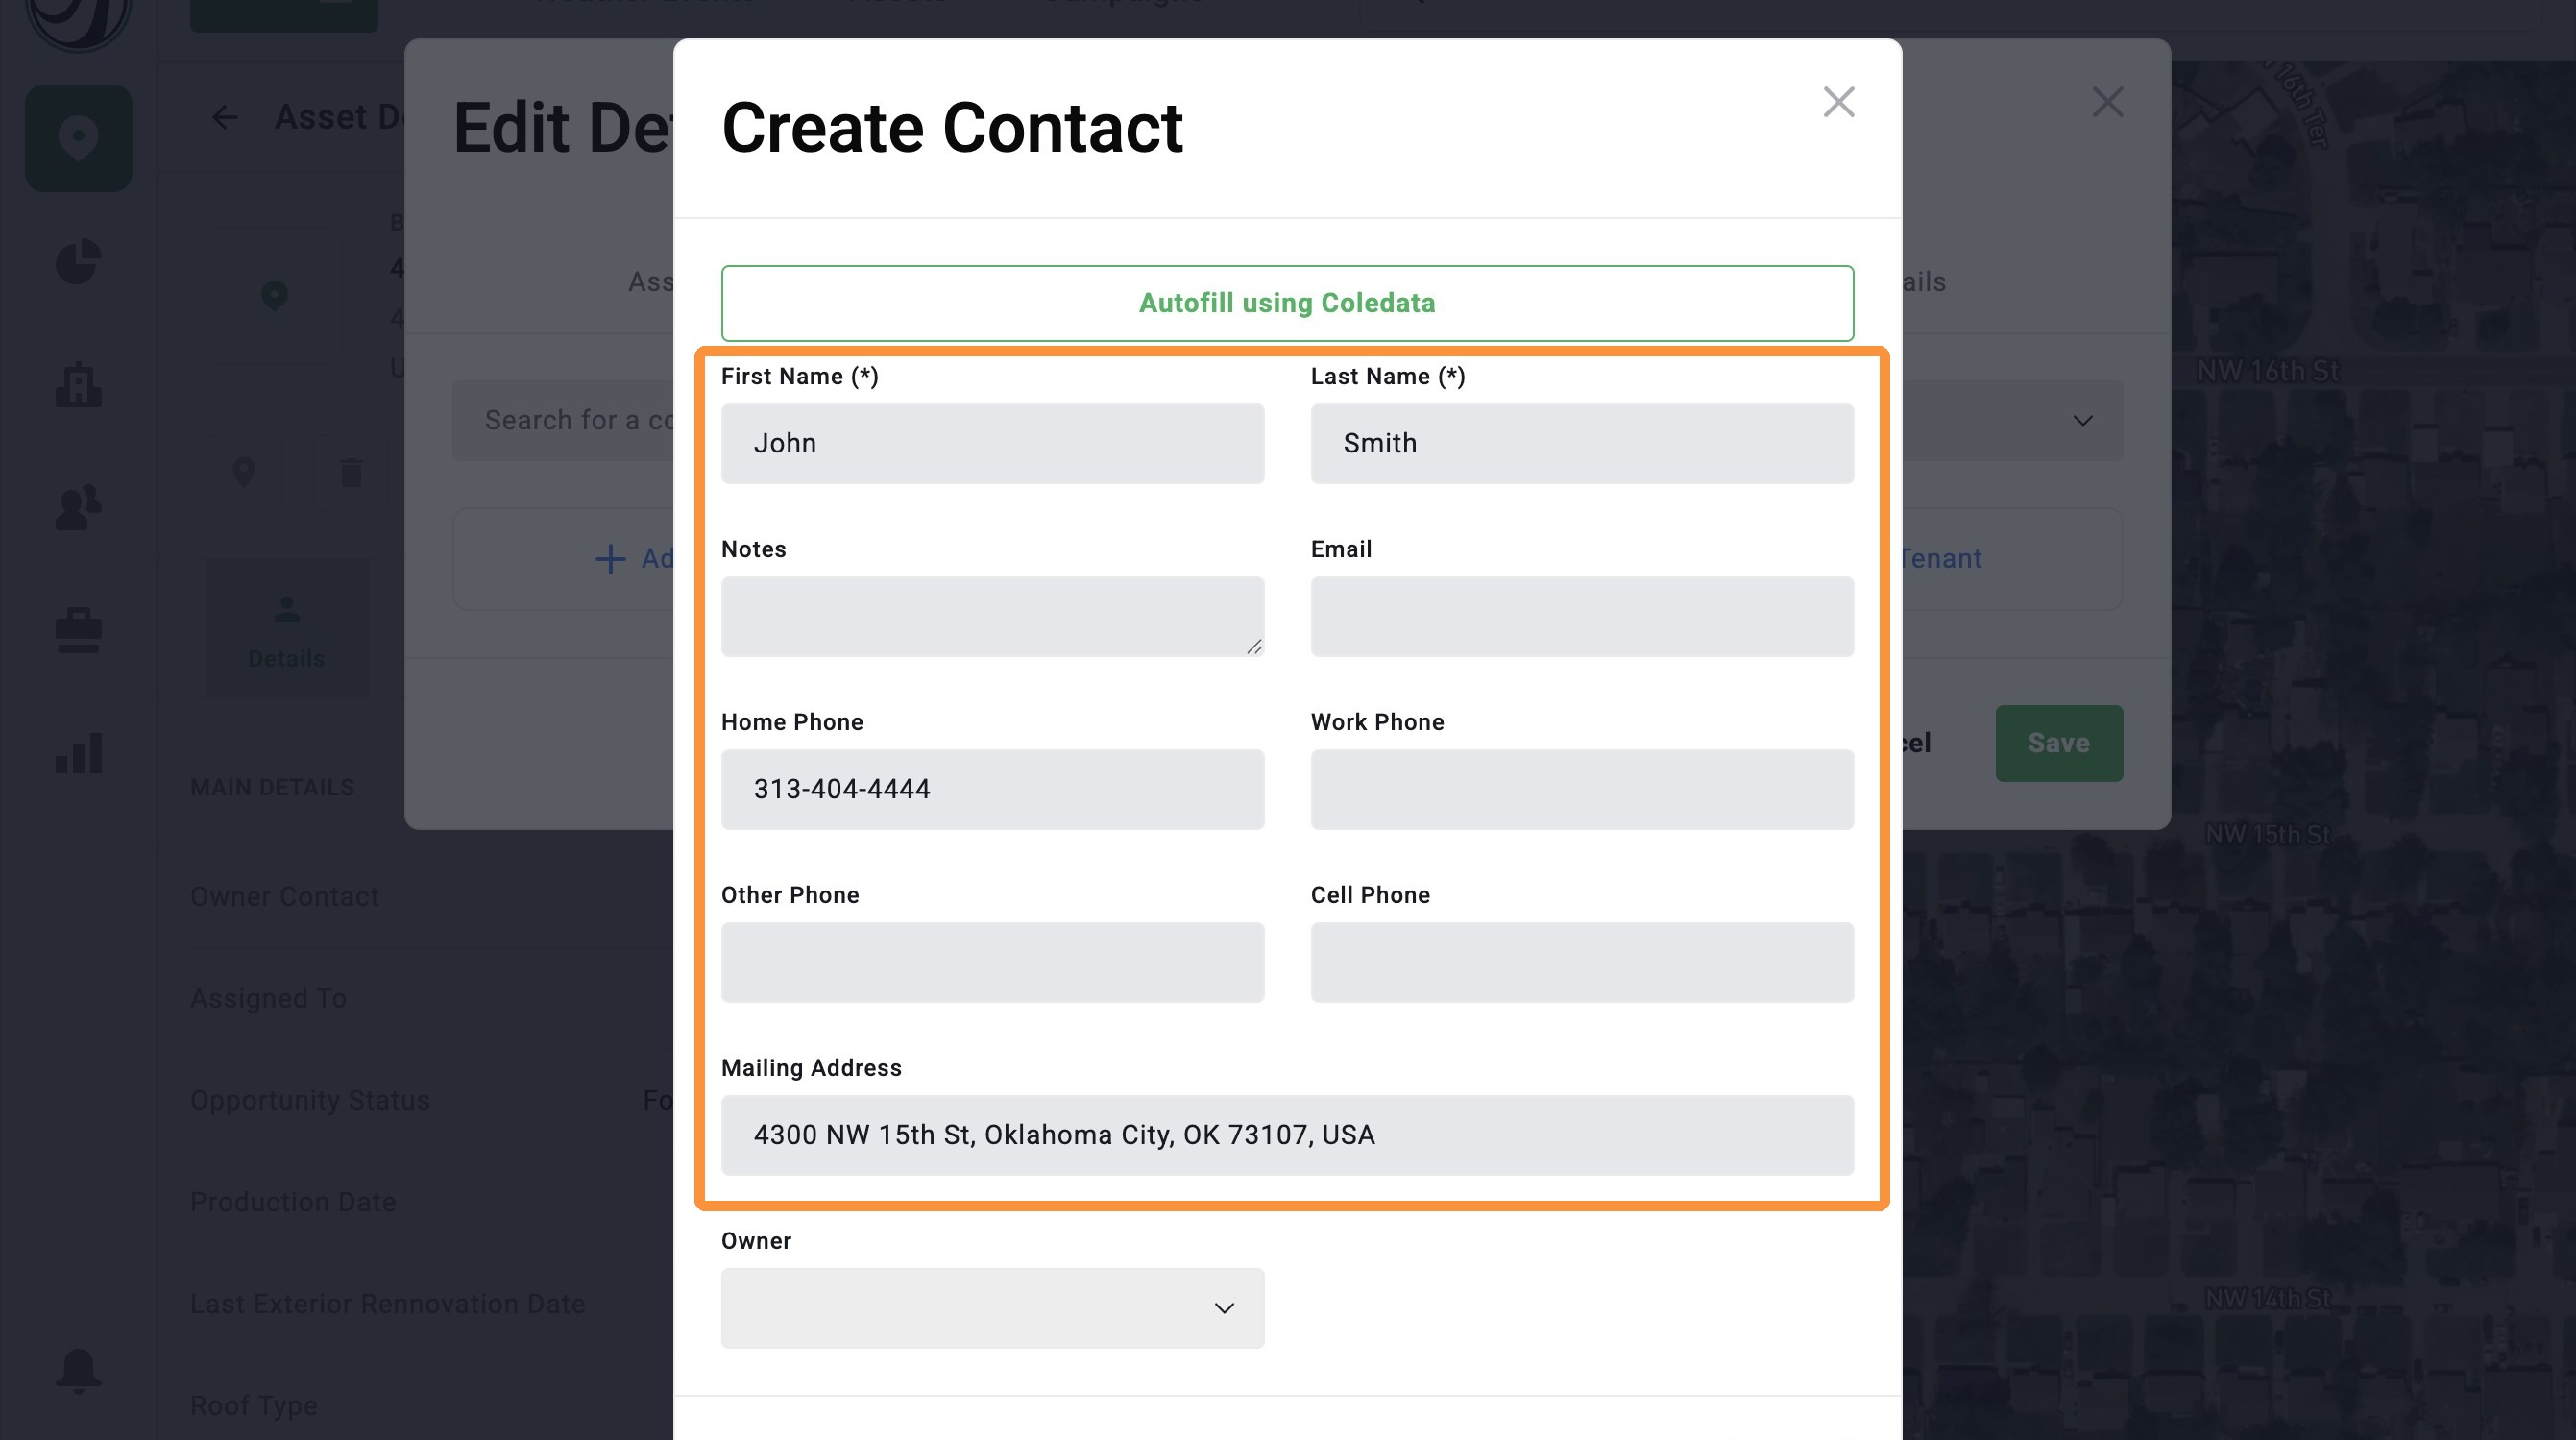
13. Click "Save"
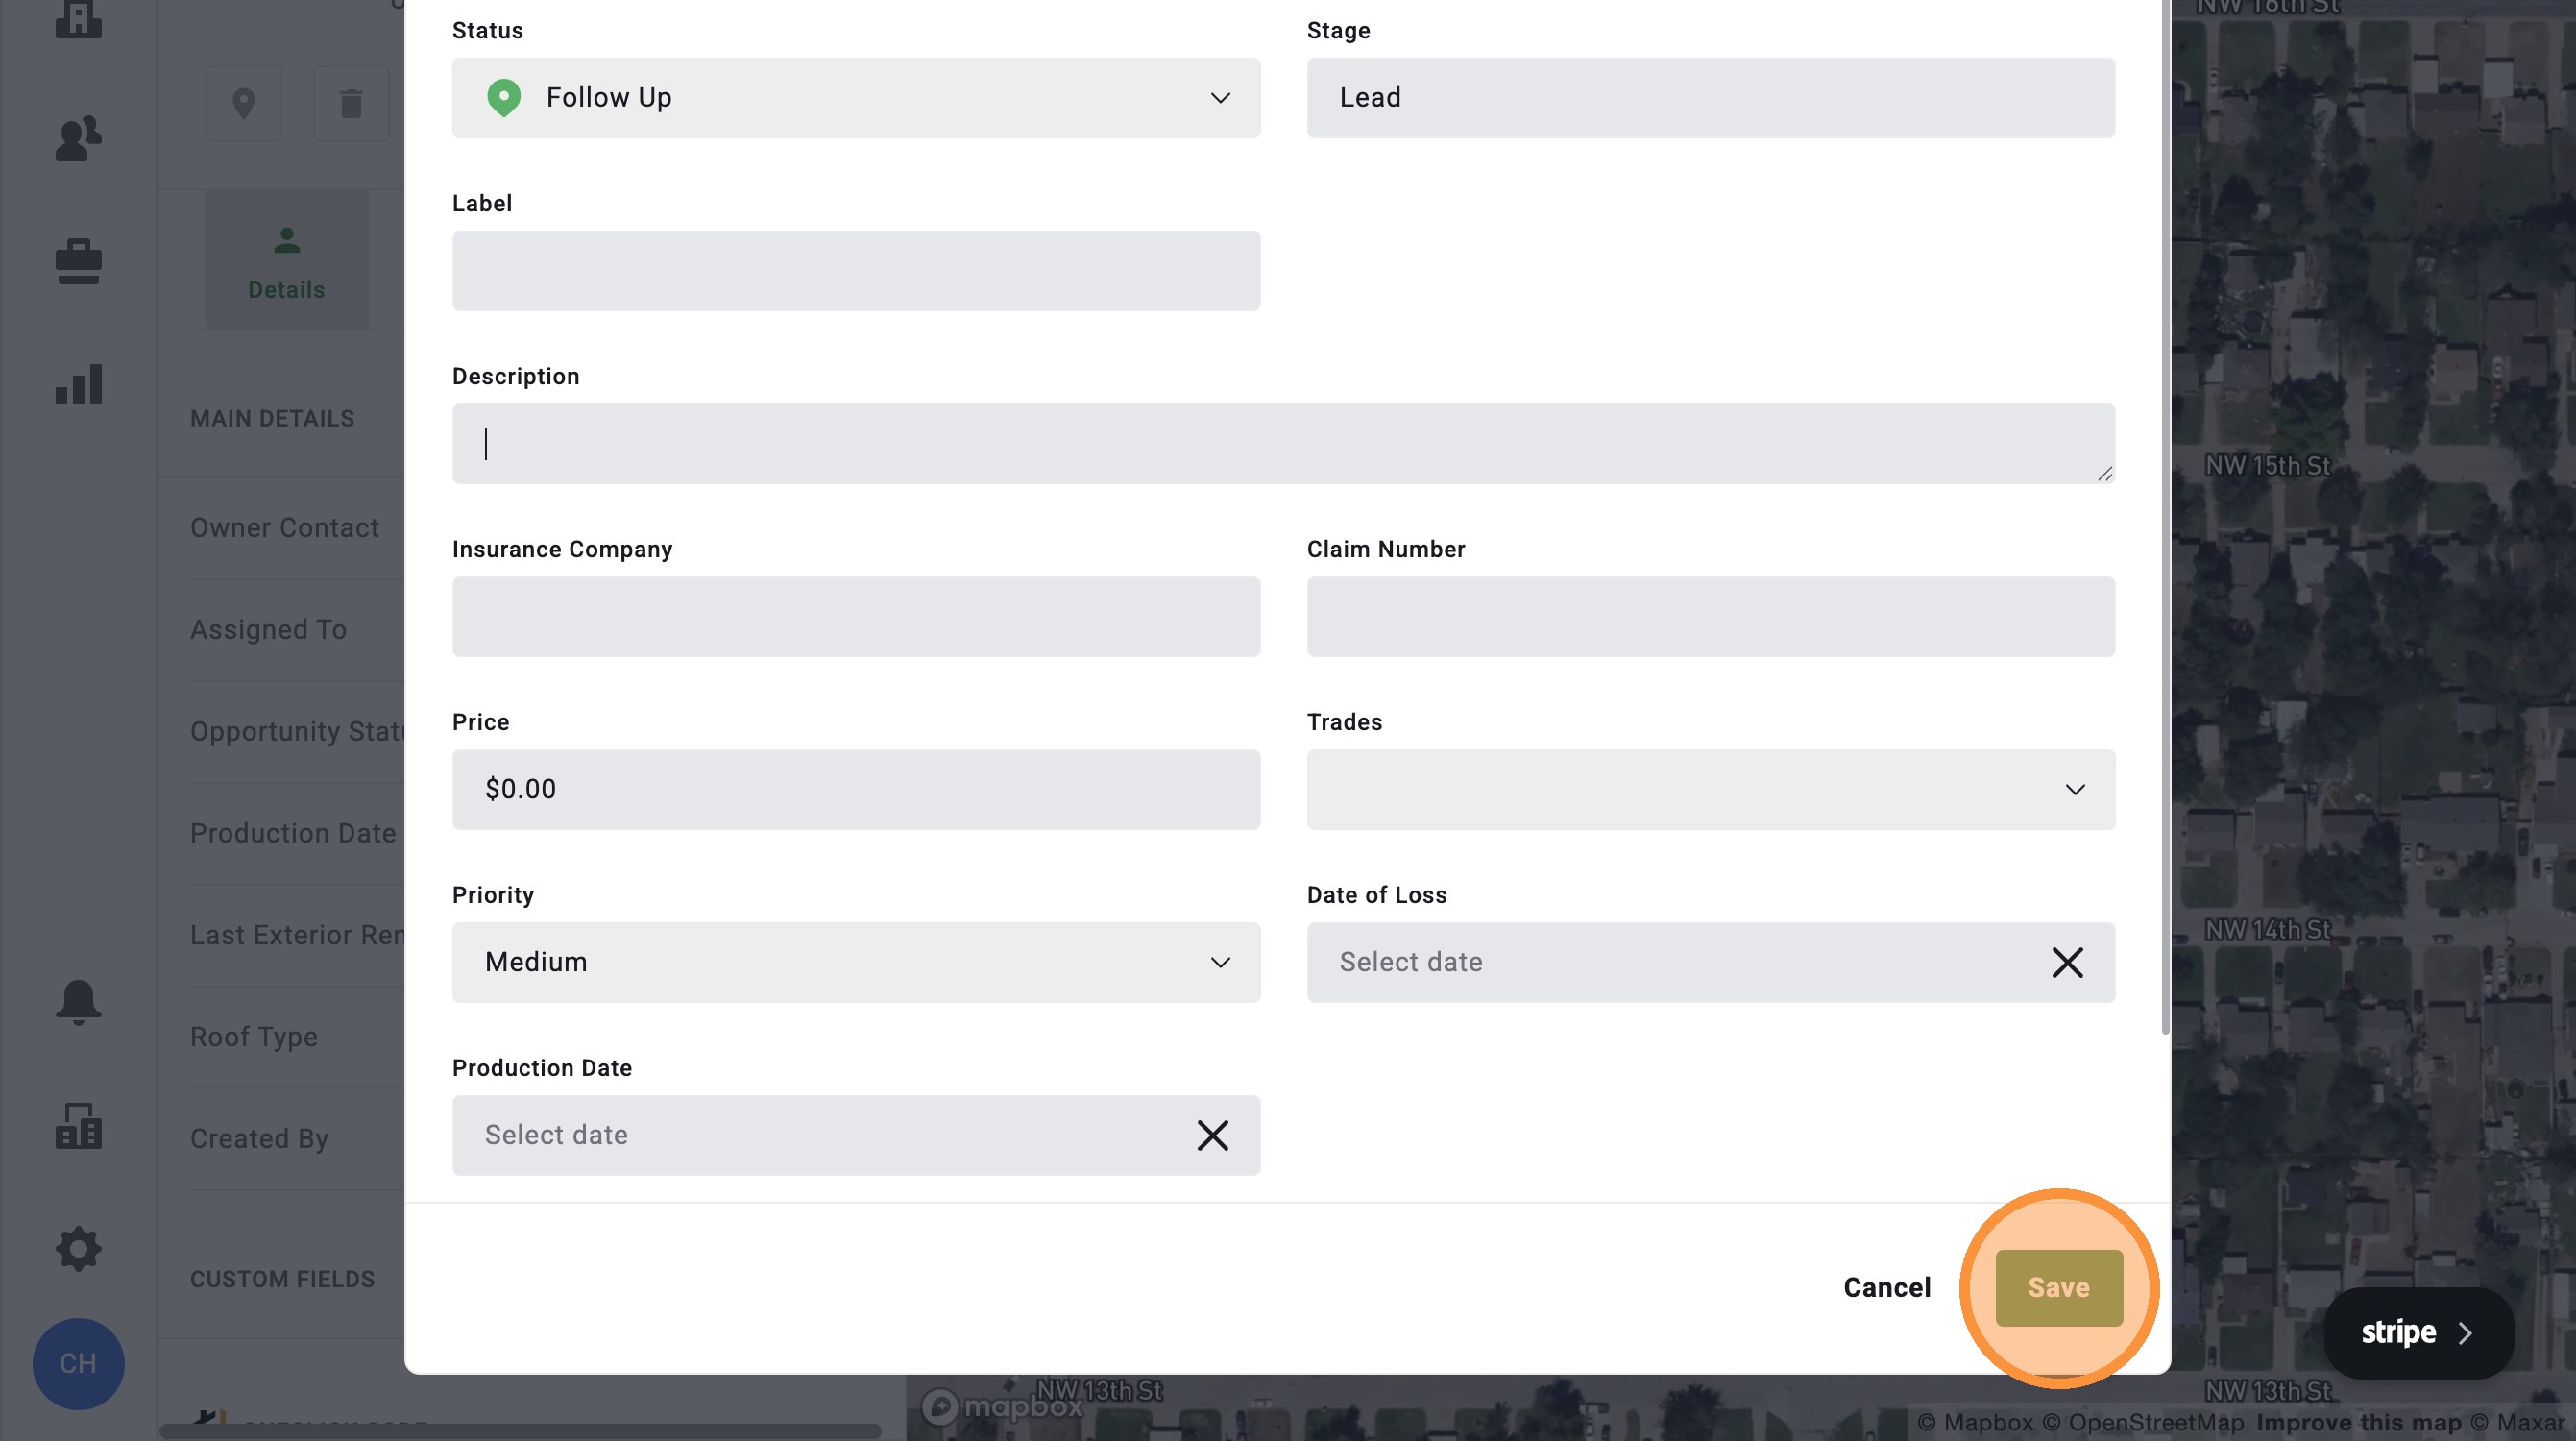
14. Click "Opportunity Details"
15. If you have DealTrace, add Opportunity Details, such as a note, price of the roof, the priority level, and etc
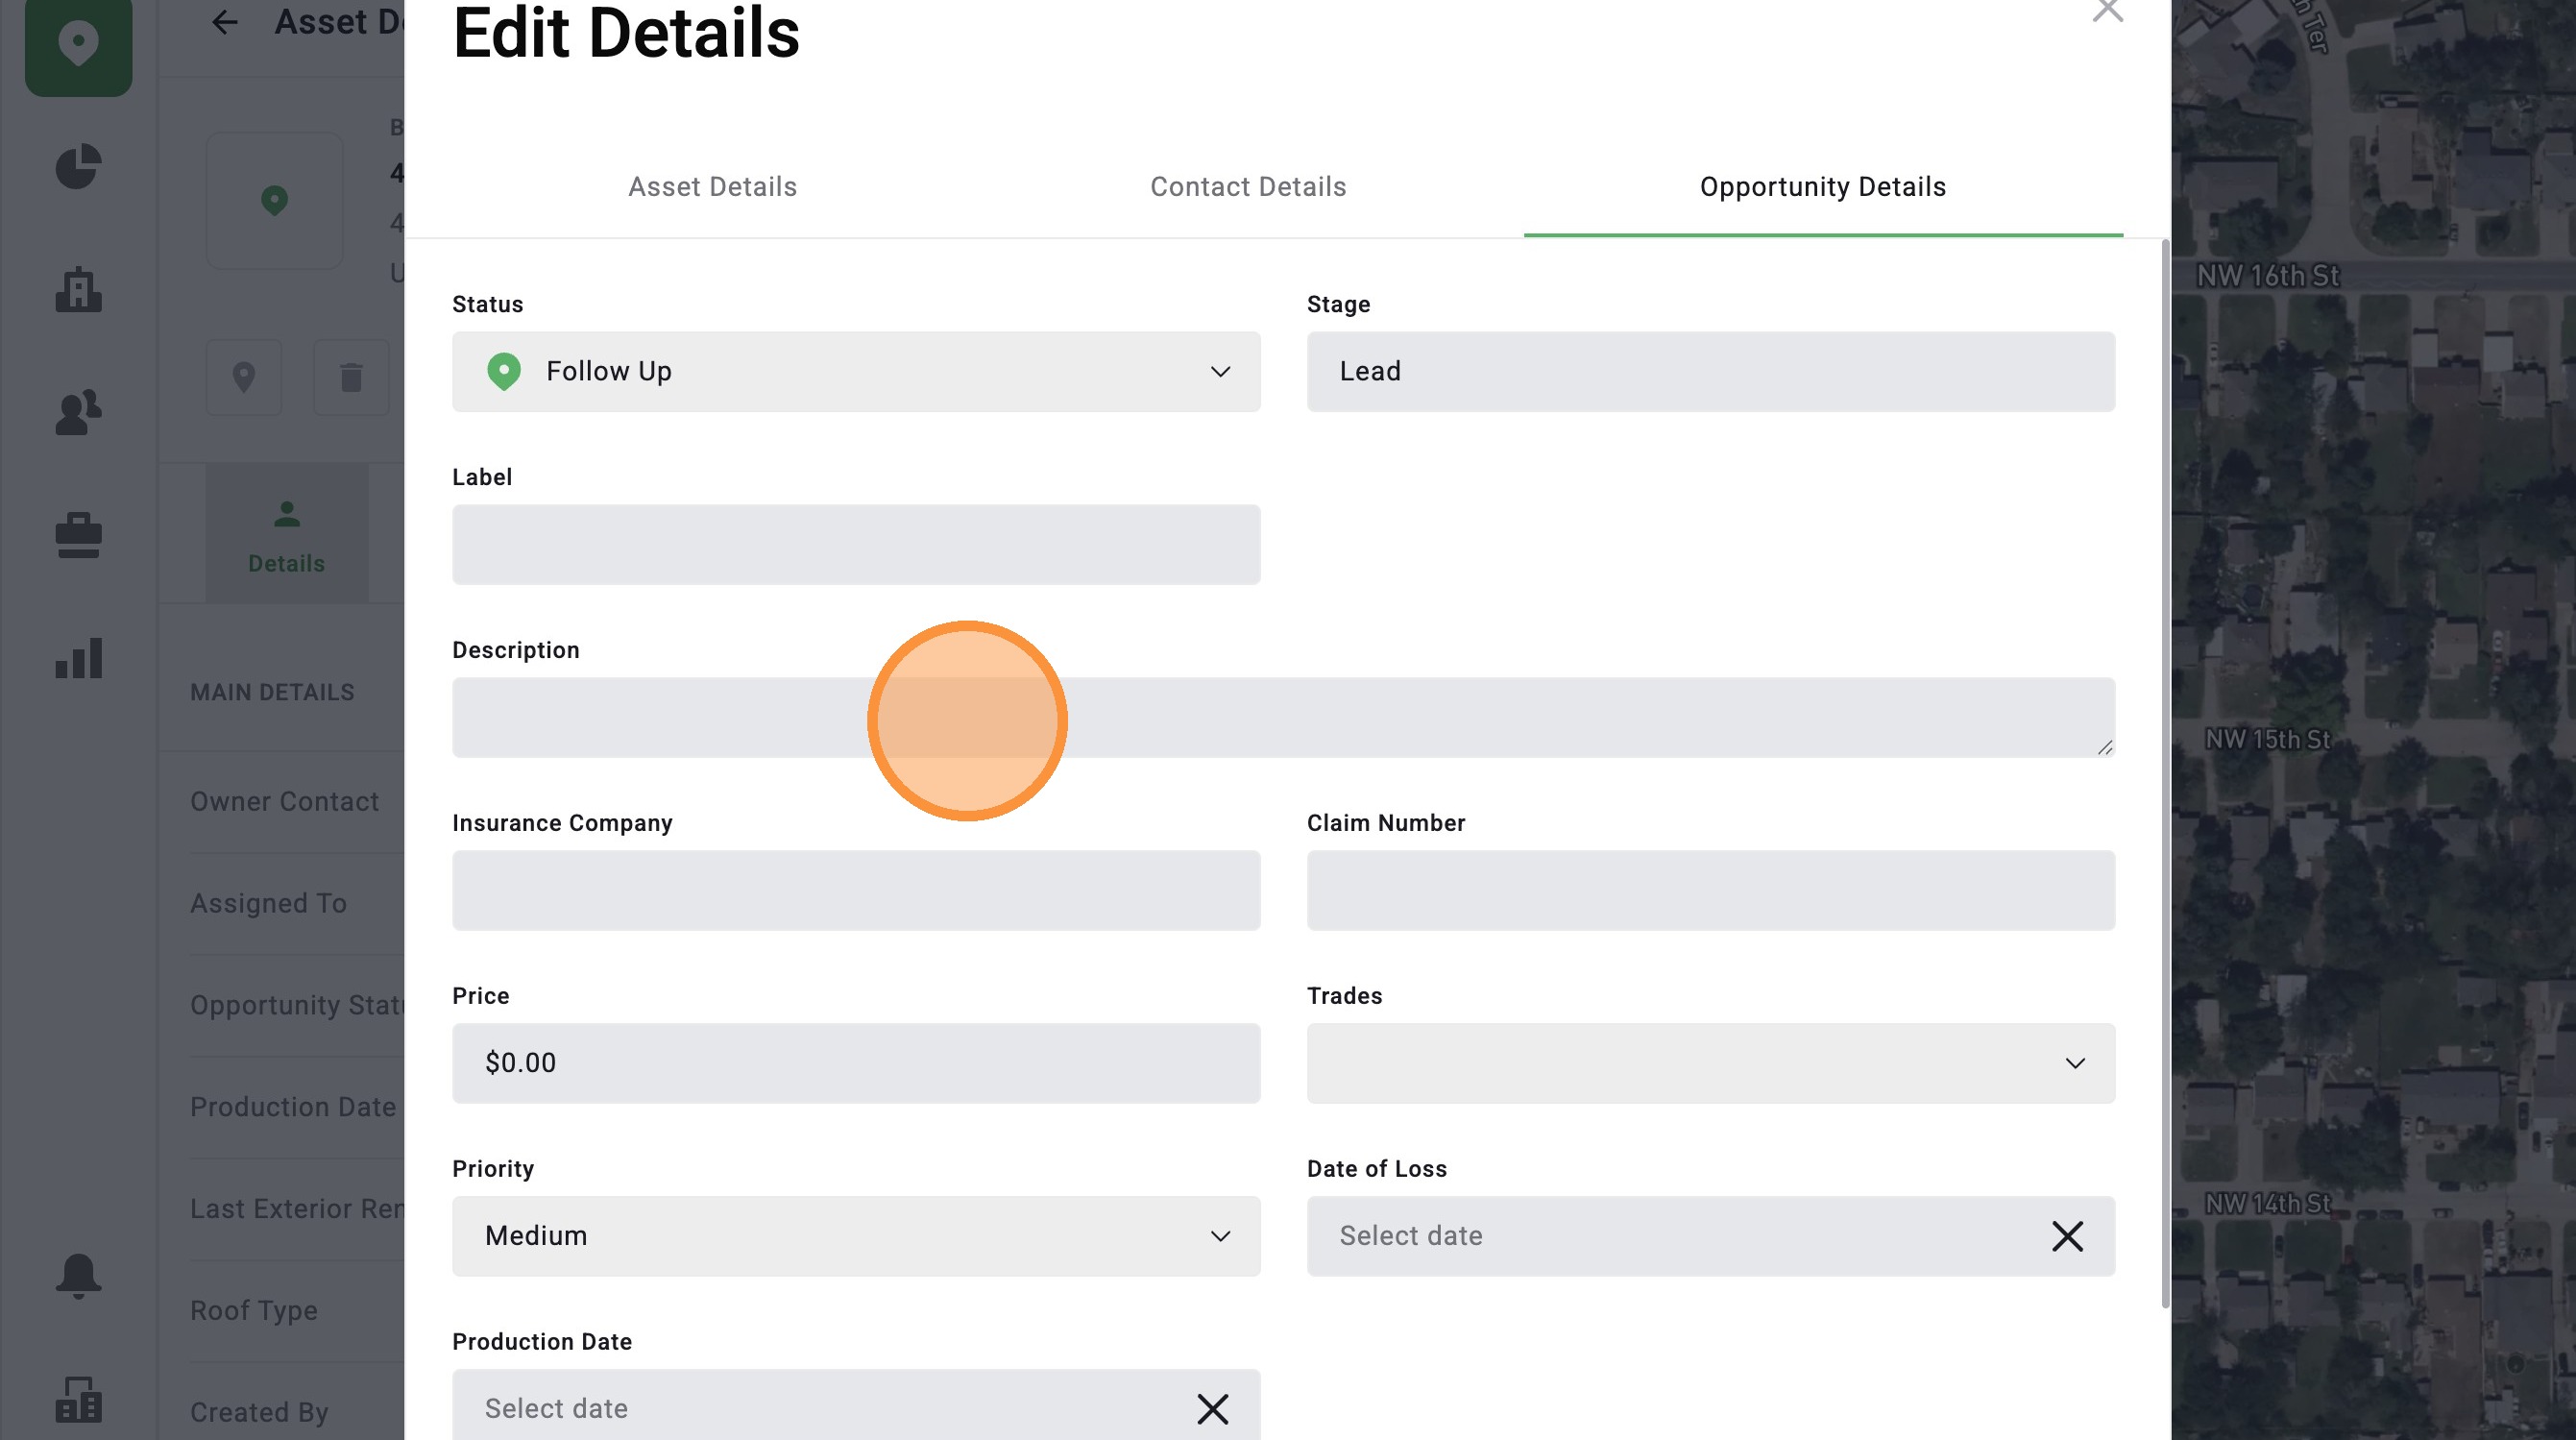
16. Click "Save"
Search For Address
1. Click "Maps" page
5. If the pin placement is incorrect, you can
B. Click the blue "Location" button to place the pin at your location
6. If you have DealTrace, you can adjust the Status within your Opportunity Pipeline
7. If you have DealTrace, you can assign the asset to other people on your team
8. Click "Create." You've created your asset!
9. To add more details, such as the owner and the roof age, select "Edit Details"
10. Under "Asset Details," you can add Roof Type and Last Exterior Renovation Date
11. Click "Contact Details"
12. Search for a existing contact or add a New Owner, Manager, or Tenant
13. Add the Contact details
14. Click "Save"
15. Click "Opportunity Details"
16. If you have DealTrace, add Opportunity Details, such as a note, price of the roof, the priority level, and etc
17. Click "Save"
Related Articles
[5.0] Use the Asset Panel to Find, Create, and Manage Assets
The Asset Panel now makes it easier to manage your work without leaving the map. Filters are built right into the panel, so you can quickly find the assets you need. You can also create a new asset right from the panel. This helps you stay organized, ...[5.0] How to Create a New Opportunity for an Asset
Opportunities help you track deals tied to an Asset in HailTrace. They include details like the status, notes, priority level, and assigned user. If a deal is lost, a claim is closed, or a new storm creates another sales opportunity, you can create a ...[5.0] How to Create an Asset, Contact, & Opportunity
When dropping a pin or tracking a lead in the HailTrace app, you can create an Asset, Contact, and Opportunity at the same time. This helps you track the door knock, start monitoring the property for future storm with Impacted Assets, and work the ...[5.0] Upload Your Assets(Clients) Into HailTrace
Uploading your clients into HailTrace helps your team see which properties were impacted by recent storms and track every deal in one place. By importing your client list, you can: Generate new sales from past storms – Identify and contact leads or ...[5.0] How to Create Custom Roles
The app comes with several pre-set roles that work well for most companies. But every company runs a little differently, and you may need a role that is not already built into the app. A Custom Role lets you choose the exact permissions a user needs ...